
The longest journey...
…starts with a single step, so the saying goes, and it has felt, at times, as though that first step might never end. Of course, in reality, there have been hundreds of tiny steps involved in getting the kiln this far.
The list of “little” jobs continues though, and I finished the bulk of the work on the roof/chamber-lid a few days back. It consists of an old kiln shelf, and a layer of light-weight bricks all held together in a welded steel cradle, with a handle and steel loop above it to allow for the whole thing to be hoisted up:


Despite using “light-weight” bricks, the shelf and the additional steel, combined with the friction of the rope in the hoist loops mean that it feels far from light, and needed a foot loop in the end of the rope so that I can apply enough force to lift it(!) - There’s quite a lot hanging on my welds, and on that tiny carabiner too, so I will be buying a certified lifting shackle soon, and I may switch to a smoother nylon rope so allow for smoother lifting.
Another huge step forward was finally cutting the circular hole in the corrugated steel roof which will allow the removable stove-pipe to protrude.


Seeing the final section of chimney go up was so exciting! I could see her true shape for the first time, and it seemed to give me a boost. Like reaching the ridge of a foot-hill on the way to the summit, and stopping to appreciate the view, and the journey made so far...
On seeing her shape like this, cutting the horizon line, I realised that she doesn’t have a name yet. - Suggestions, and their logic, welcomed via Instagram or the Contact Page (the crazier the better please!)
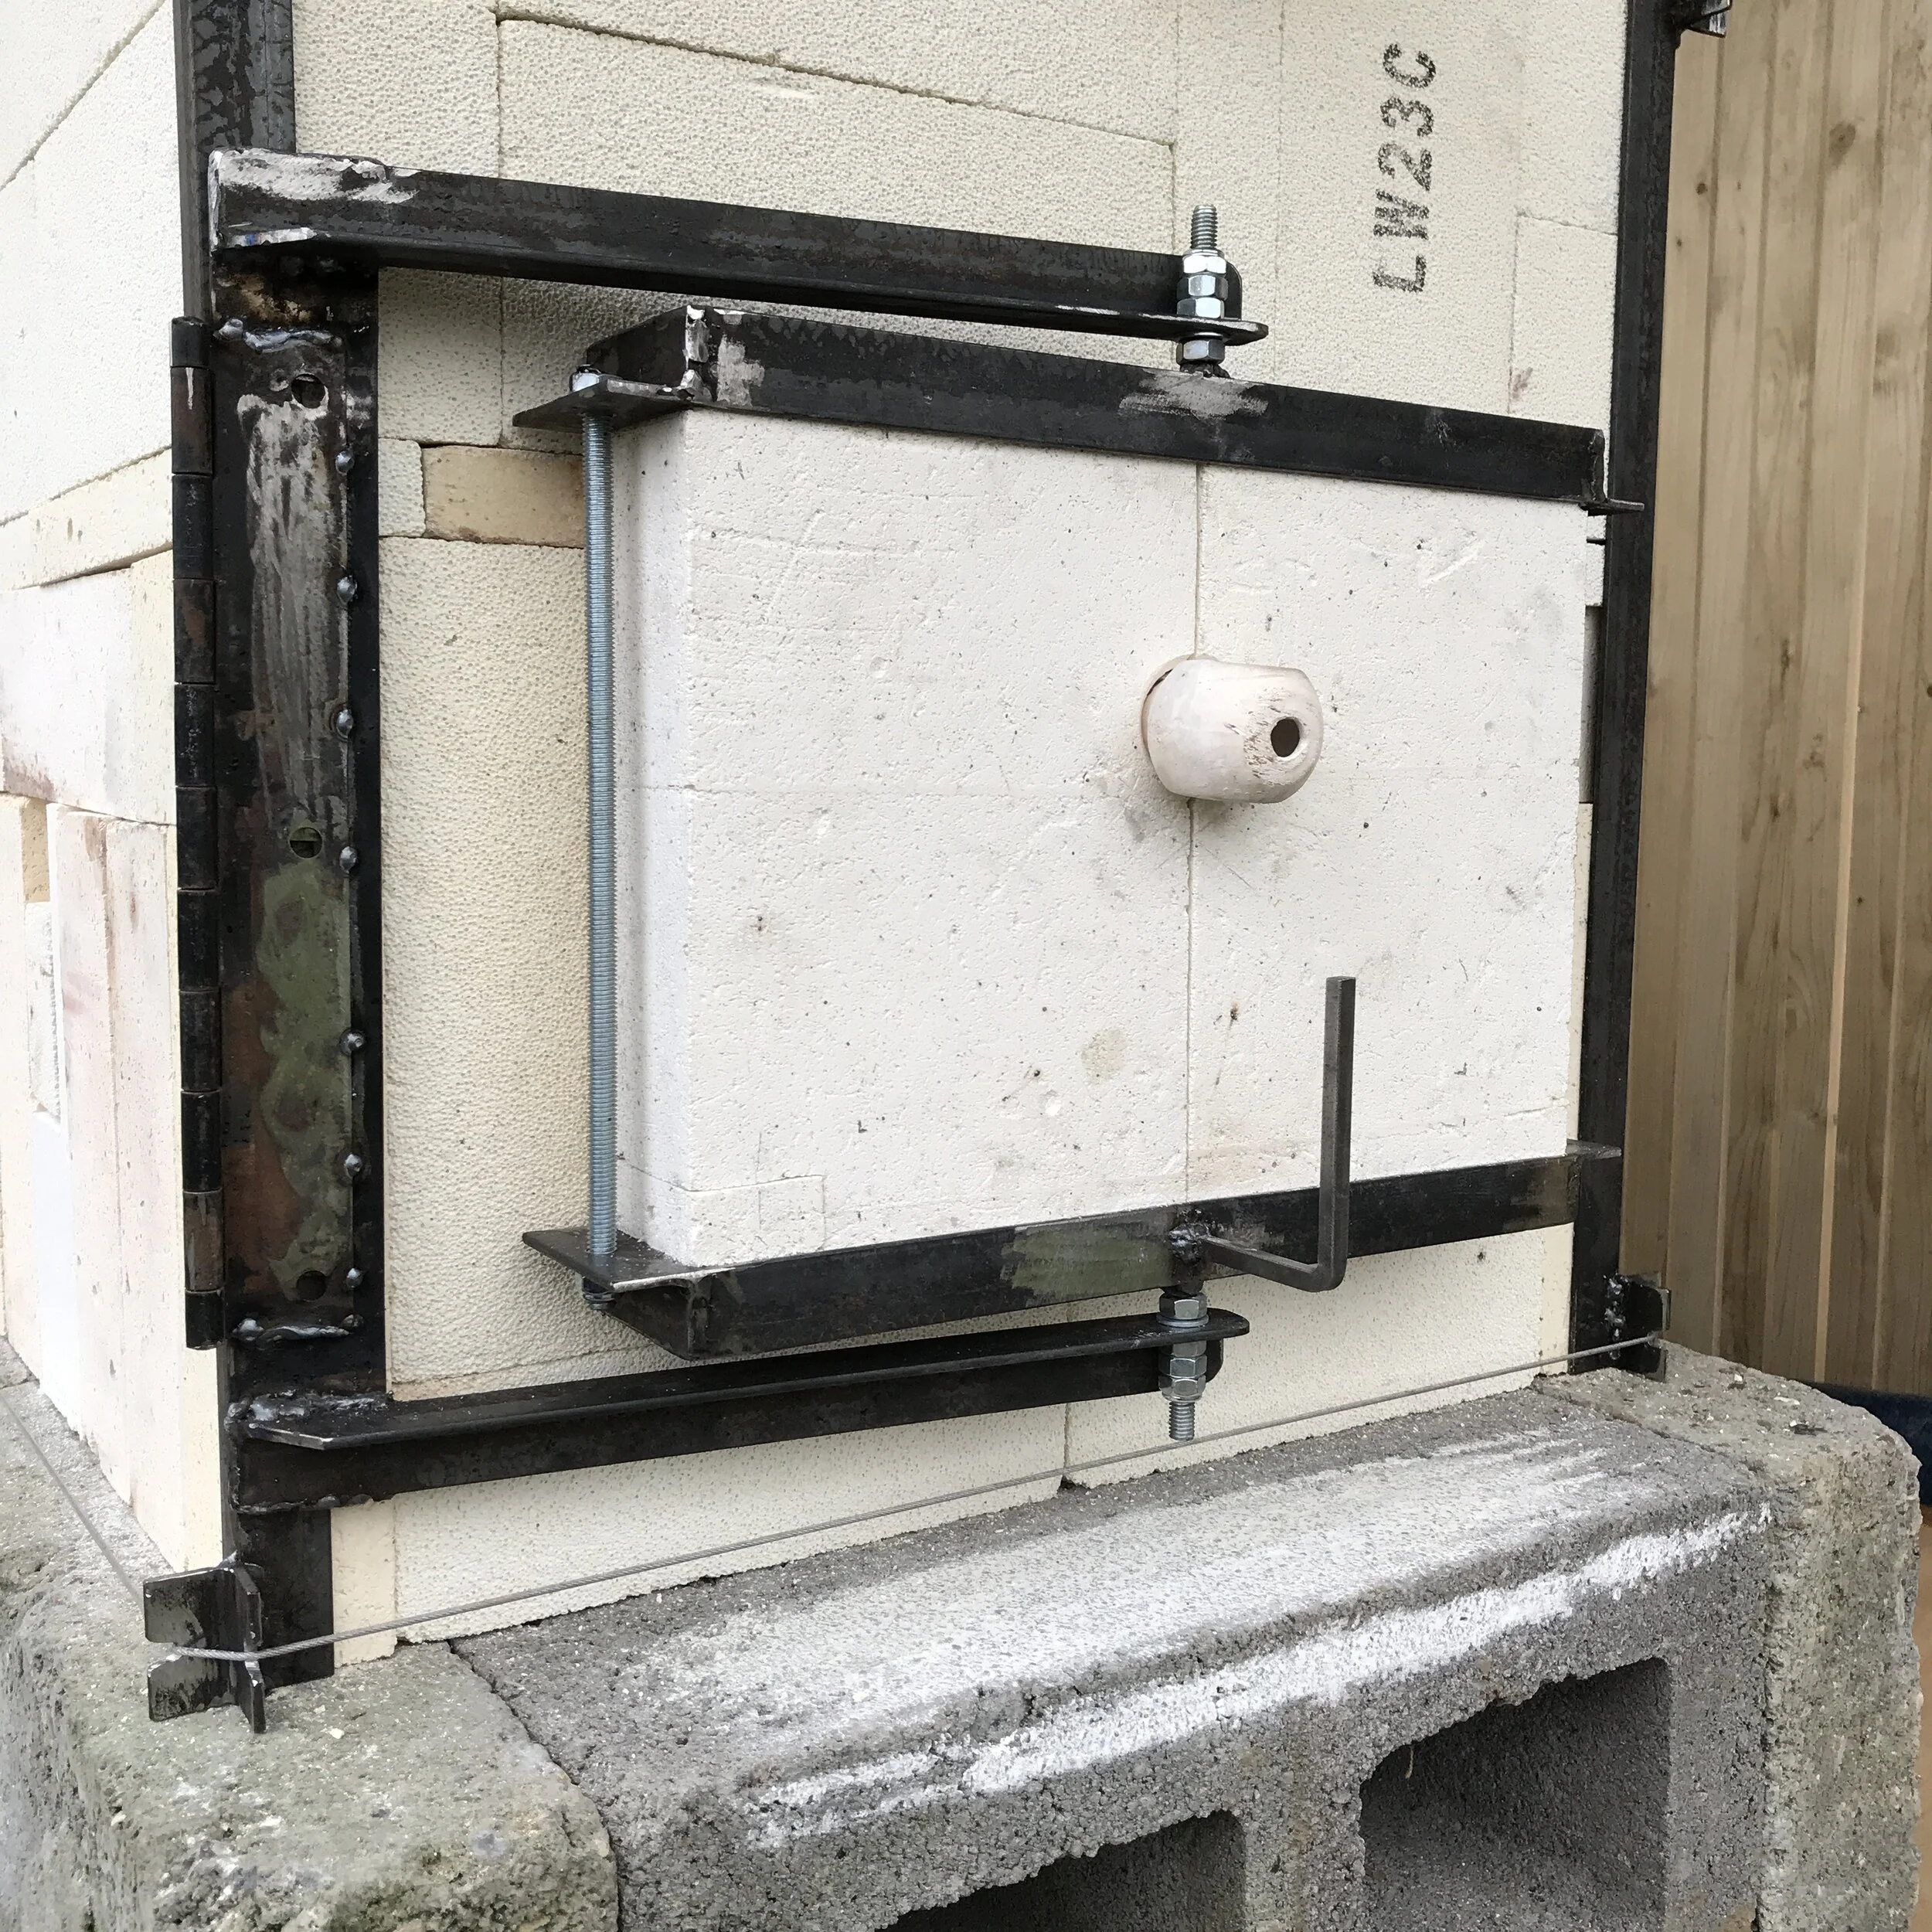
Of course, having cut a ruddy great hole in the roof, I now needed to make the cover which would stop the rain from pouring straight in and flooding the kiln(!) The remaining off-cut of sheet steel has laid waiting for this, and I fixed the steel stud pins to the roof which allow this section to hang directly over the hole:


The turnbuckle fixings, attached to the lower edge of the roof, lock the sheet down. When preparing for a firing, I will ‘unlock’ these, then lift the sheet off the locating pins at the top edge of the roof, before fitting the removable stove-pipe.
I took delivery of the ceramic fibre blanket which I will use to better seal both the firebox door and the chamber lid, and also insulate the roof timbers closest to the chimney, and line the steel collar which supports the stove-pipe. It’s horrible stuff; itchy, irritant and bad news if inhaled (even the bio-soluble stuff), so full PPE will be needed when I fit this.
My new digital pyrometer arrived from China after over a month in transit. Following some tests, it in conjunction with an old long-probe thermocouple through the bung-hole of a small electric test kiln, I determined that it’s an ‘R Type’ thermocouple, and had a chance to familiarise myself with all the buttons before use in the wood-kiln.


I will almost certainly use Orton cones (probably the ‘mini’ cones, as the chamber is so small) to gauge the heat-work towards the top end of the firing schedule, but knowing the approximate temperature of the kiln atmosphere, and the rate of climb in the earlier stages is also important, and that’s where the digital pyrometer comes in handy.
With such a small internal volume in this kiln, it’s important to me that any ports, spy-holes, stoke-holes etc are as small as possible; they need to do their job without letting too much heat out. Fortunately, with only a 20mm skin of hard-brick the thermocouple ports were not too difficult to drill. Hard brick is quite brittle, and the hammer action of an SDS impact drill is just split the scraps of brick which I tested it on. I opted for a masonry-bit at a medium speed with water to cool the cut, and no impact.
I puzzled over the best place to read temperatures from: It’s a tiny chamber, so I am expecting the heat to be pretty even, but seeing as this project is all about learning, I am opting for two ports; one at the back of the chamber, low down, and close to the exit flue, the other at the front of the chamber, high up, above there the flame enters the ware chamber from the firebox. The digital pyrometer accepts two thermocouples simultaneously, and I have been able track down another ‘R Type’. With luck, this will let me track the temperature distribution in the kiln and help me understand the impact of my actions during the firing.


Even in a chamber this small, (perhaps more so?), the packing of the ware can have a huge impact on the look of the work. The position of each piece dictates the path the flame will take through the chamber on it's path to the exit flue, and in turn the flame path dictates any flashing documented on the surfaces.
Knowing me, I will spend ages agonising over the exact positions of the work, and probably then realise that it's all a shade too big, and won't fit in the way I'd hoped. In a bid to minimise this frustration, I knocked together a 1:1 replica of the ware-chamber in plywood. With the pyrometers, ports and flues all modelled in dowel and paint, I can use the actual kiln furniture and pots to visualise the pack. (I just need to remember that the wadding will add height to the props and ware!)


Looking back, this ‘first step’, itself packed with s of small decisions, has, in fact, only taken four months. Given that I teach full time, and also have a teenager and a four-year-old to keep me busy, maybe I’m just too impatient, and I can actually be pleased with my progress…