
Micro-Kiln
Somehow, after years of imagining this moment as a practical impossibility, I find myself at the stage of laying the first course of blocks for my new micro wood-kiln.


Hollow concrete blocks are often used for kiln bases; they are large, inexpensive and somewhat insulating from the cold of the ground. Here I am using their hollow nature to allow the “primary air” to flow in and up (through holes drilled in the firebox floor) and pass directly through the bed of embers in its path through the kiln. Notice how, using a diamond blade and angle-grinder, I have removed parts of three of the blocks making an ‘E’ shape from the original ‘B’ shaped section. This modification is a key adaptation from larger kiln designs and will hopefully keep the ember bed alive. If these holes become blocked by embers then the air-flow could stagnate, so I may need to build the more traditional “mouse-holes” into the sides of the firebox.
This is one of the many unknowns where the theory of this build will crash headlong into the practical reality of the first few firings. (gulp!)

With heavy rain for the next week, and other projects pulling rank, a tarpaulin seemed like the best option. Once she is fully built, I might even sew a kind of box-shaped tarpaulin-tent to wrap her up in, but I am also thinking that a waterproof, insulating render might be a nice addition if she fires well. It might prolong her life in this relatively exposed location.
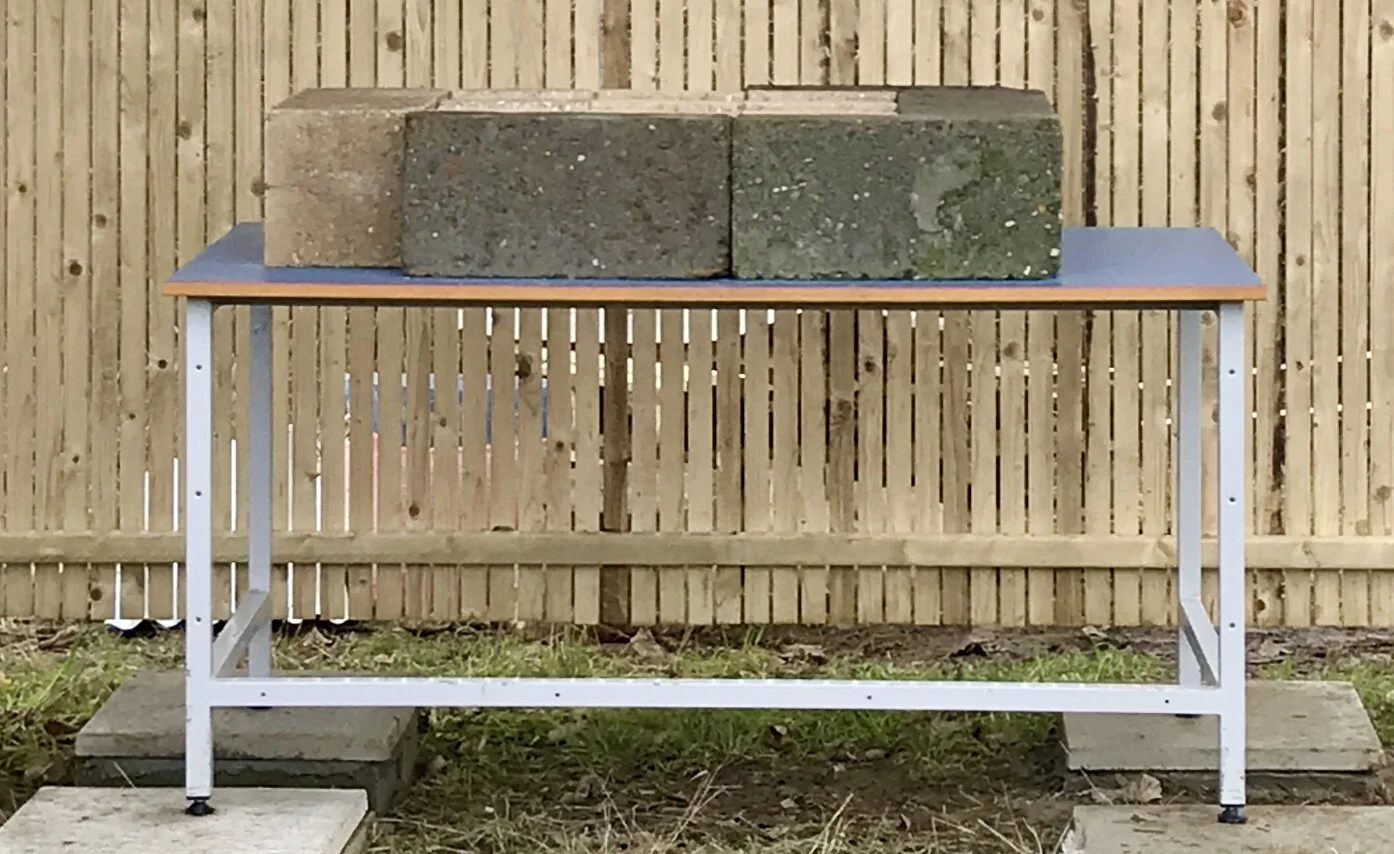
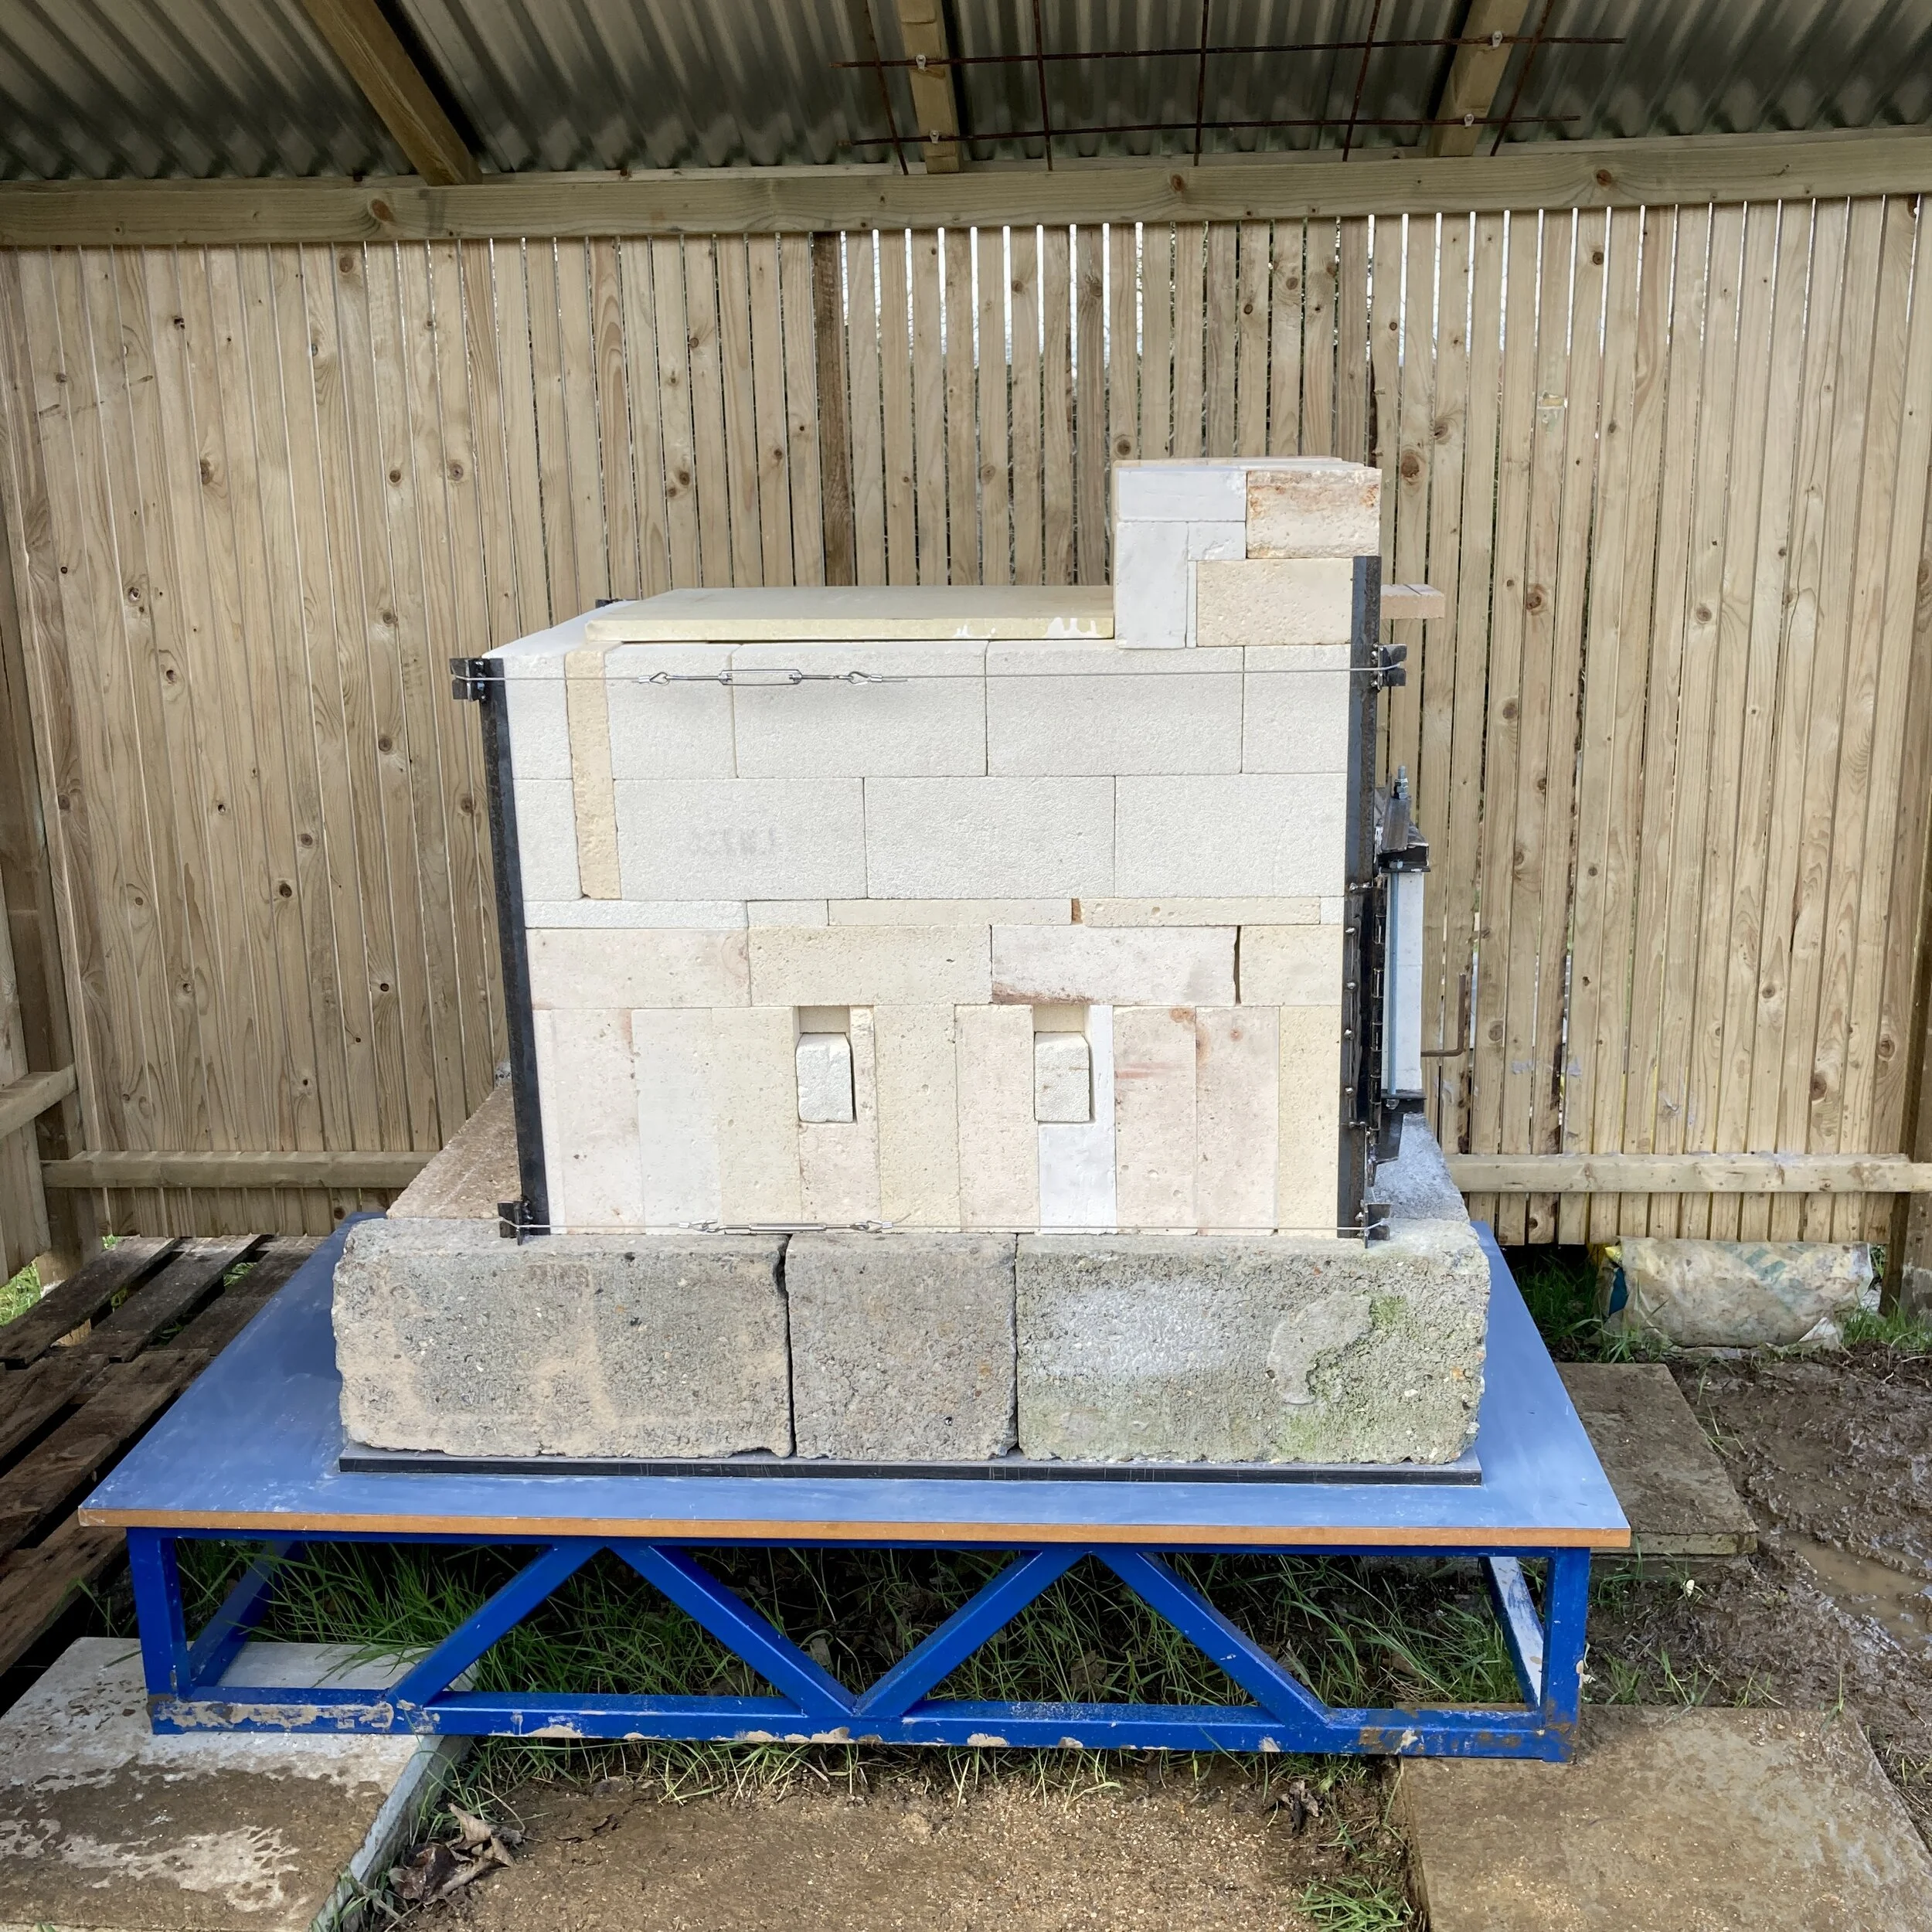
Having initially hoped to support the entire kiln on a sturdy metal table reclaimed from the science labs of a local school, as I began to load the concrete blocks and bricks on top, I ran into two problems:
The overall height of the kiln, despite being perfect for stoking with little need to stoop, was encroaching on the roof timbers and I feared that the intense heat during the peak of firing might burn all my hard work to the ground. The solution seemed simple enough and I cut the metal table legs down to allow some more headroom.
The weight of the concrete blocks alone was beginning to bow the initially level table-top, and now the first few courses of bricks were having to accommodate this curve with thin wedge-shaped gaps appearing where the joint should have been crisp. Additionally, the adjustable feet on each table leg, while convenient for leveling the table, are only plastic and ran the risk of either sinking under the weight, or becoming brittle in the frosts.


Time to rethink. - I like the idea of it all being above the cold of the ground, and with air-flow beneath, but the whole thing needs to be strong and durable. In a last ditch attempt to save these ideas (before resorting to enlarging the concrete slab), I decided to cut and re-weld the metal table frame into something stronger.
Welding is not my strong point, but the kiln itself will need some steelwork, so it’s time to get some practice in!
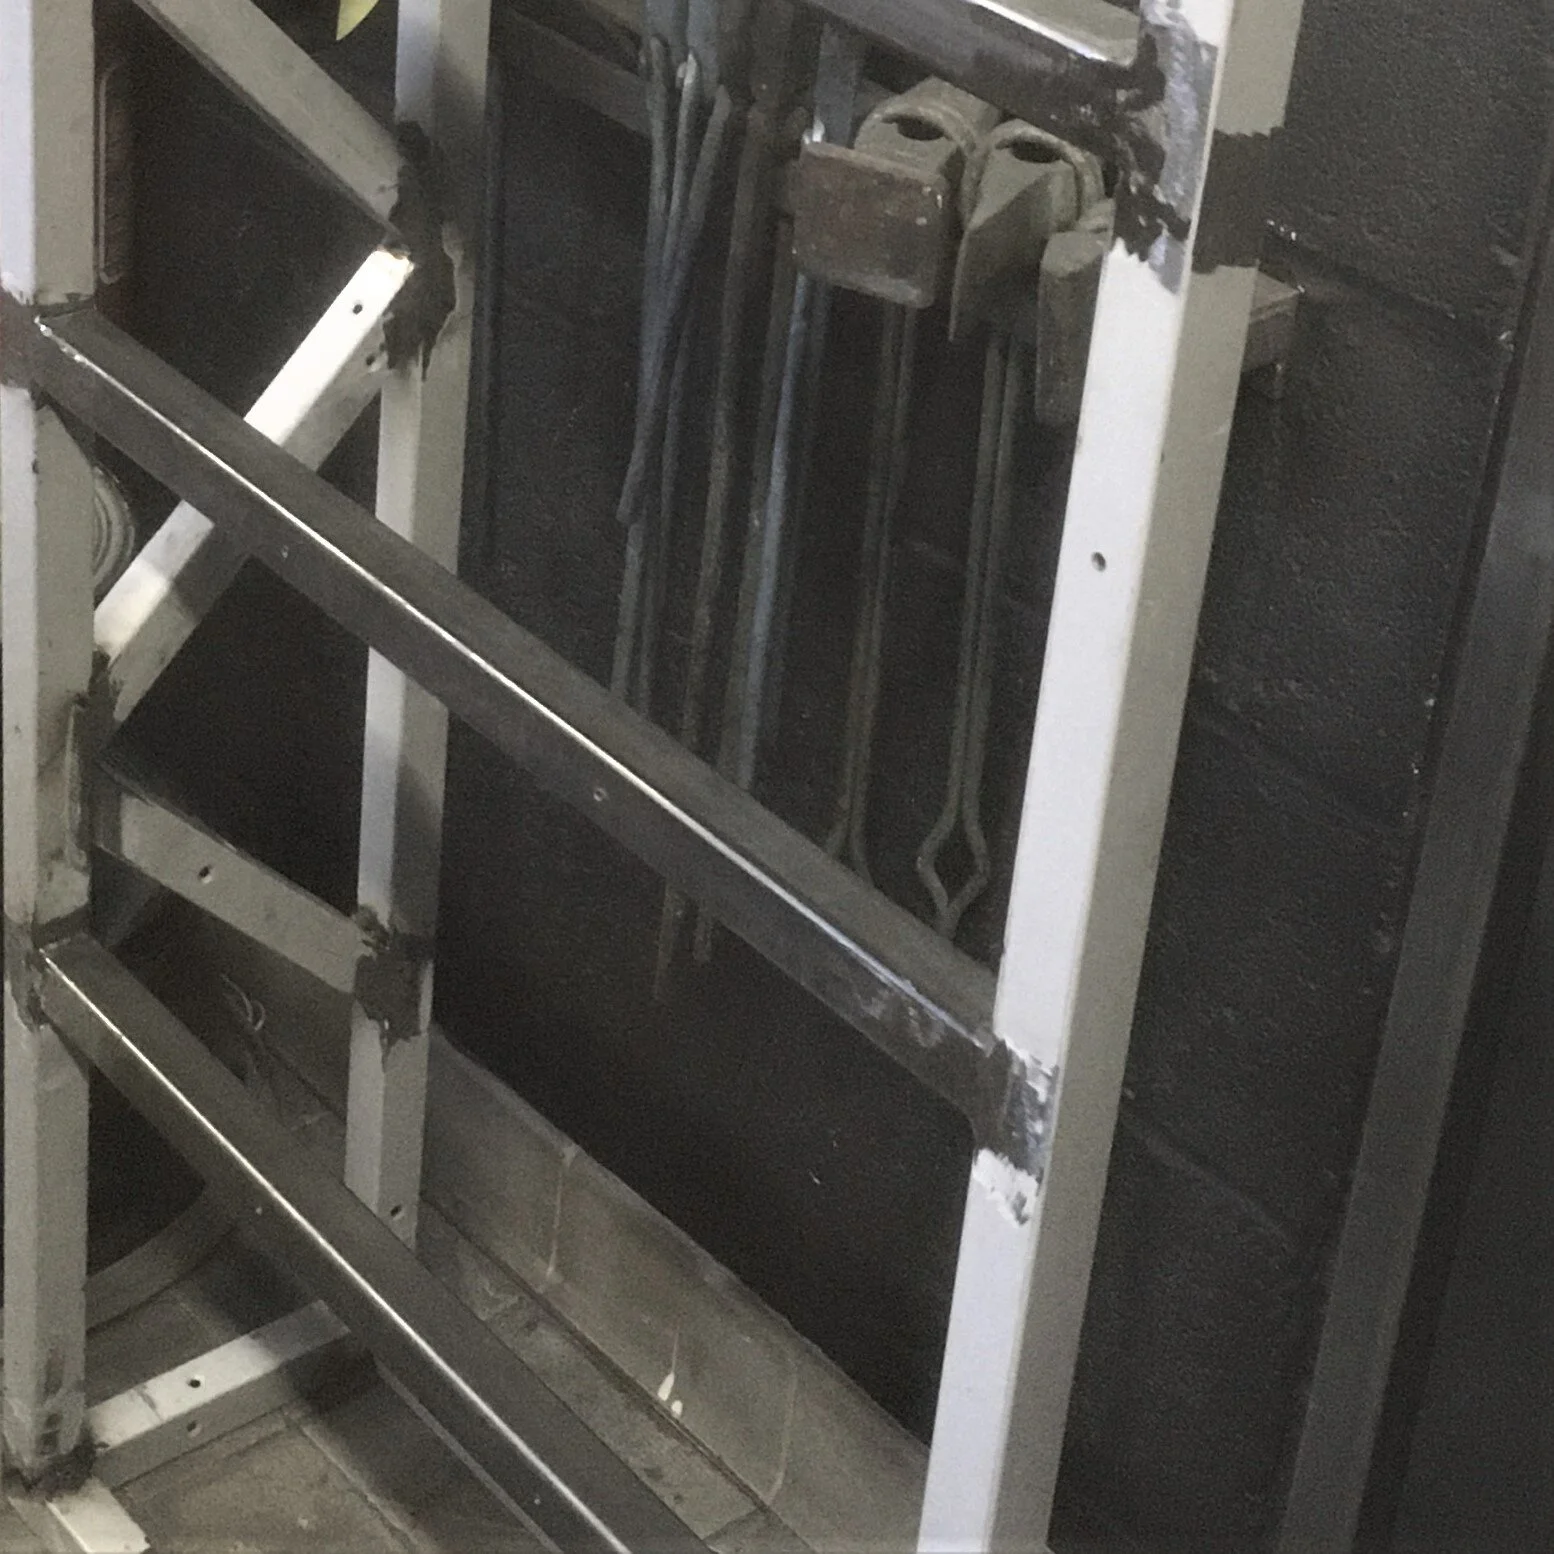
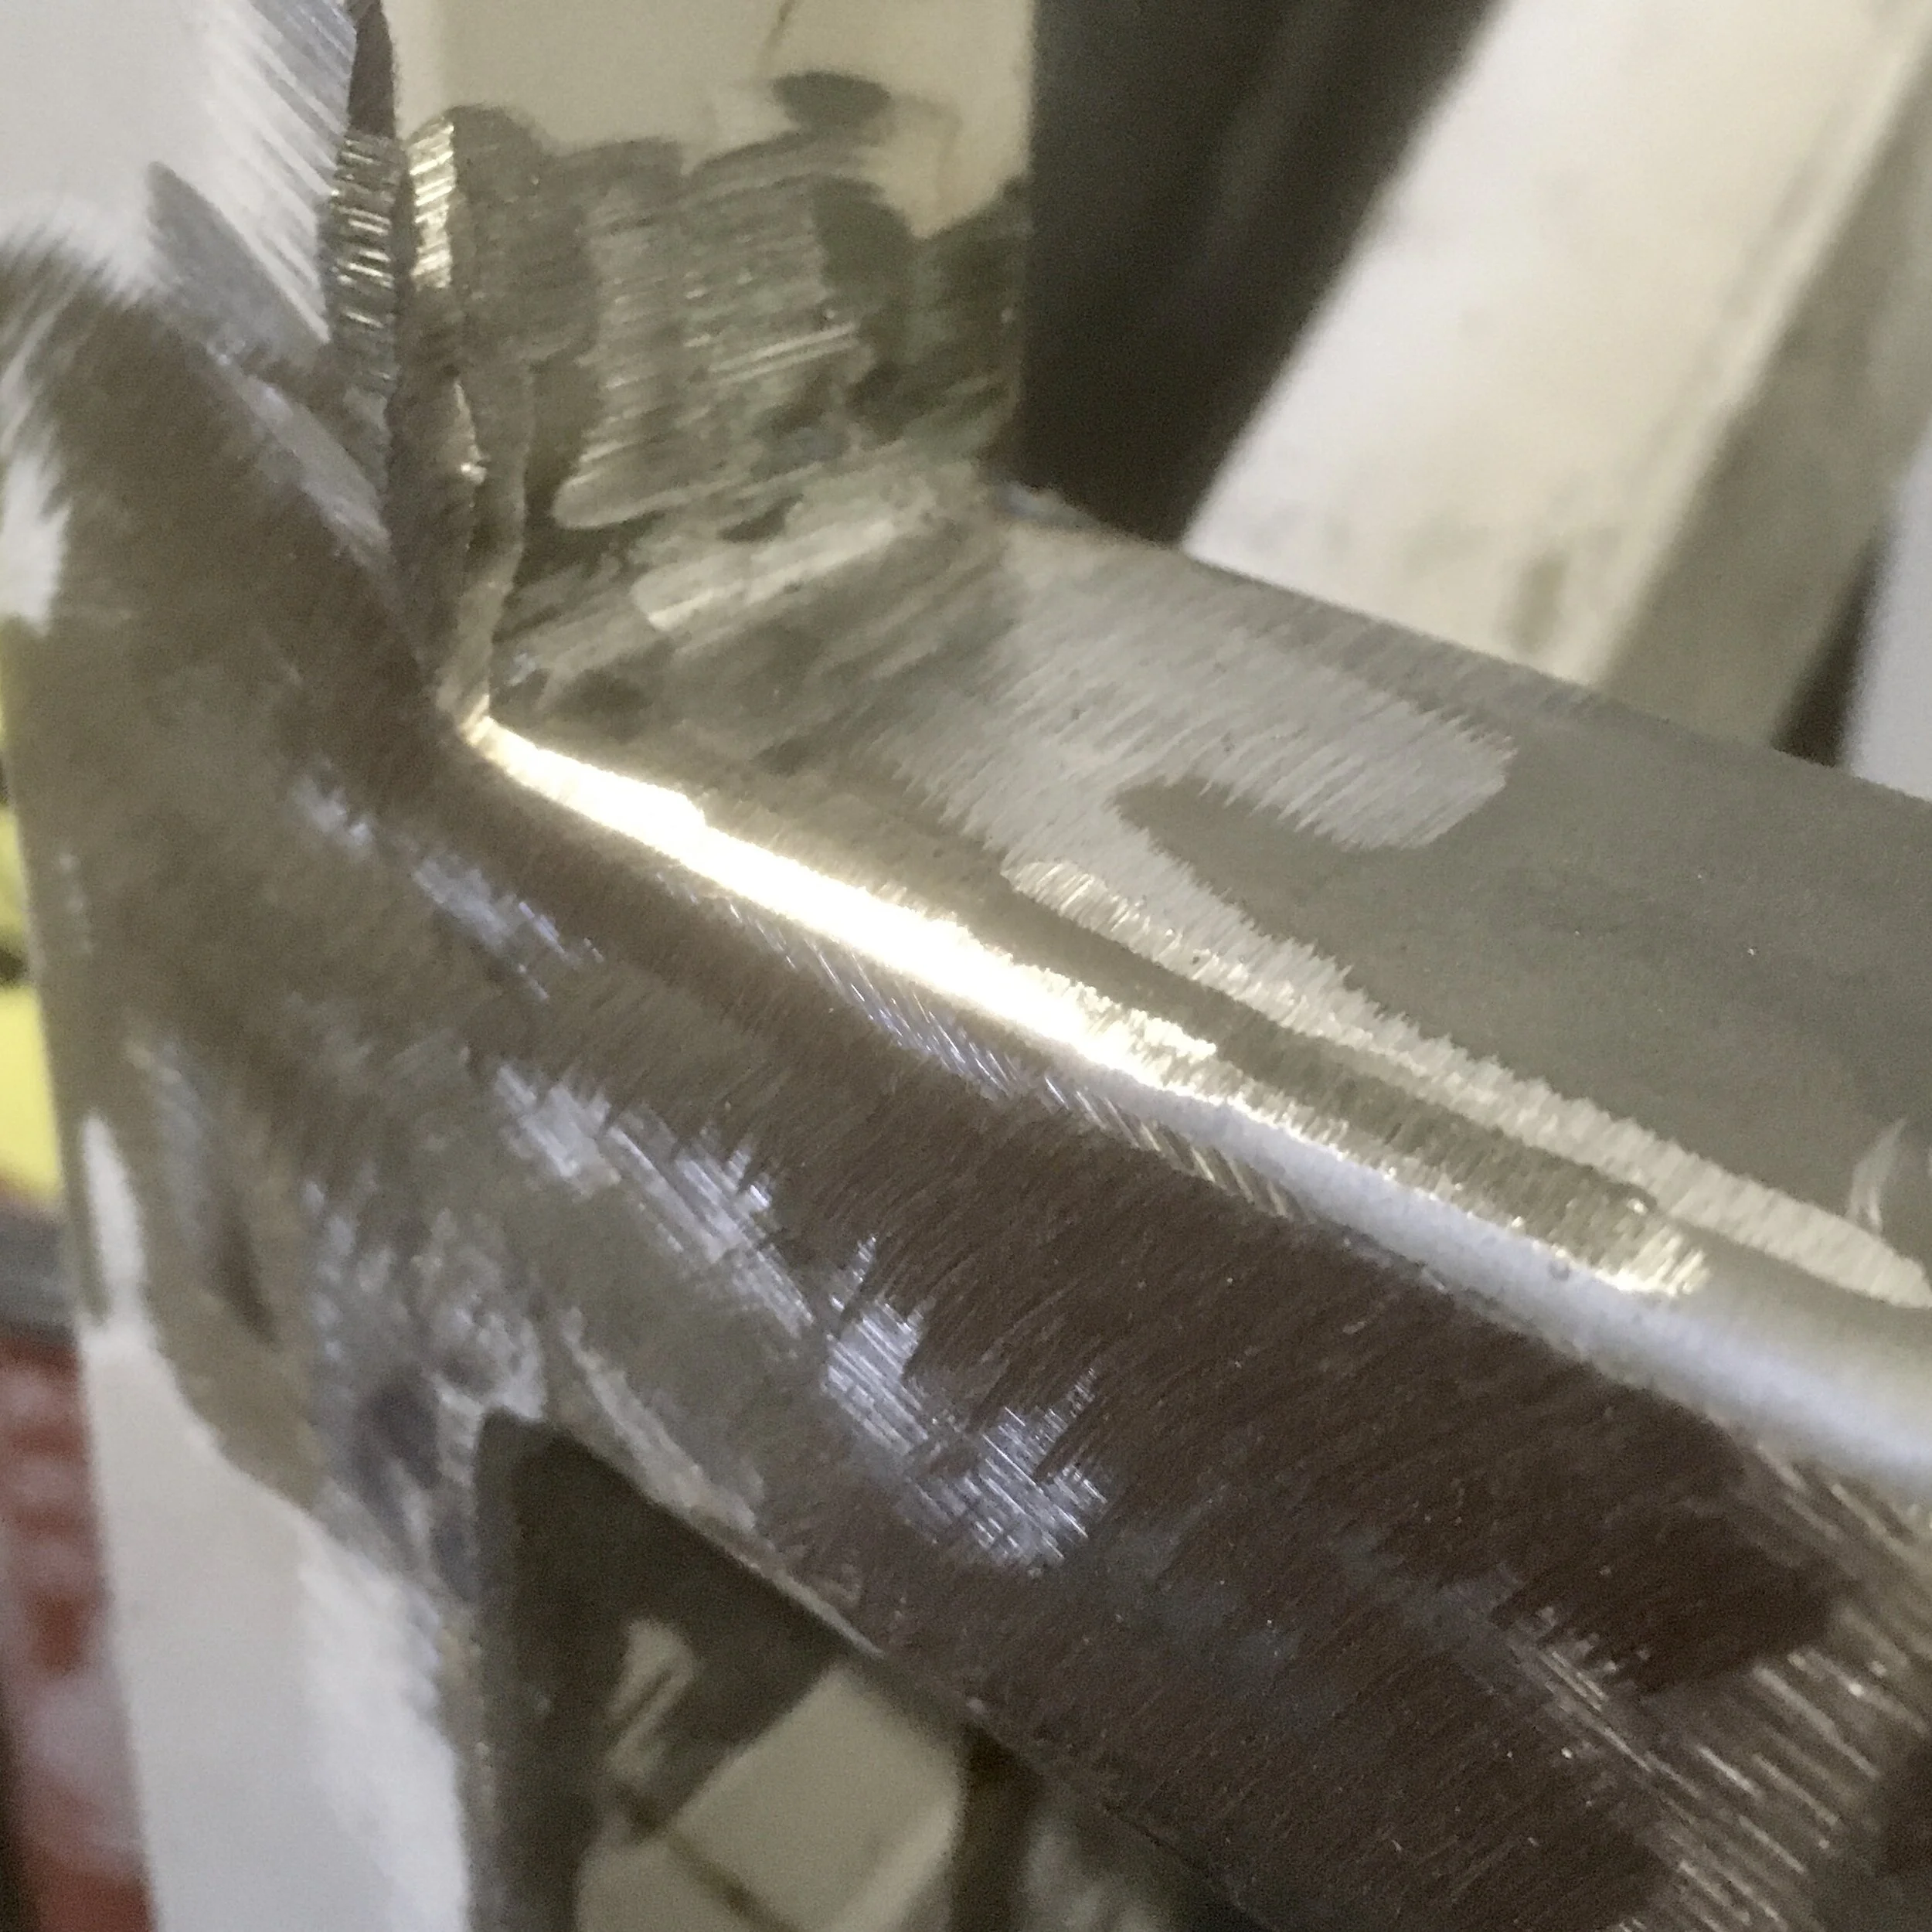
Having access to a MIG welding plant is, of course, great! I wish I could say the same of my welds: In the absence of technique I resorted to a point-squirt-and-hope strategy, and spent a LOT of time with the angle grinder afterwards. - Nobody should ever x-ray my welds, but the metal has stuck and it doesn’t shift when hit with a hammer, so that’s something. It also achieves the goal of creating a stronger base which will not bend.
After a lick of Hammerite paint, she actually looks quite respectable (don’t look too close!)
With the base finally sorted, and in place, I could set out the hollow blocks again and lay the base of the firebox.
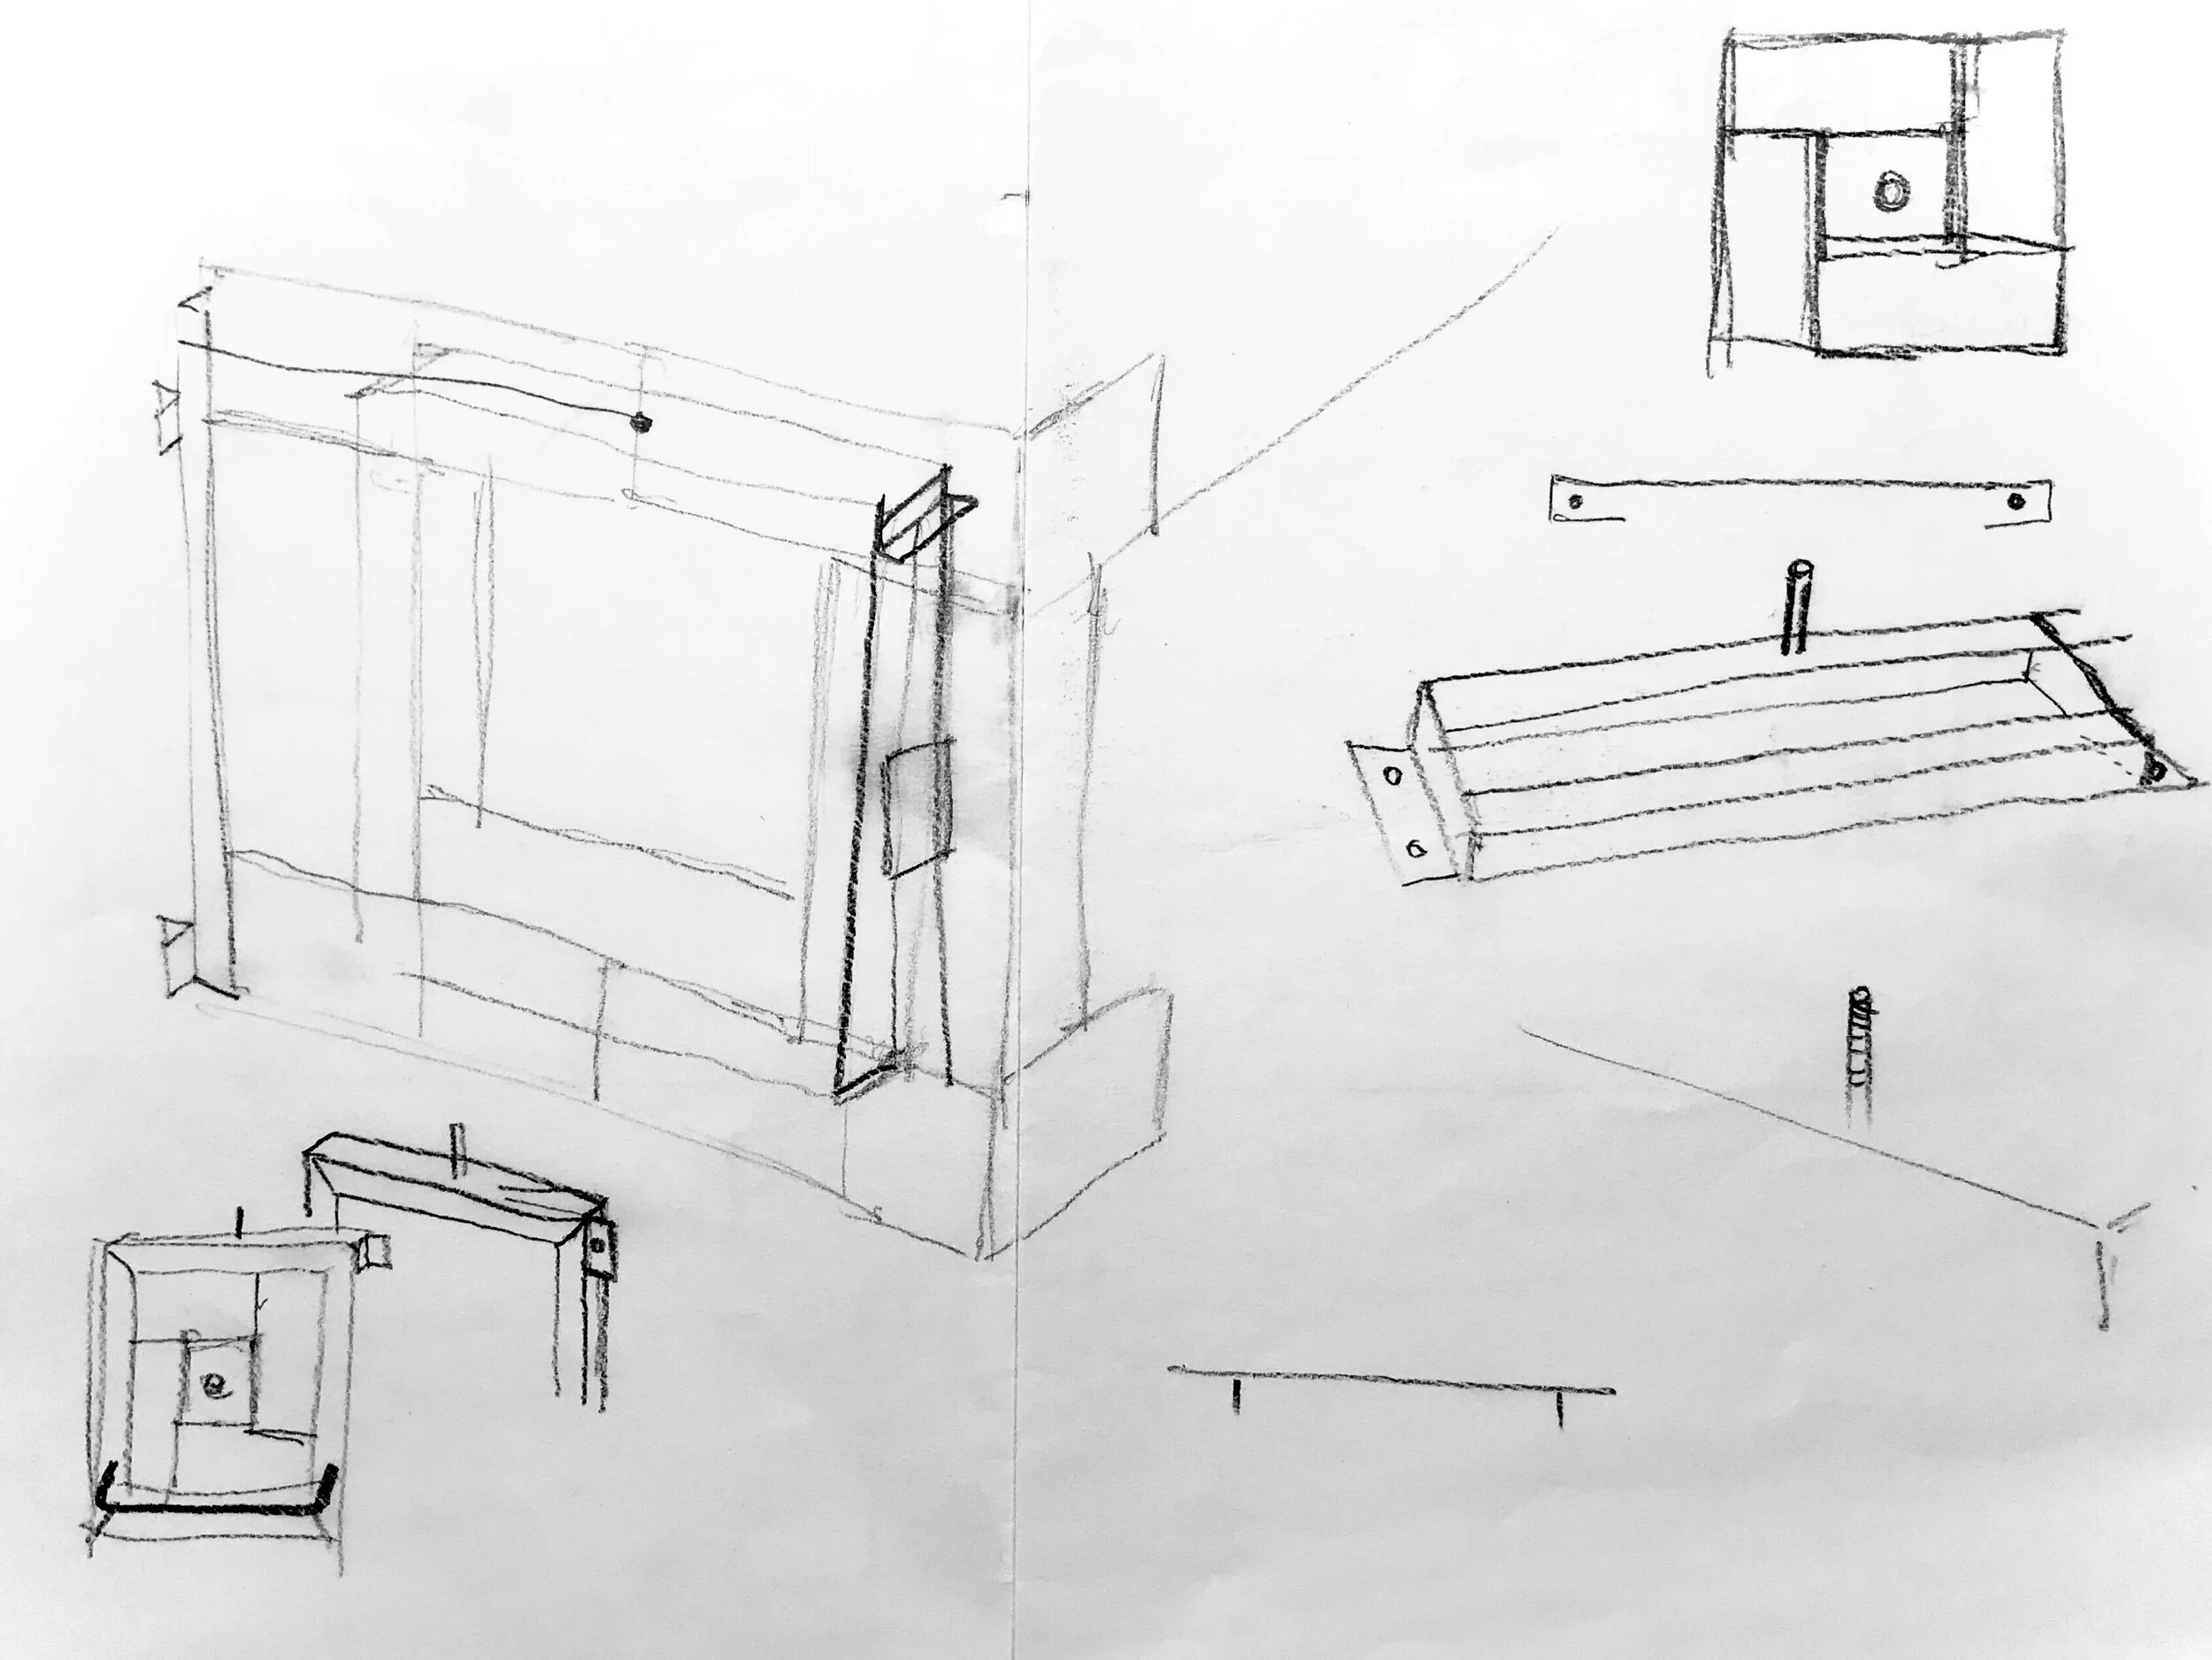
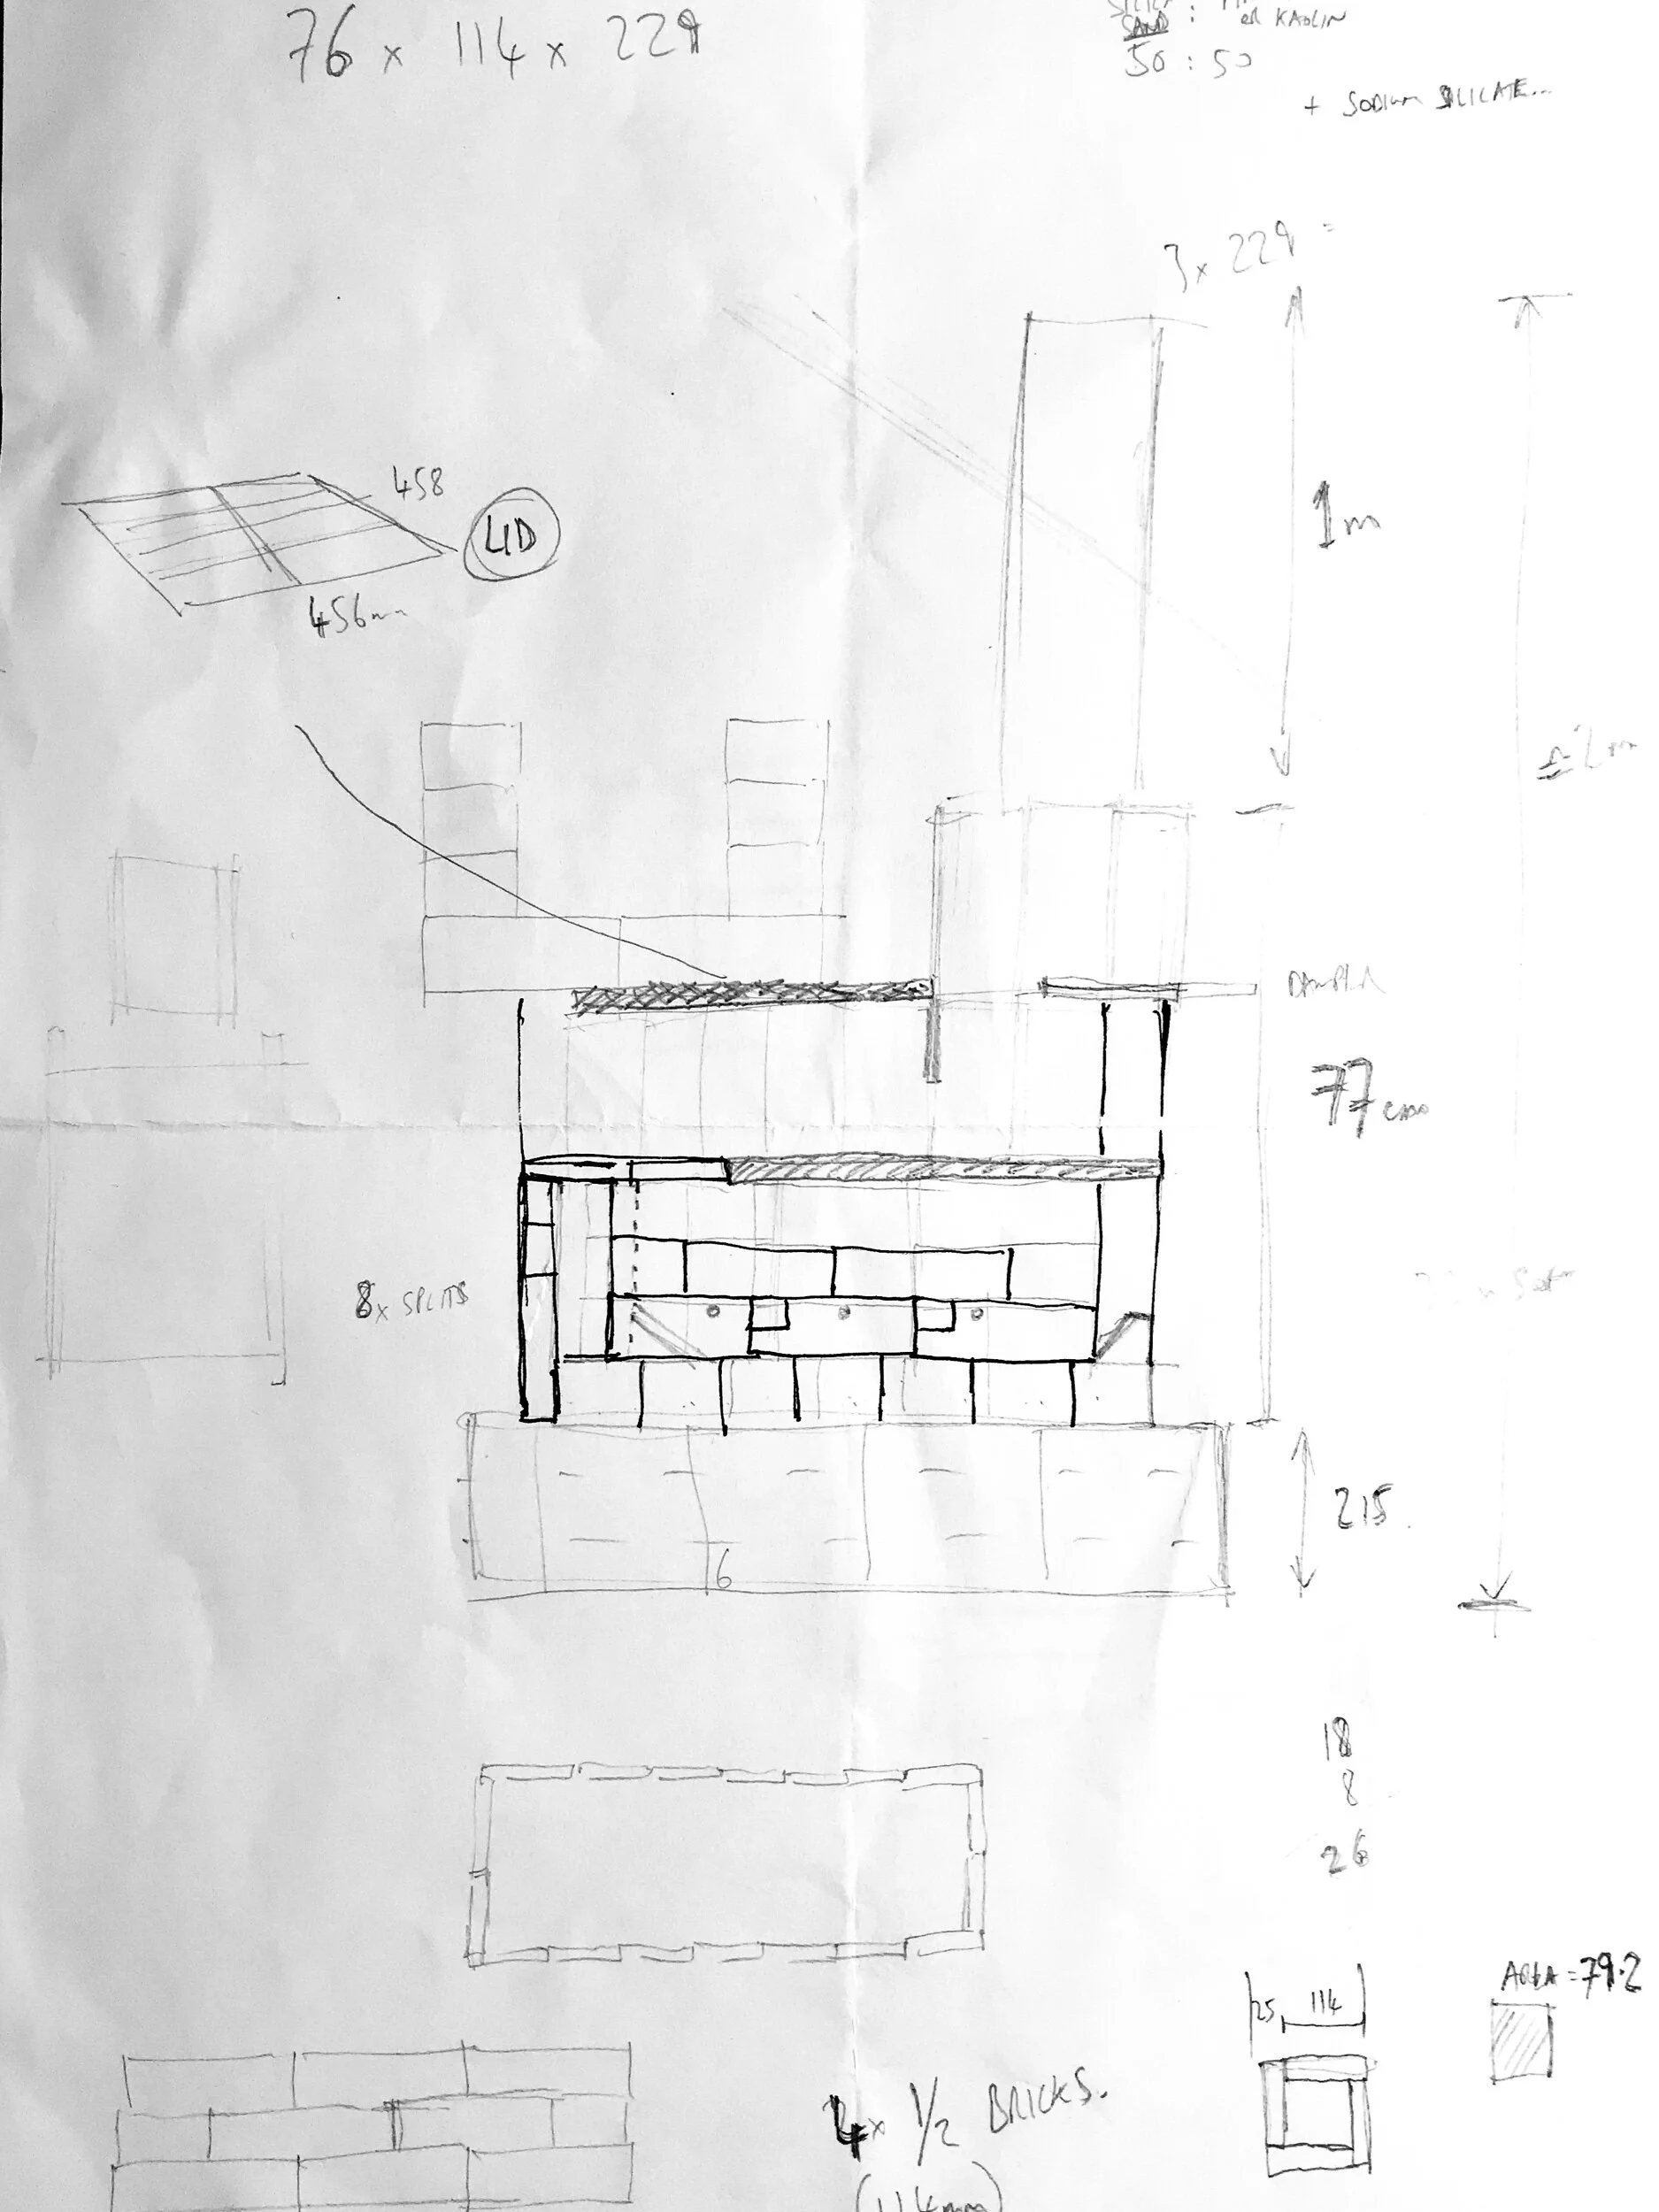
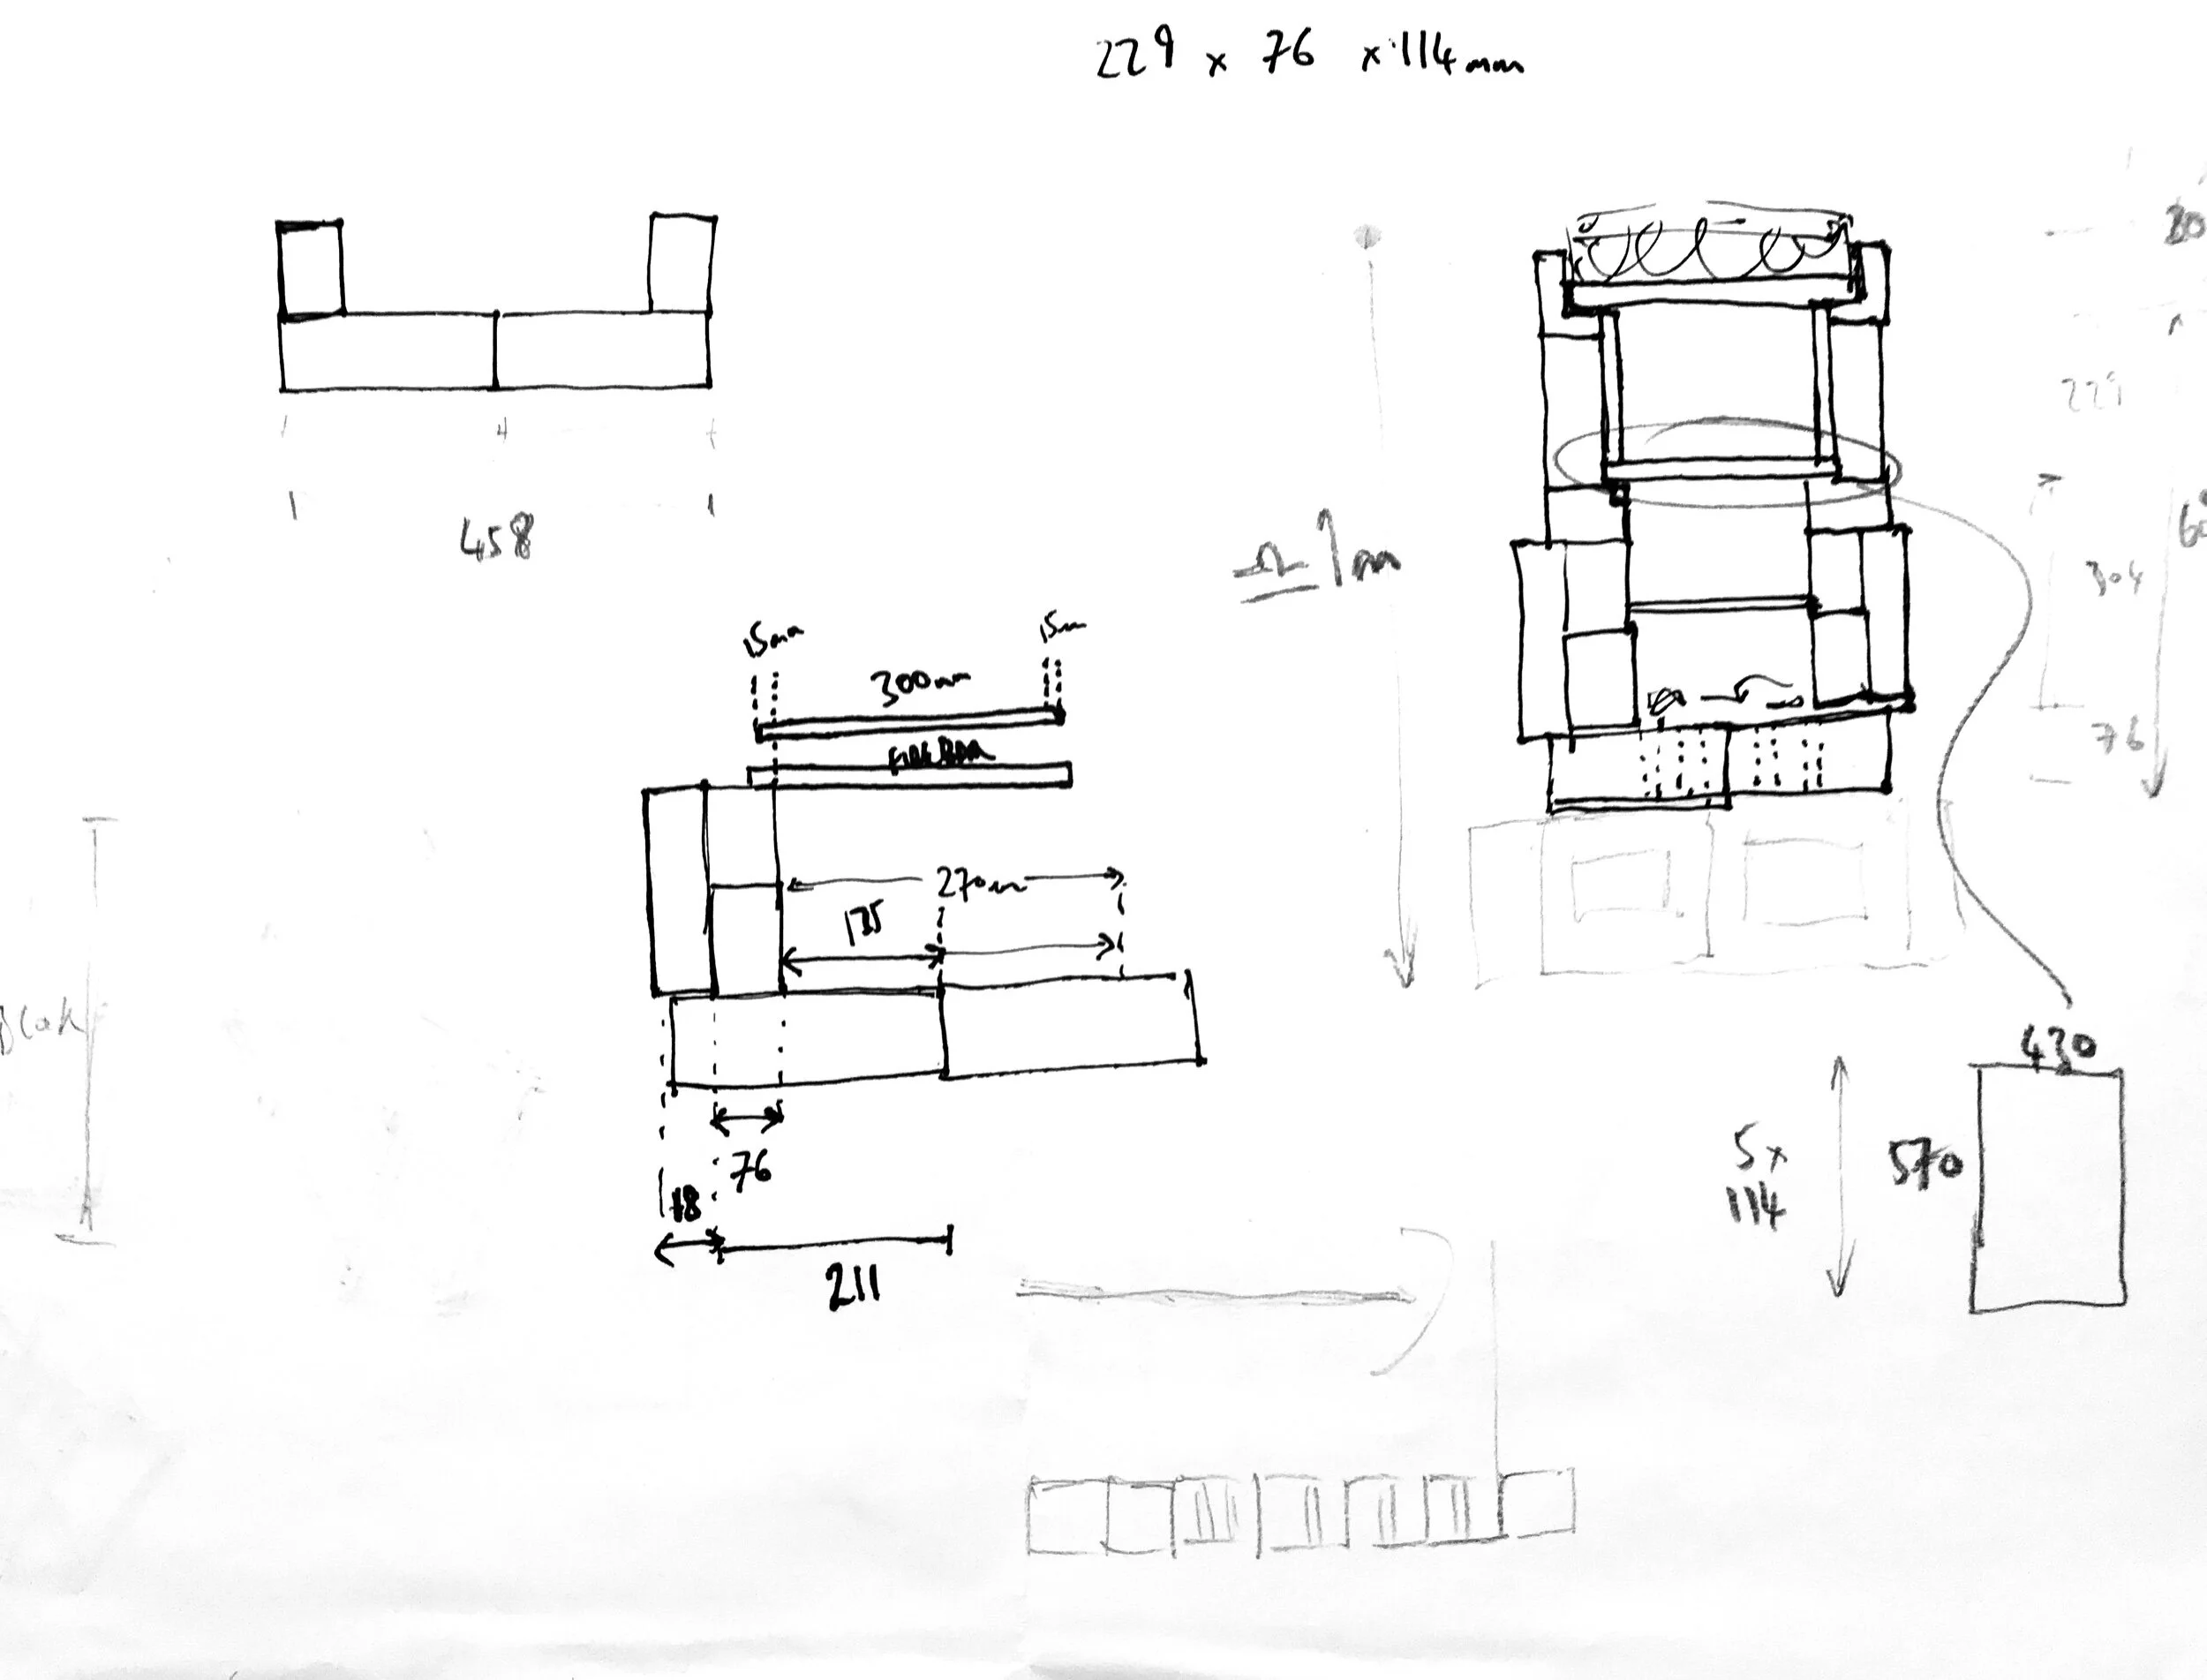
As ever, scribbled sketches and head scratching continued apace. Some of the uncertainty has been apprehended this way but, as perhaps with any new process, several ‘unknown-unknowns’ have meant a two-steps-forward-and-one-back approach.
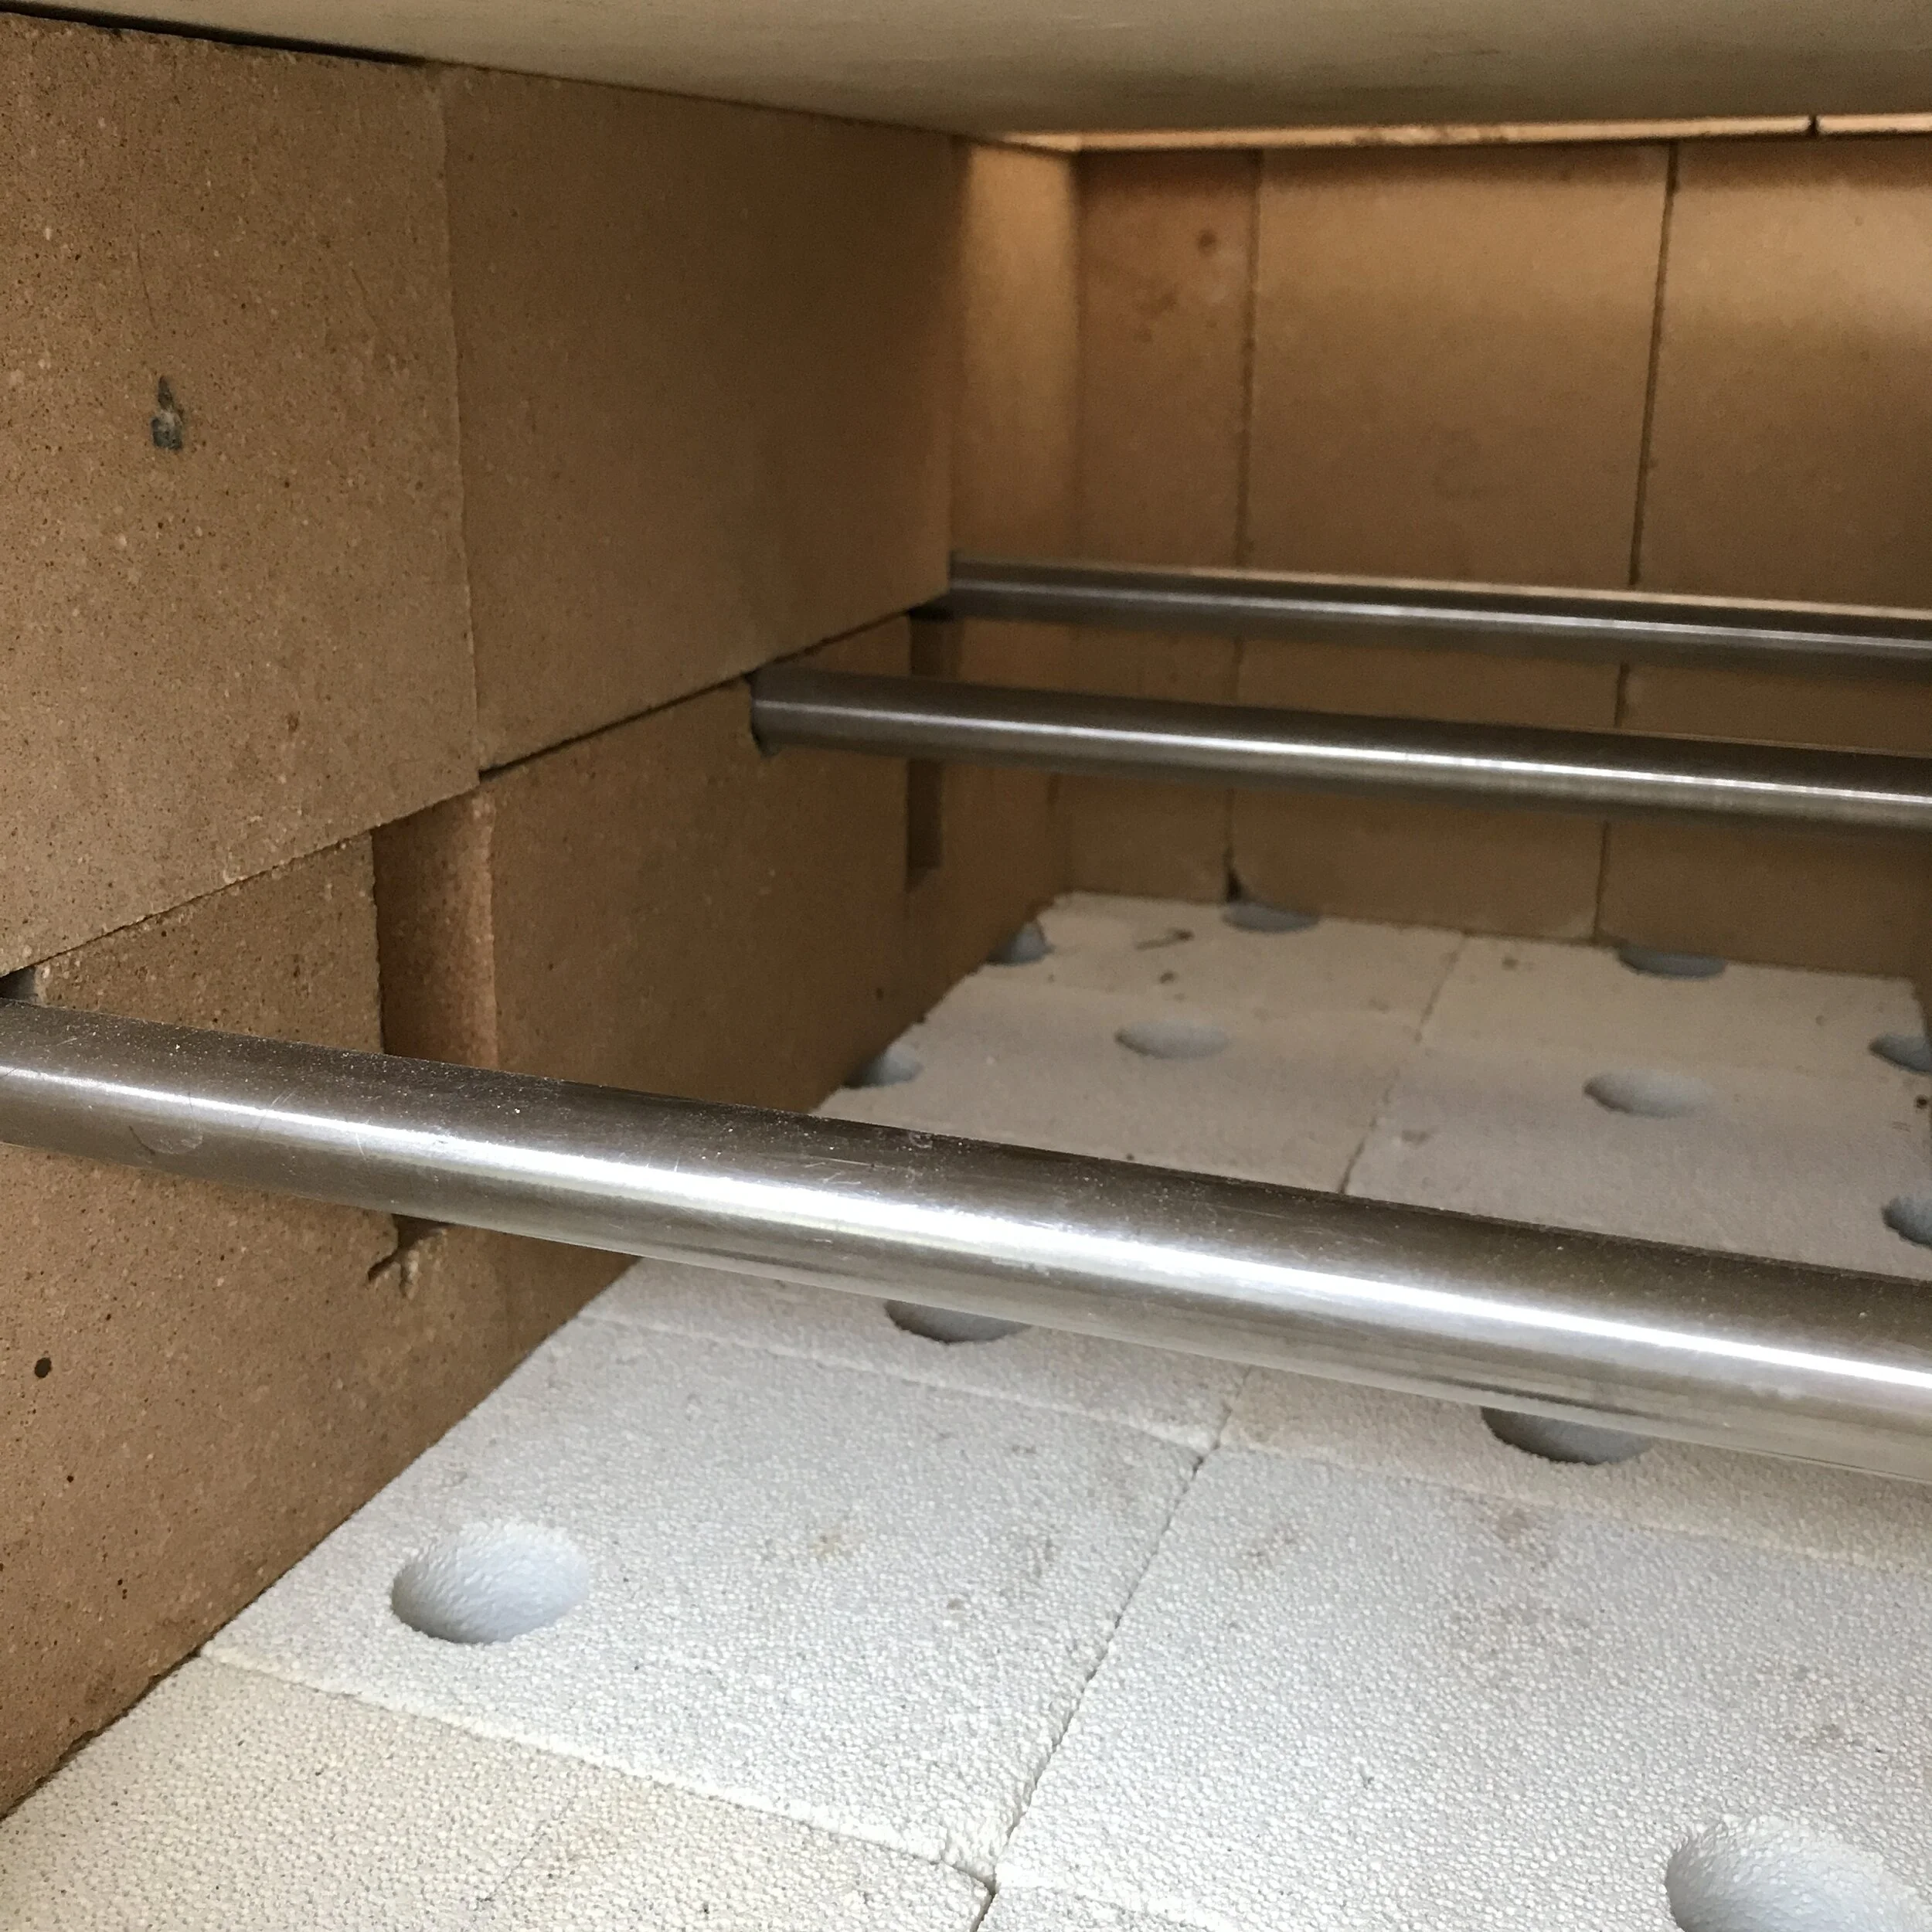
The lightweight insulating bricks were easy enough to drill using a pillar drill and a hole-saw. I opted for twelve 30mm (1 & 3/16 inch) diameter holes dotted throughout the firebox floor, and slightly more concentrated towards the back of the firebox where I am hoping the ember bed will be slightly thicker and need a little more air flow. The area of these twelve holes is approximately the same as the area of the 4inch chimney flue (81.07cm²):
Area of the Primary Air holes = 12(π(1.5cm²) = 84.84cm²
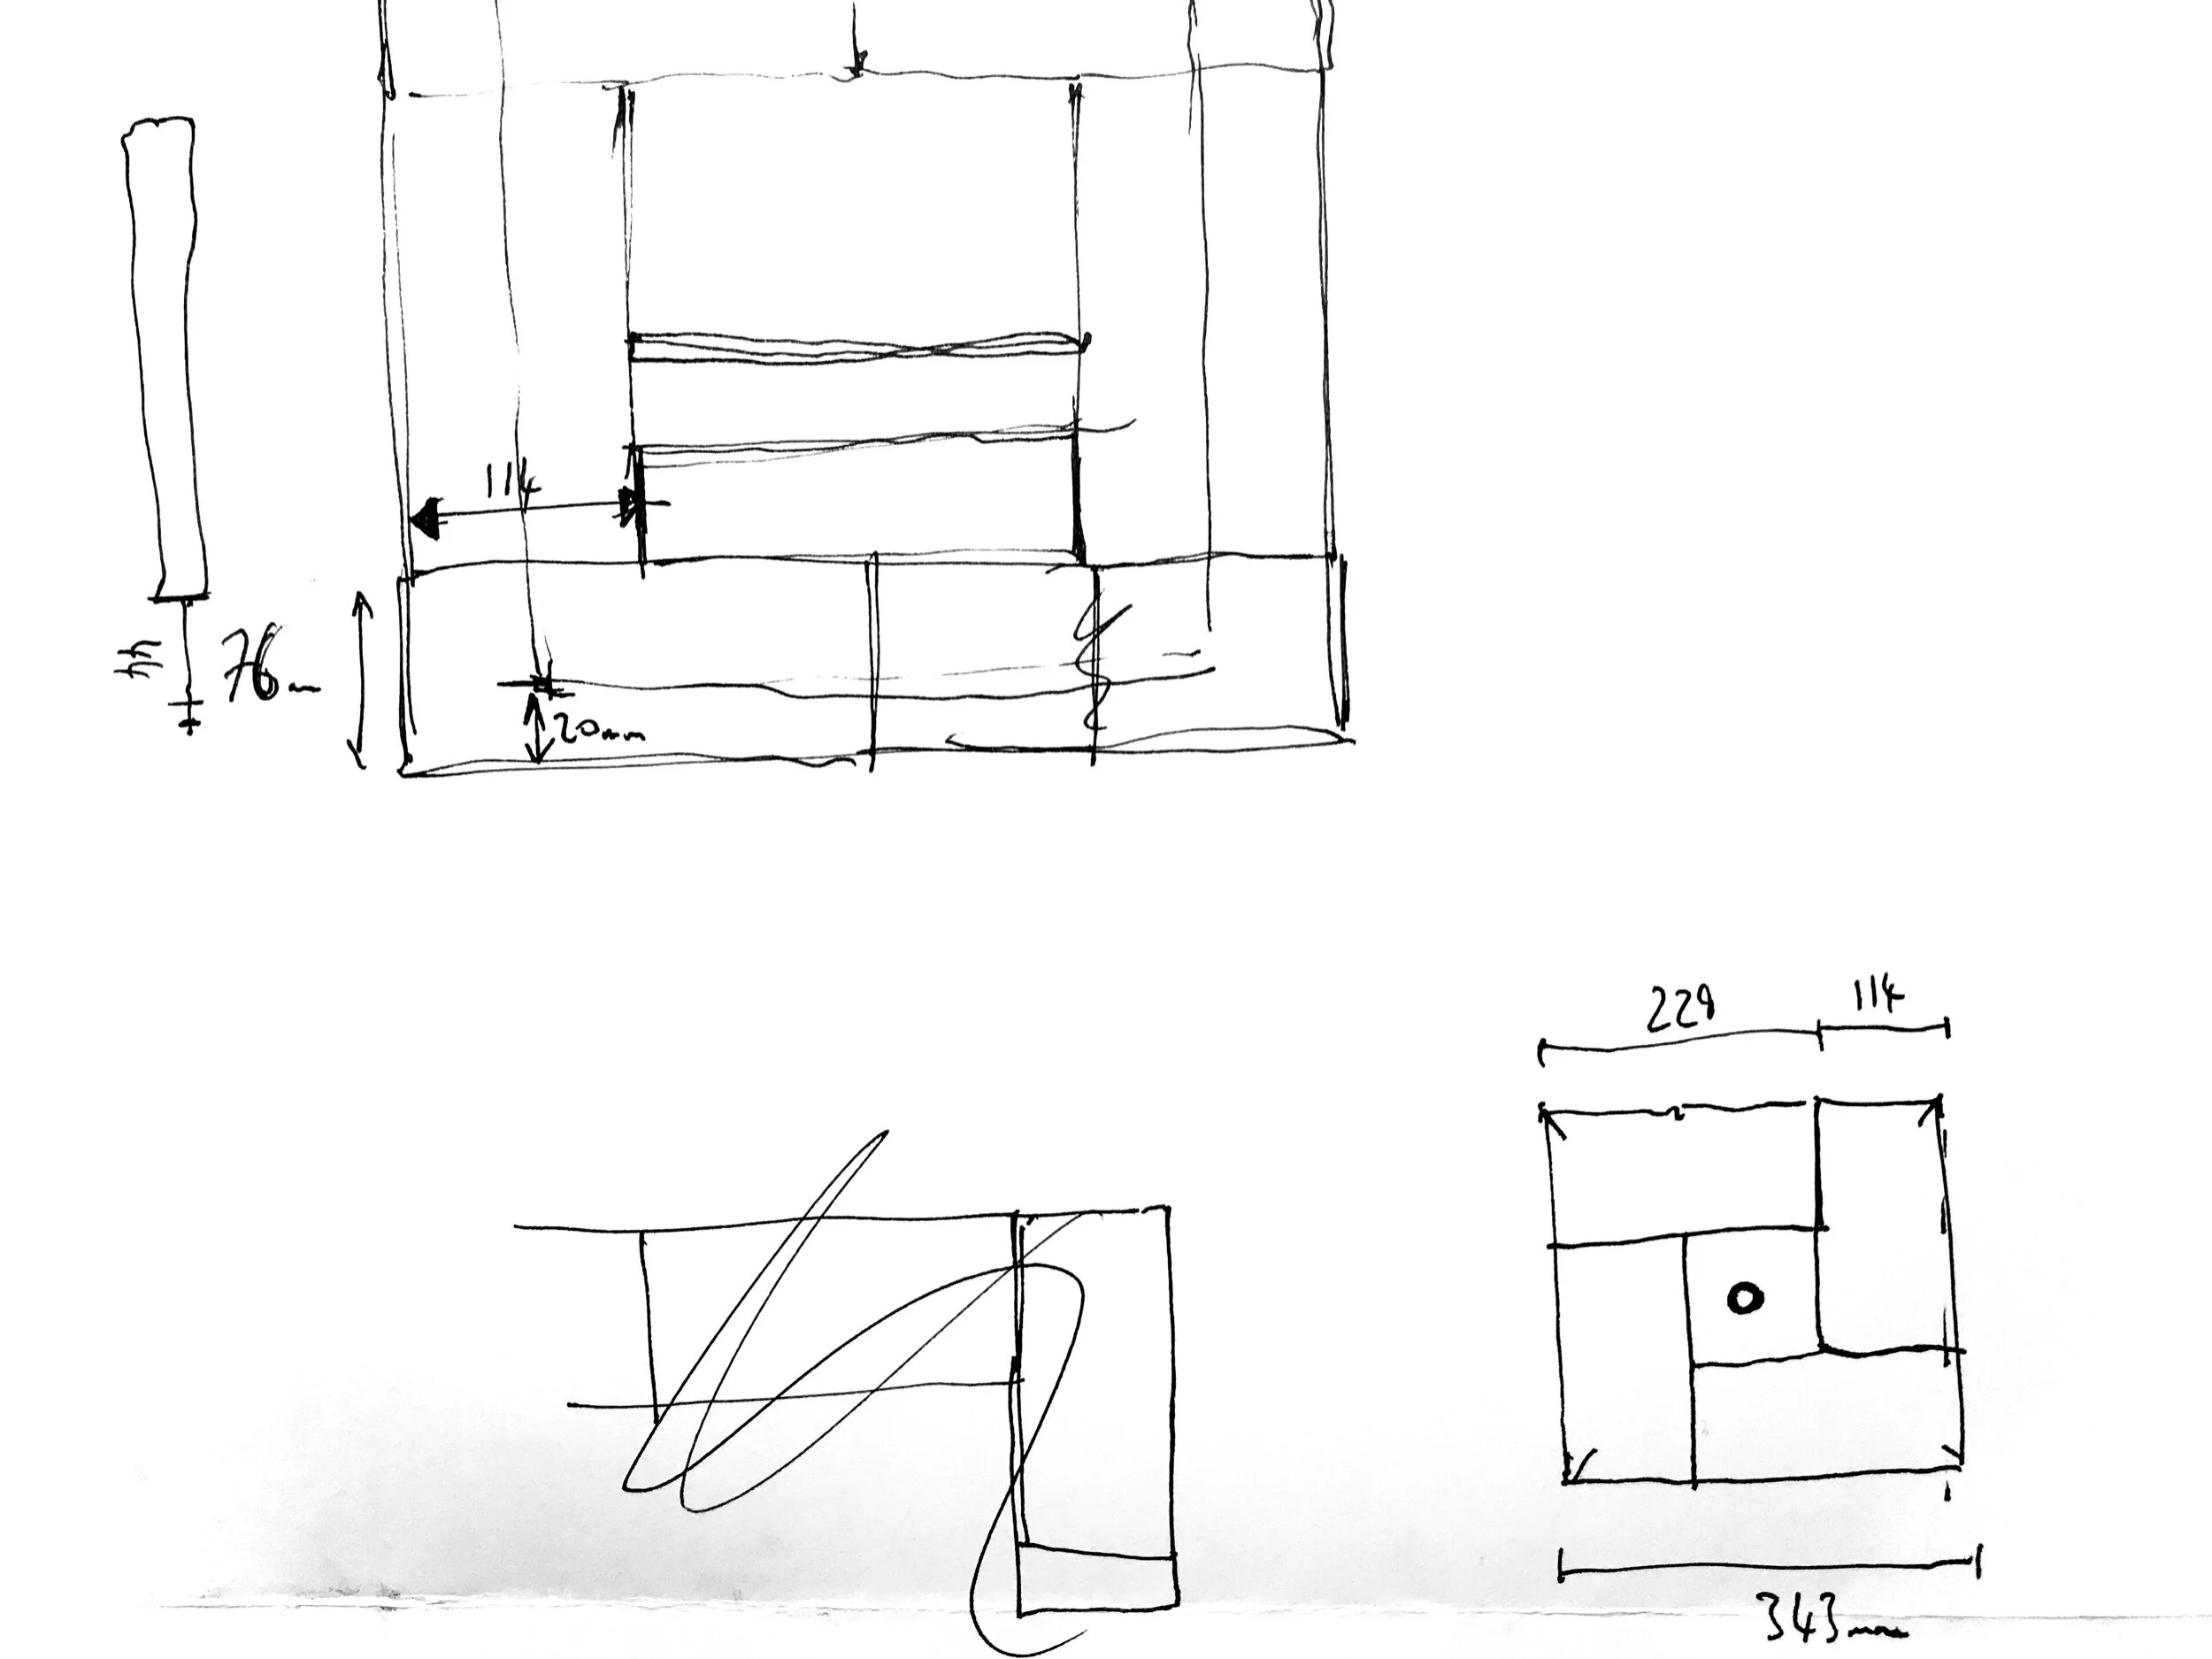
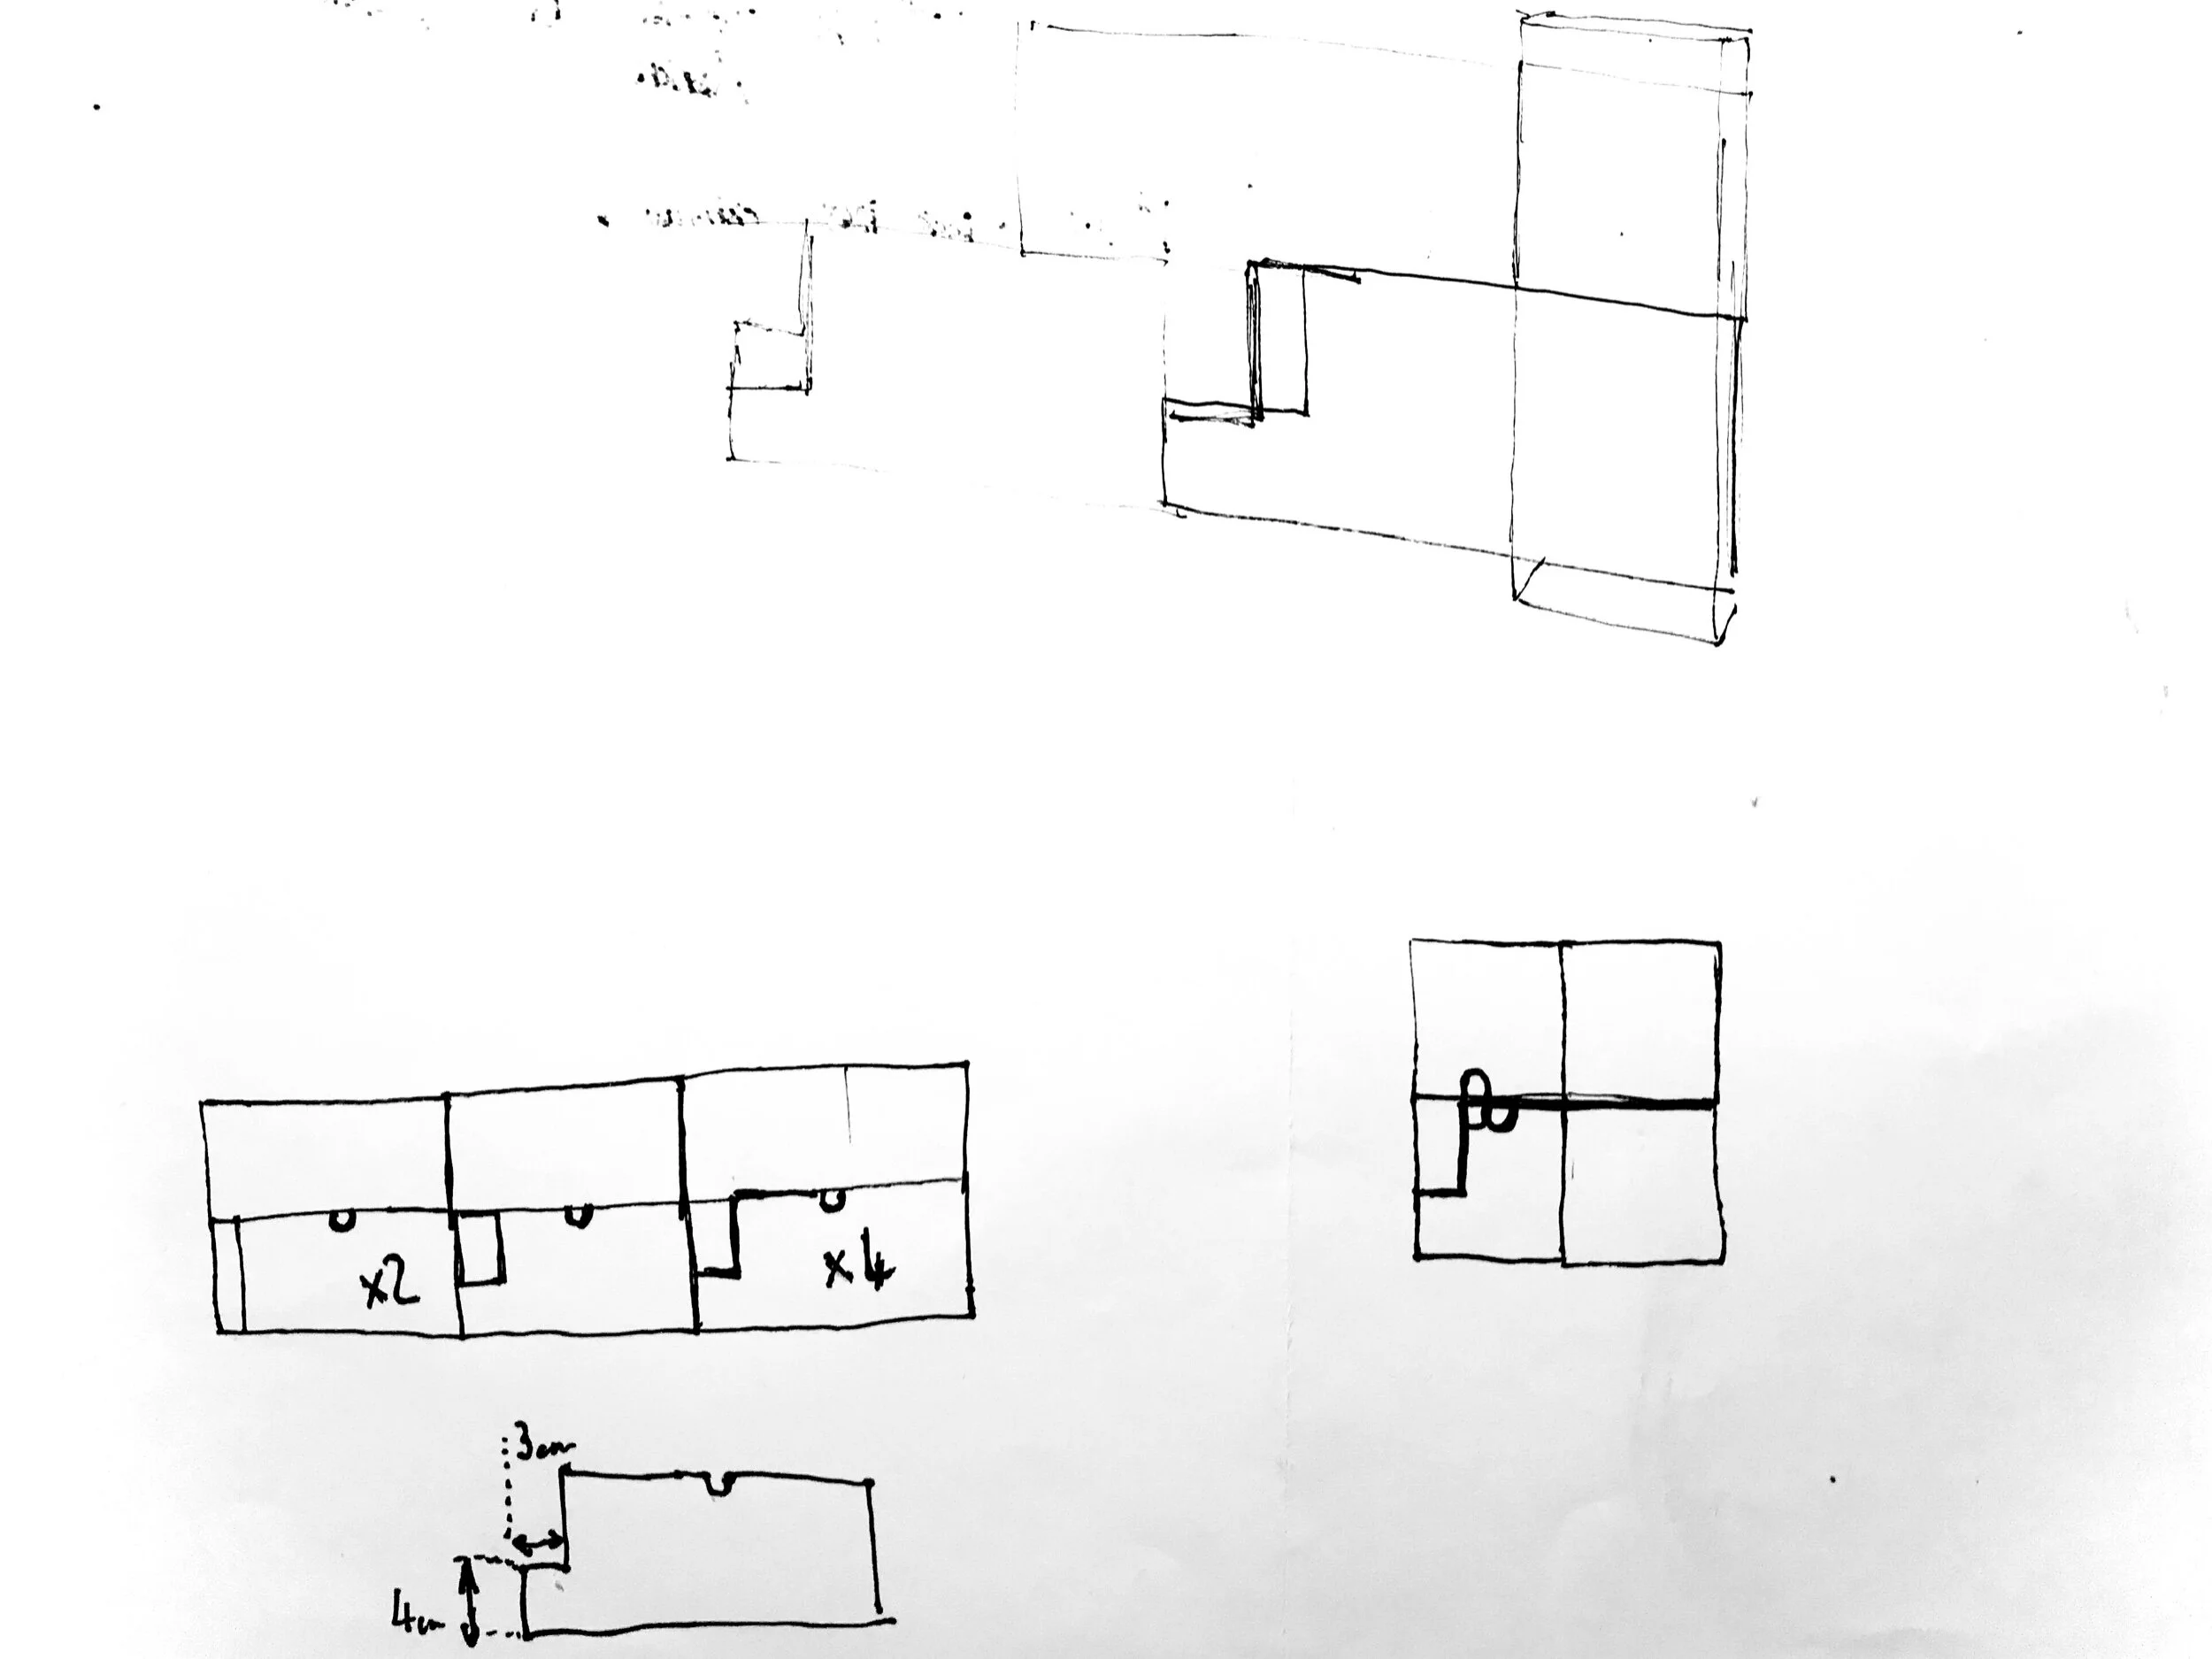
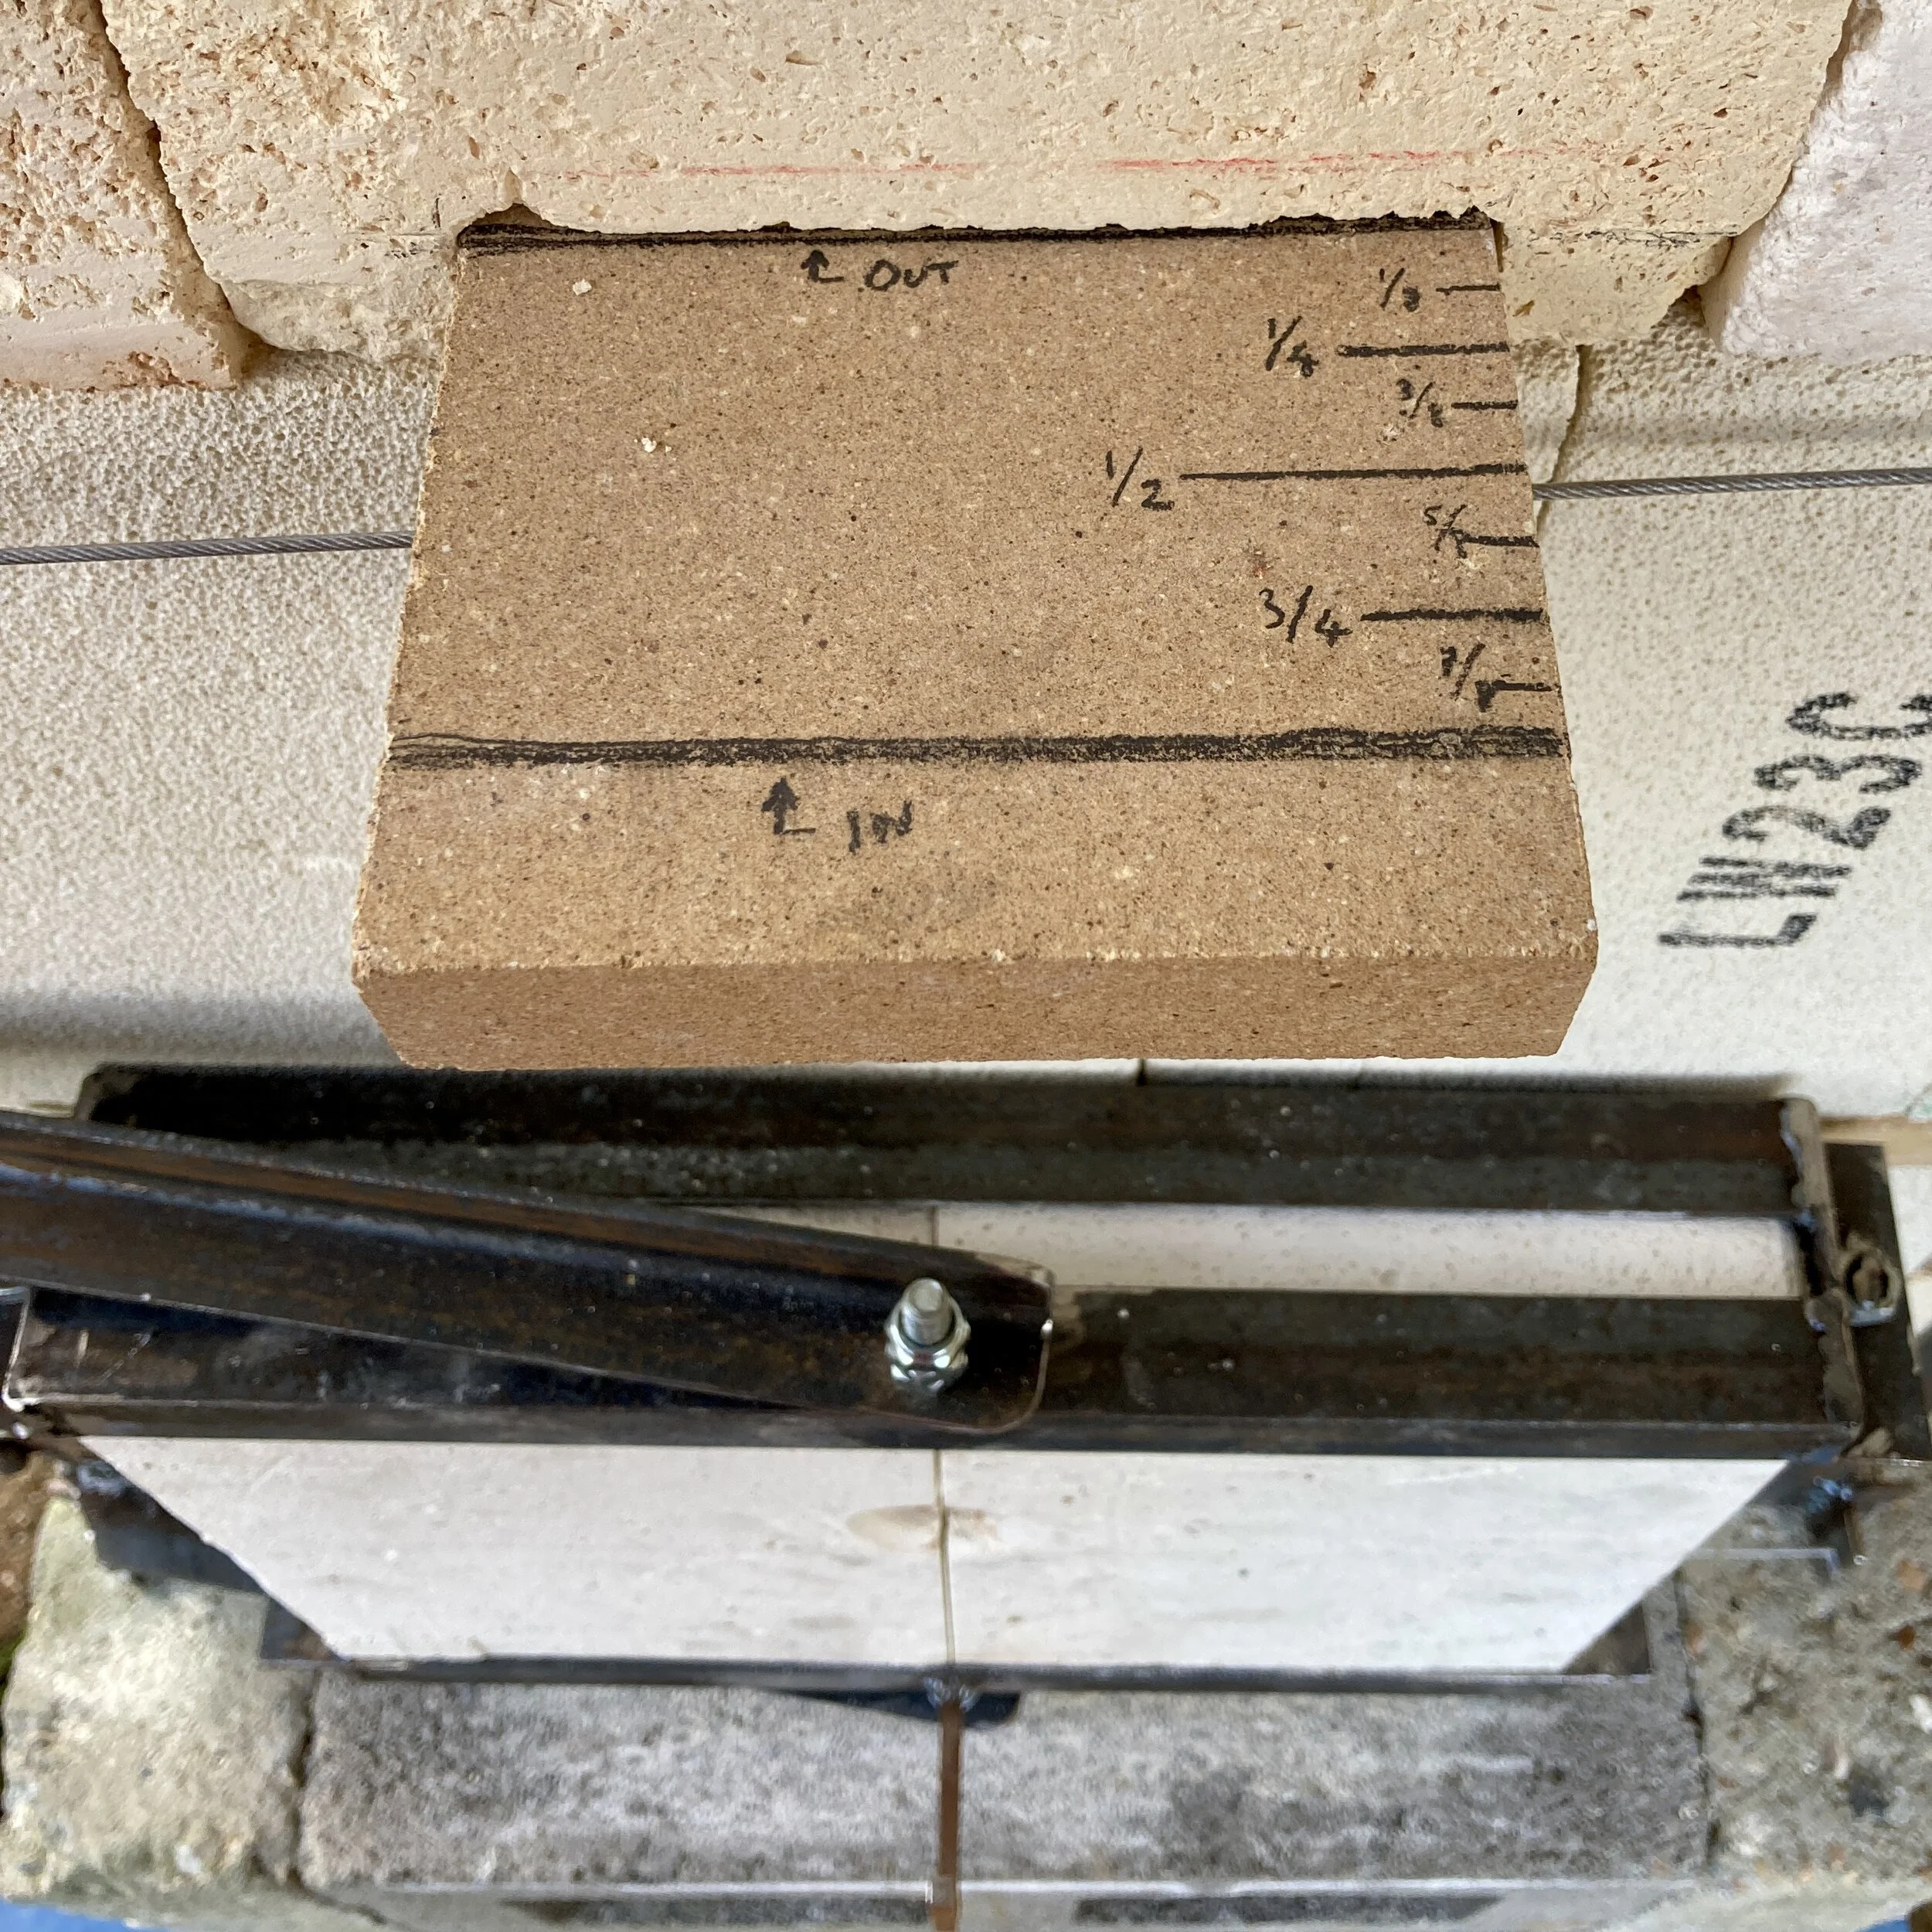
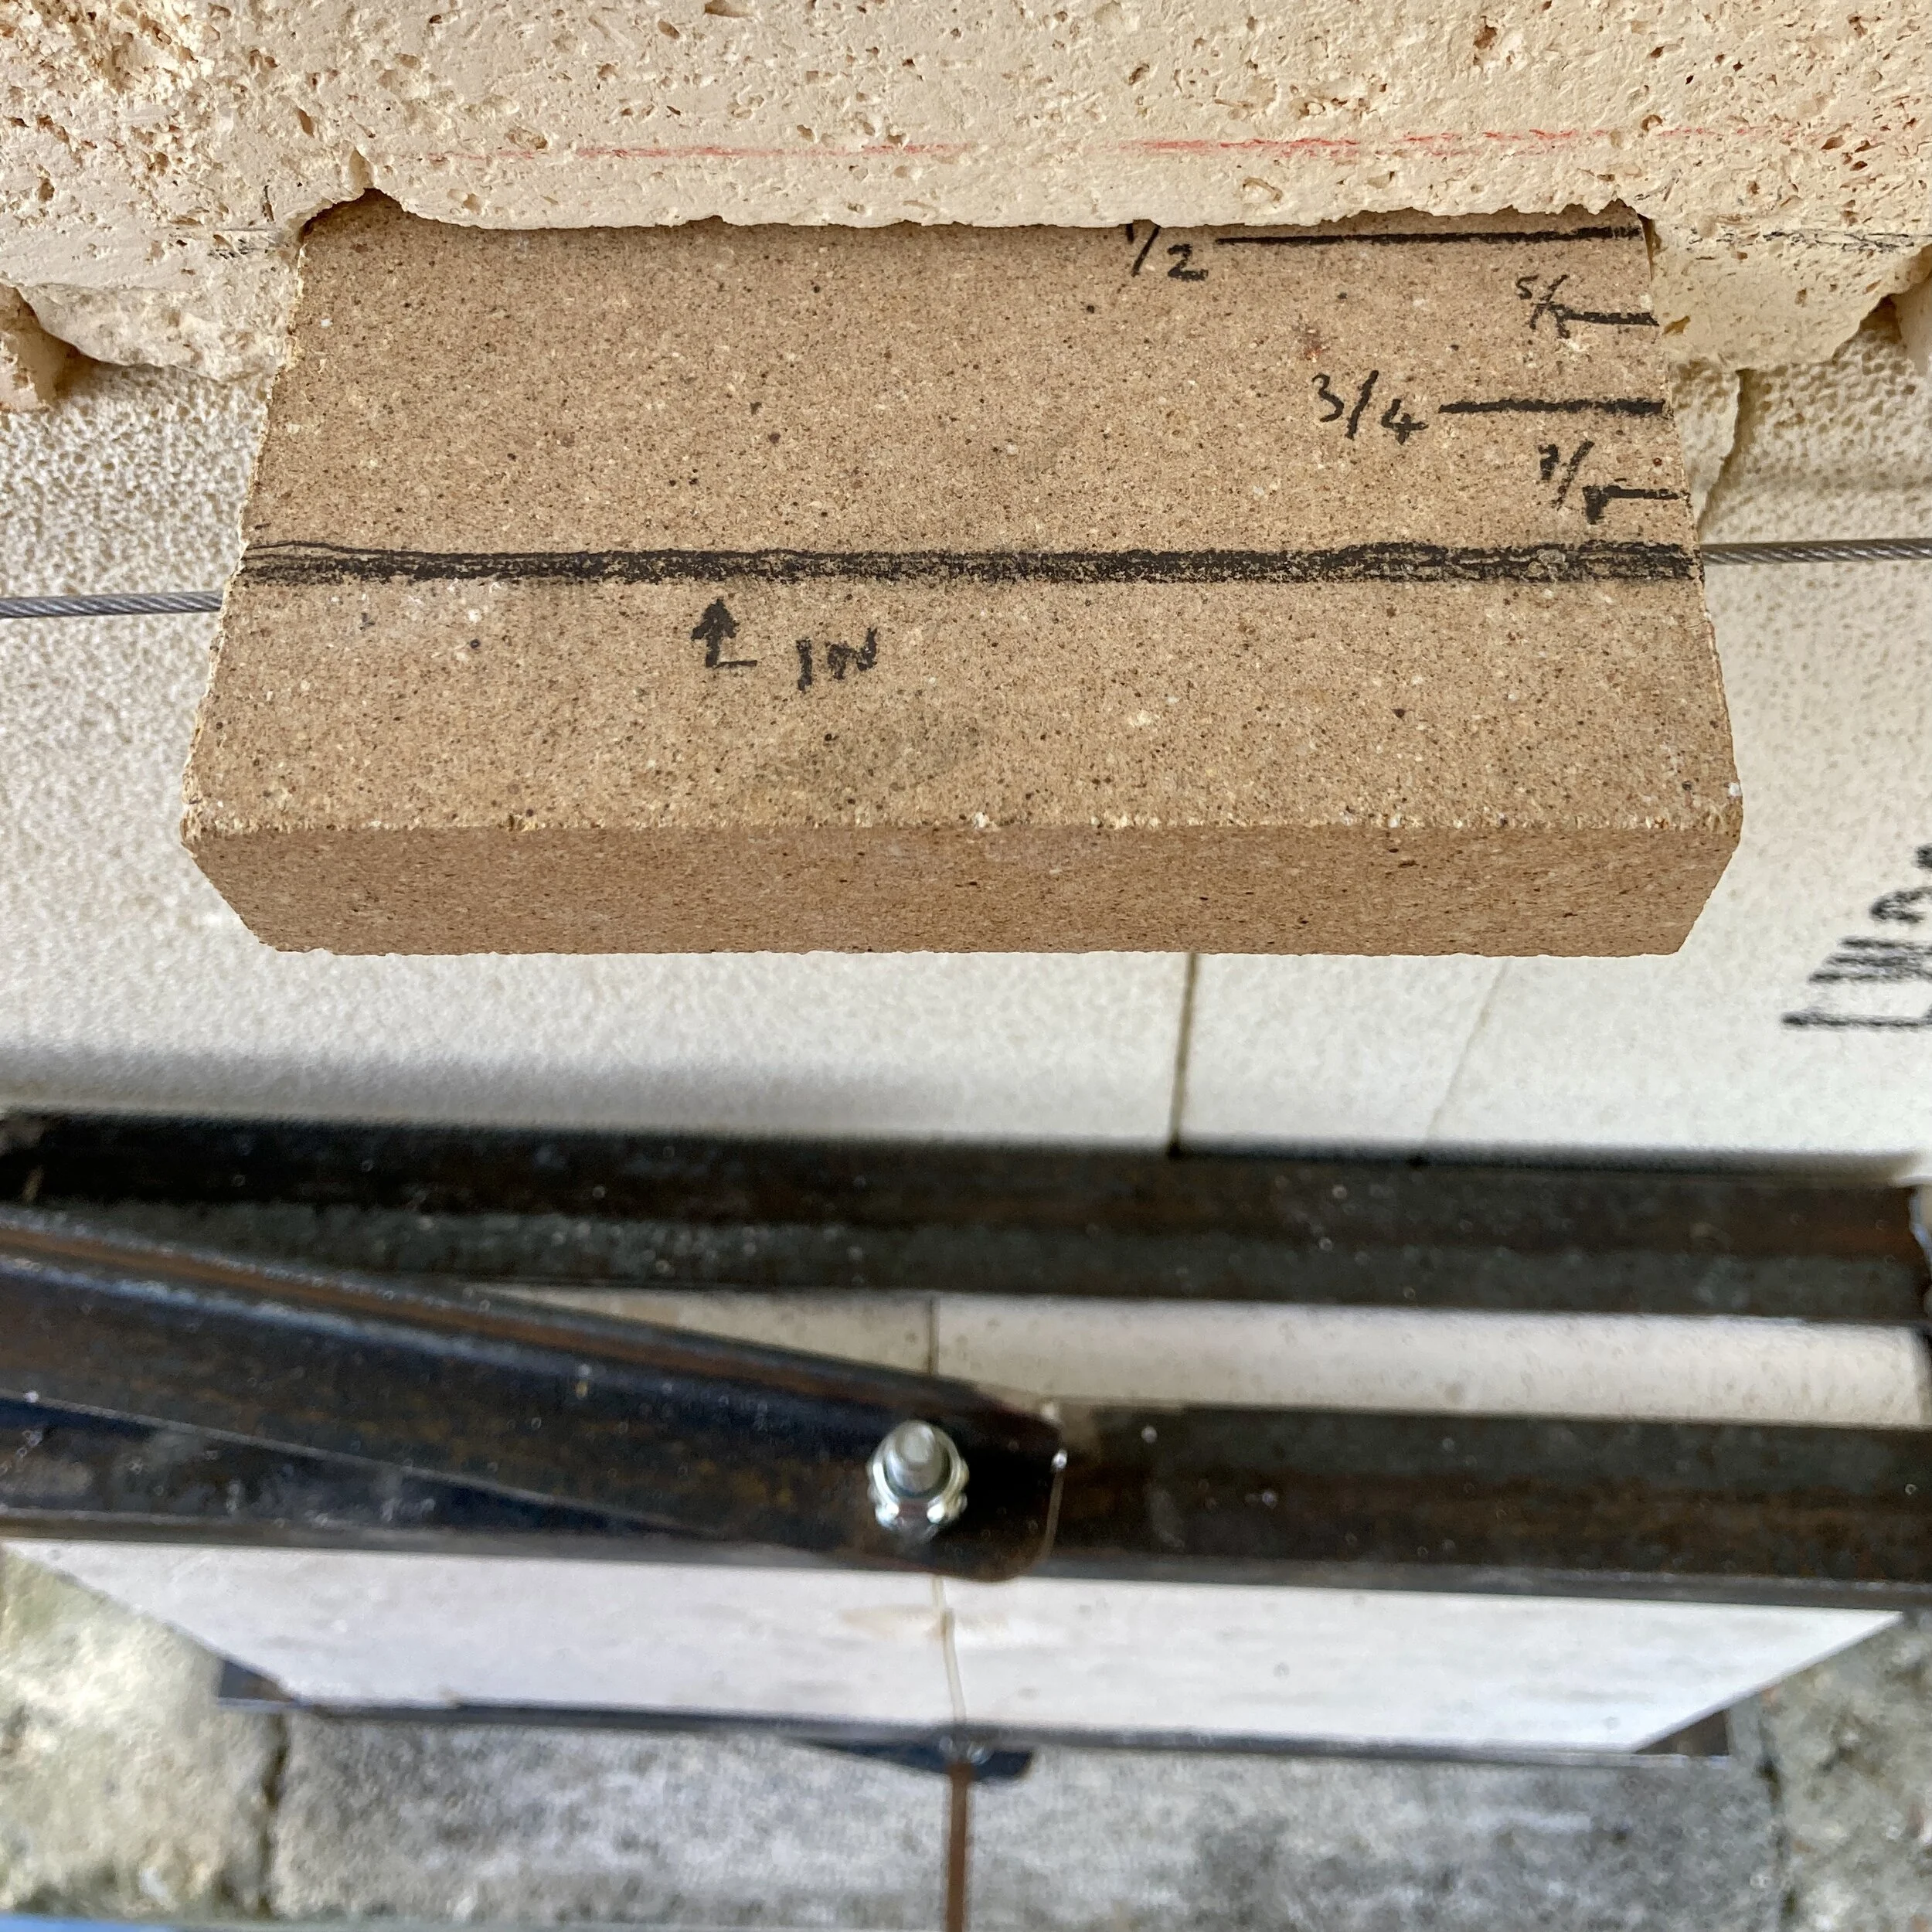
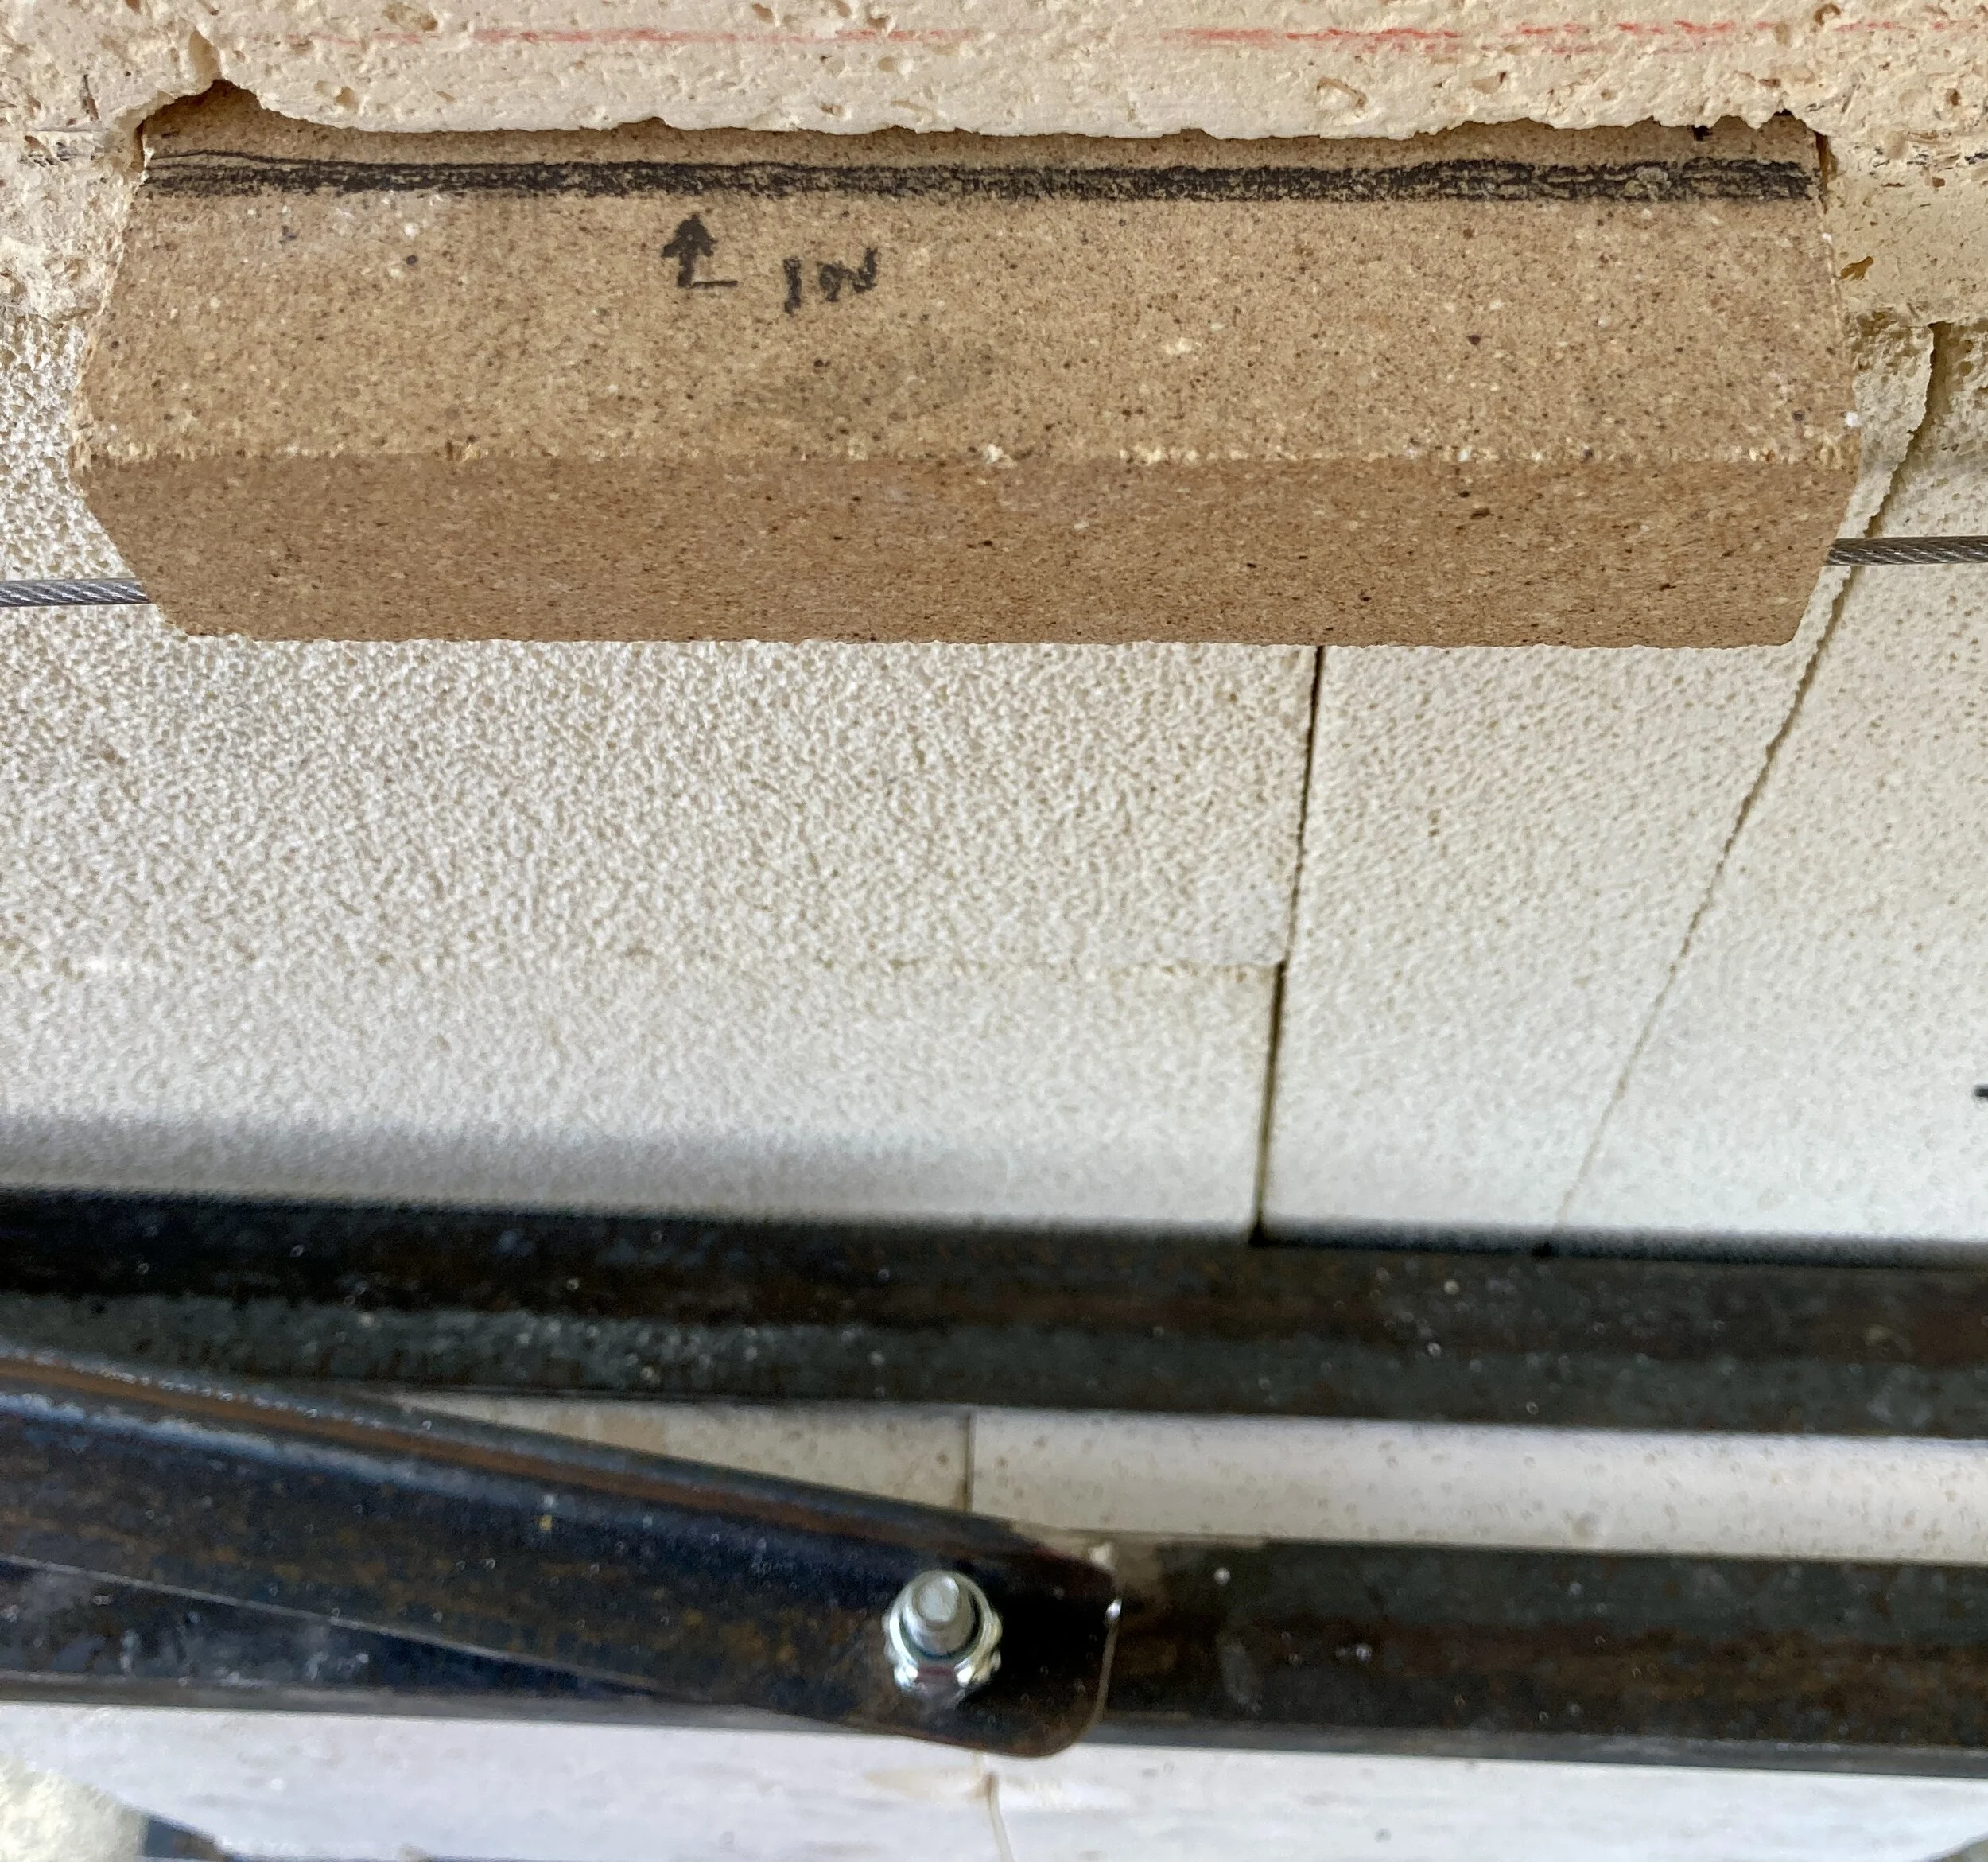
As belt-and-braces, I decided to also cut 4 “mouse-holes” in the side of the firebox to give me more options for controlling the airflow during firing. Each bung, and corresponding hole is tapered on one side (like a set-square with the thin point cut off). The idea here is that airflow can be increased or reduced by sliding the brick in or out:


The fire-bars are 18mm stainless steel, so they should take quite a few firings before they degrade too much. I just hope that they help to support the fuel sticks above the ember bed, improve the air-flow, and maximise heat. - That is my understanding of their function!
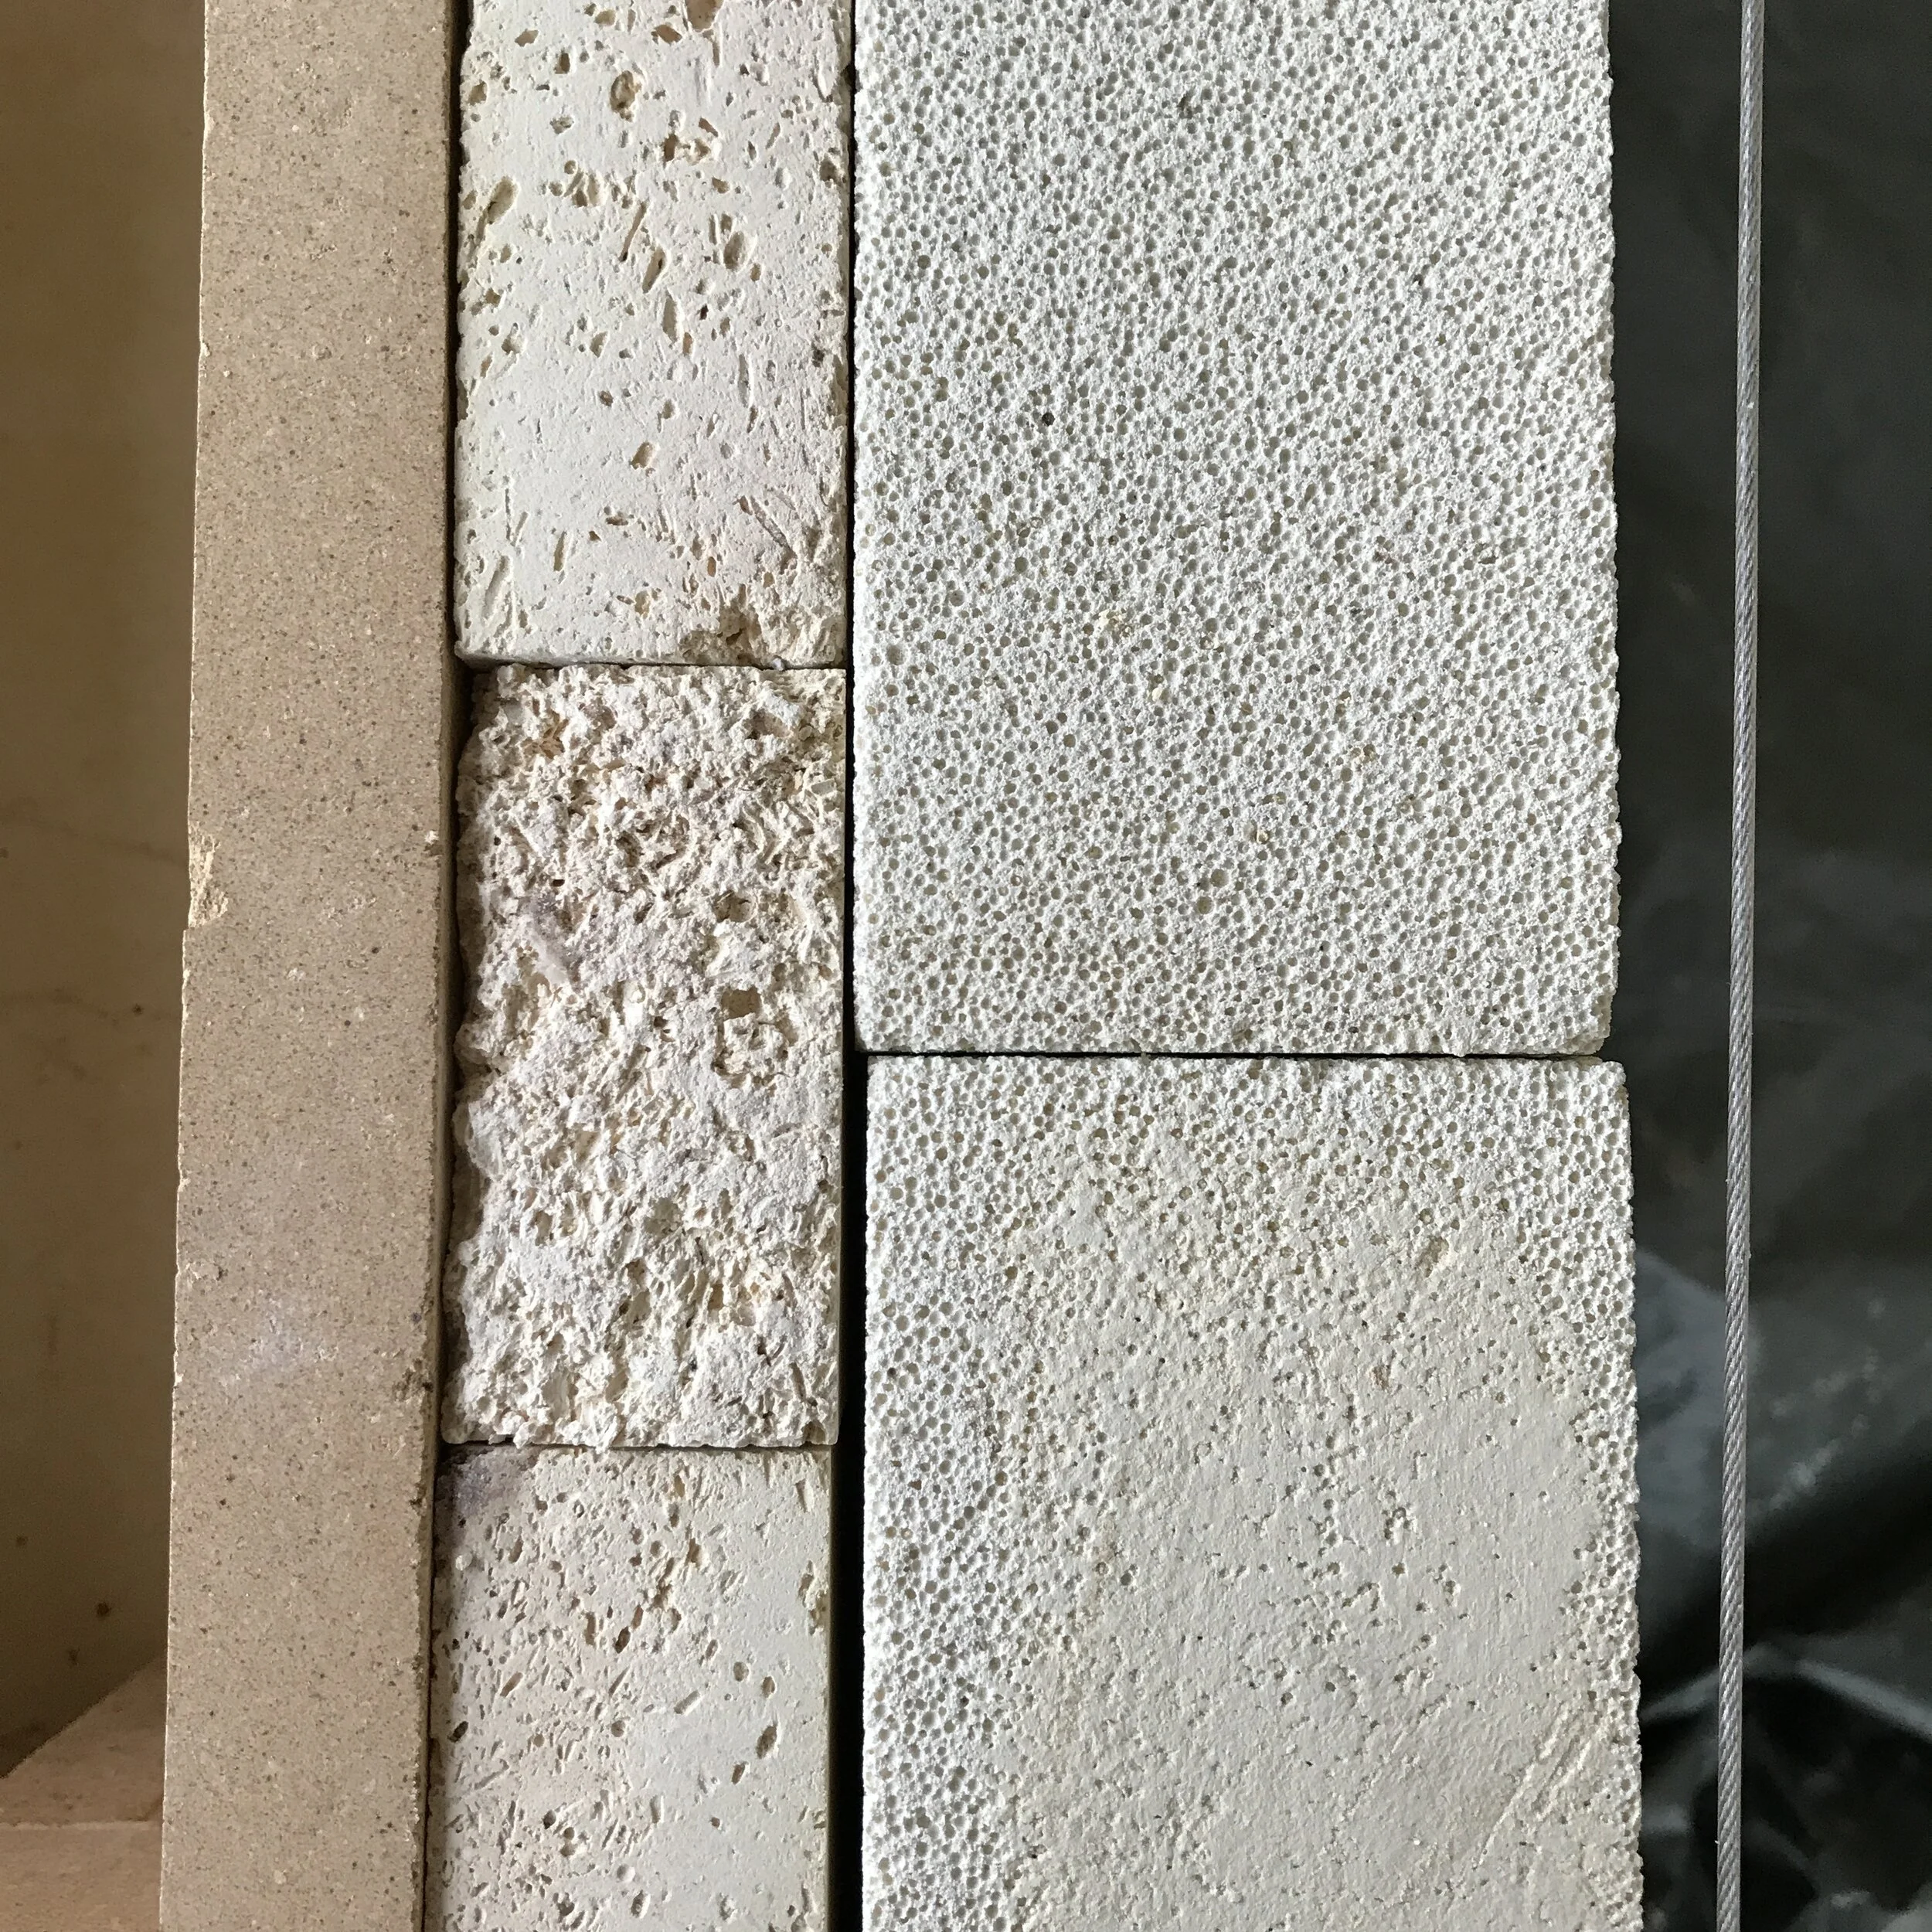
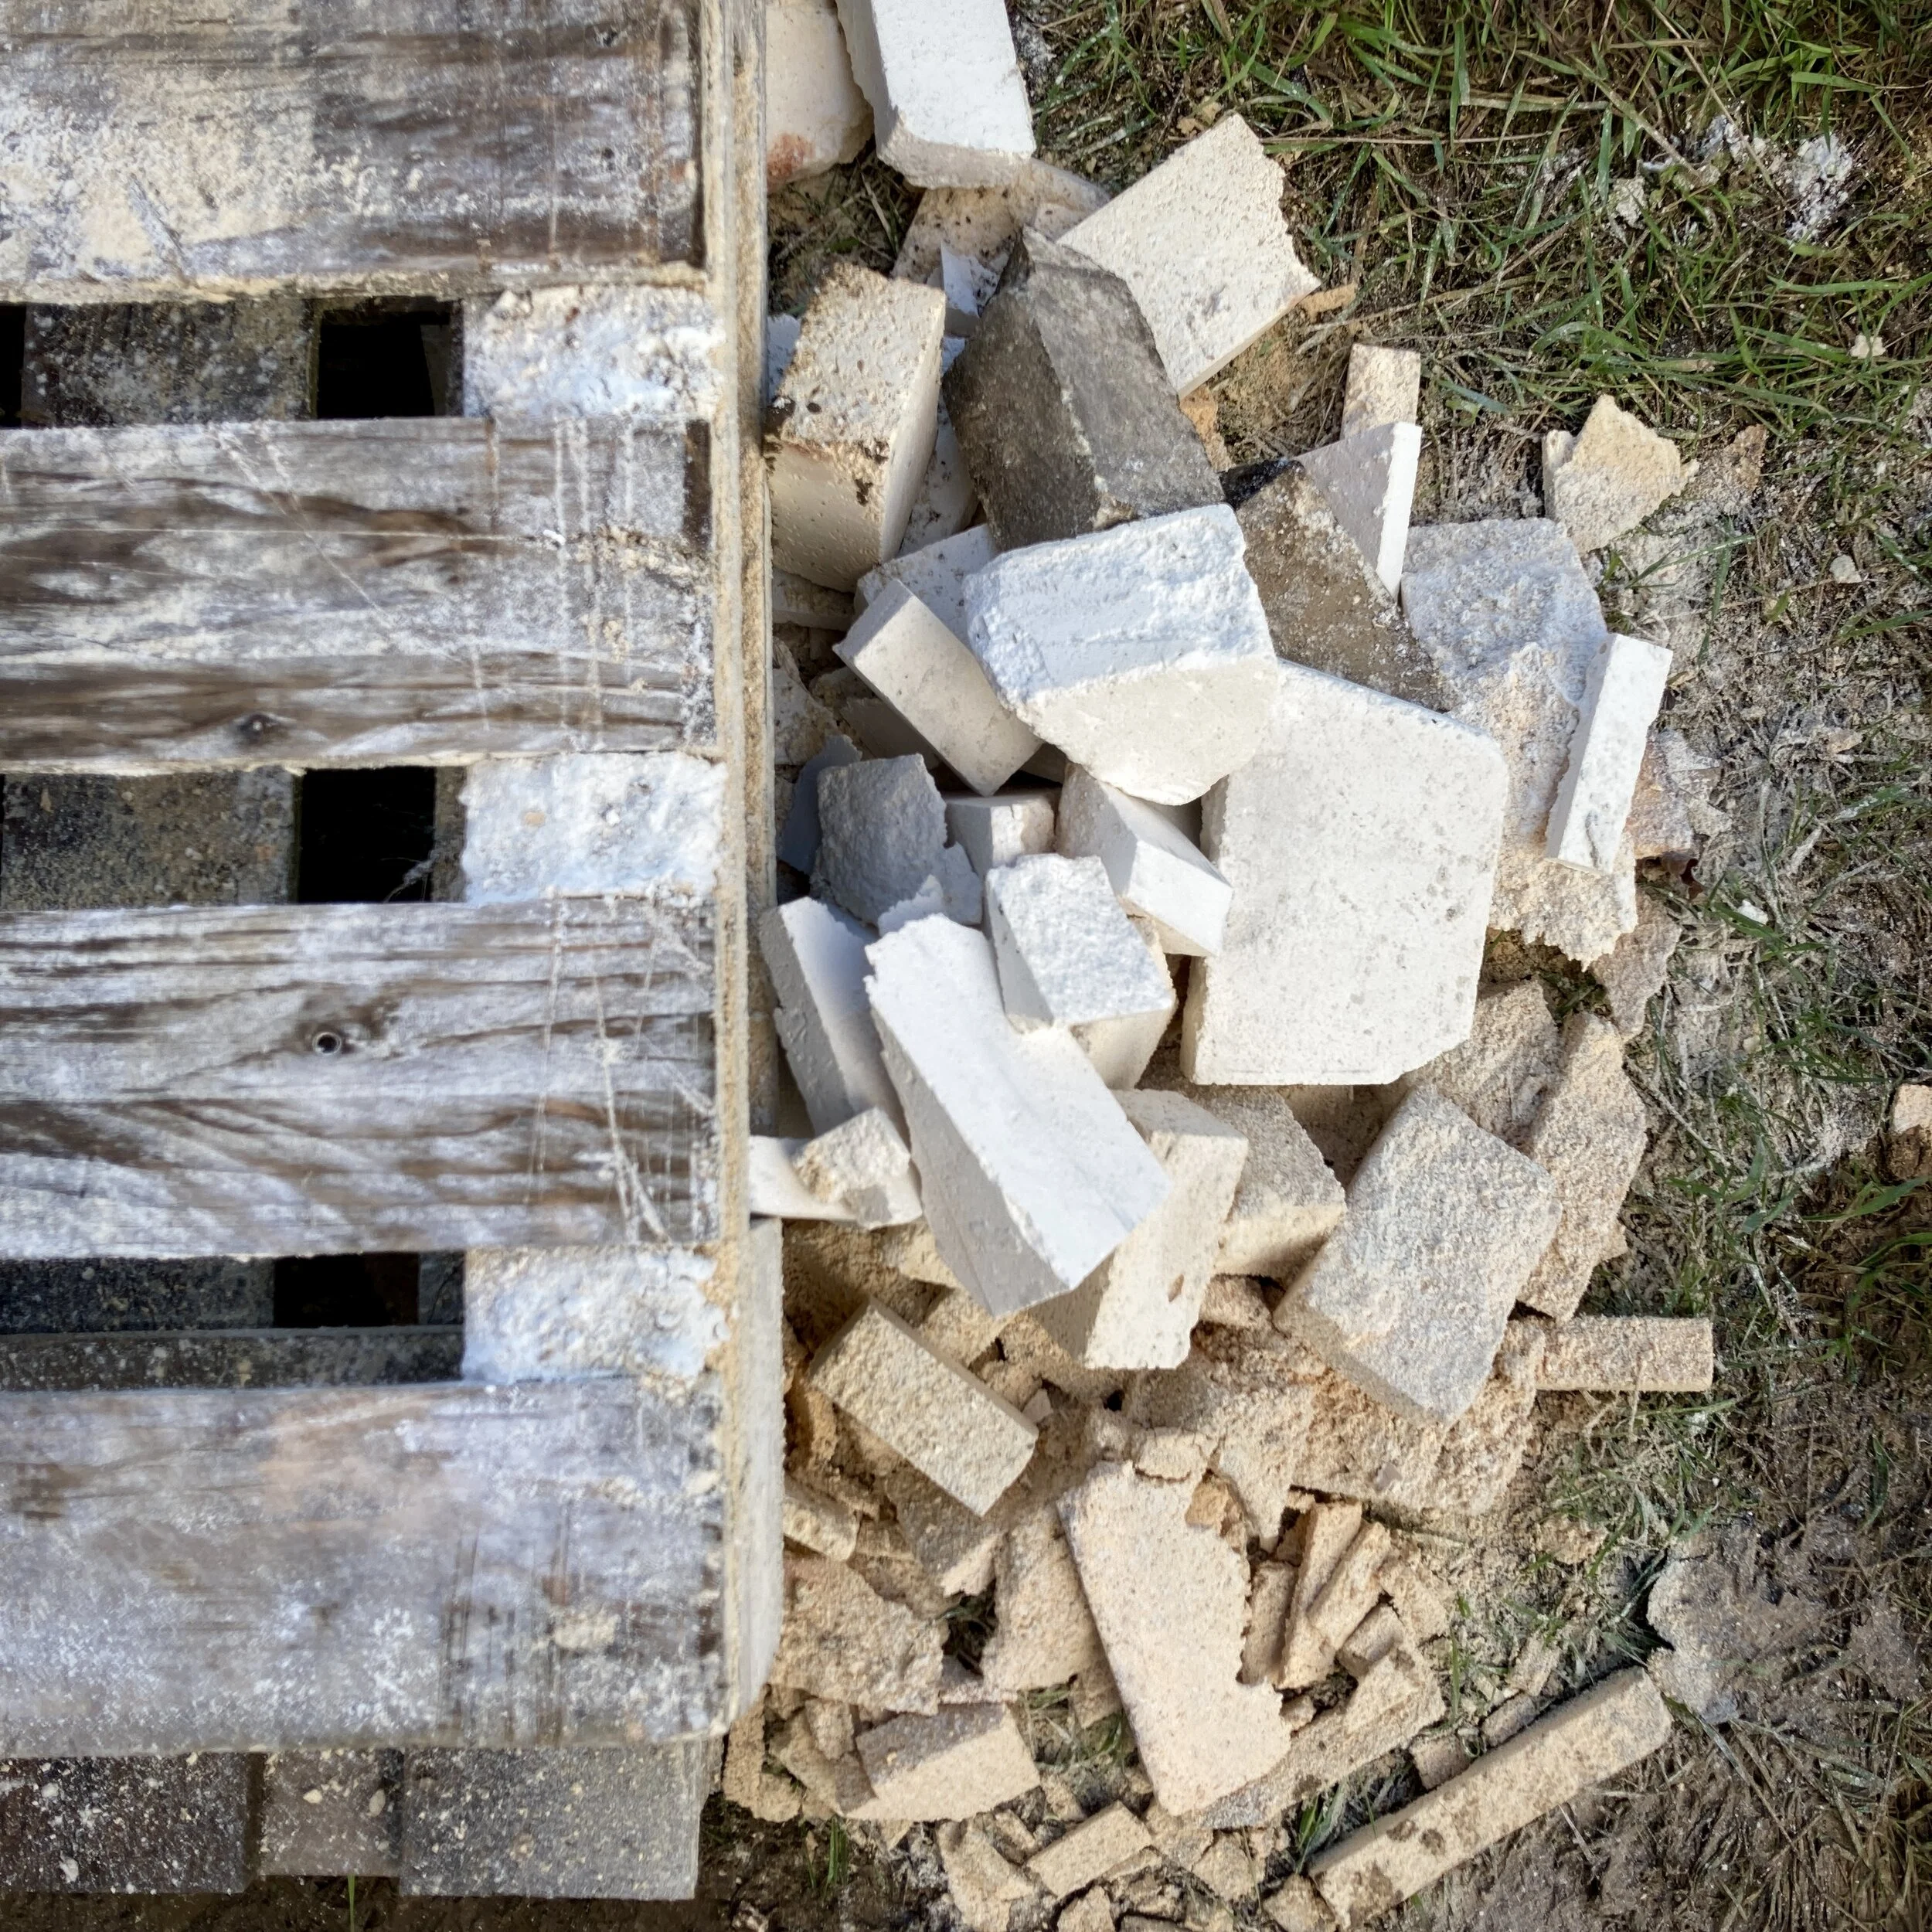
Back in the summer I had found a local chap who wanted shot of an old electric top-loading kiln. The opportunity to salvage and reclaim bricks and parts for this project seemed like too good an opportunity to miss. After a LOT of dust and mess, and a very blunt bandsaw blade, I had a stack of light-insulating fire-bricks. Of course I had to cut each brick square again, removing the element slots and the taper which, along with a lot of horrible old ceramic fibre, had made the old kiln circular. These bricks are now supplemented with a batch of around 50 new full size (229 x 114 x 76mm) light-weight bricks, and 40 new “split-bricks” again measuring 229x114mm but just 25mm thick. These “splits” are the proper hard bricks which salt kilns should be made of, and are resistant to the corrosive chemical environment which gradually eats away at the soft bricks. - I am using the thin, hard bricks to line the kiln, then placing a 38mm thick layer of the reclaimed bricks, before adding the new light-weight bricks as the external skin of the kiln, placed on-edge adding a further 76mm of insulation. So, in total, the kiln wall is 139mm thick (around 5 1/2 inches).
One of my fears, with such a small kiln, is that it is difficult to maintain a steady temperature, owing to the smaller mass of the kiln storing and radiating less heat. I worry that each time I open a stoke-hole the influx of cold air (and cold wood) will set me back more degrees than the small amount of fuel which I stoke can offer: The firebox is relatively small, after all.
139mm seems like a generous wall thickness though, and one advantage of building the kiln from three layers of brick is that I can pay attention to how the joints between each brick superimpose. Other small kilns often appear to be built from a single layer of hard-brick and, at top temperature, the heat lost between each brick joint can be seen as a yellow glow of heat. While spectacular in the photos, I am keen to avoid this so, where possible, each joint between the first layer of bricks is met with the solid face of the next layer, and so forth. It all feels like a 3D game of Tetris but, so far at least, it seems to be working.
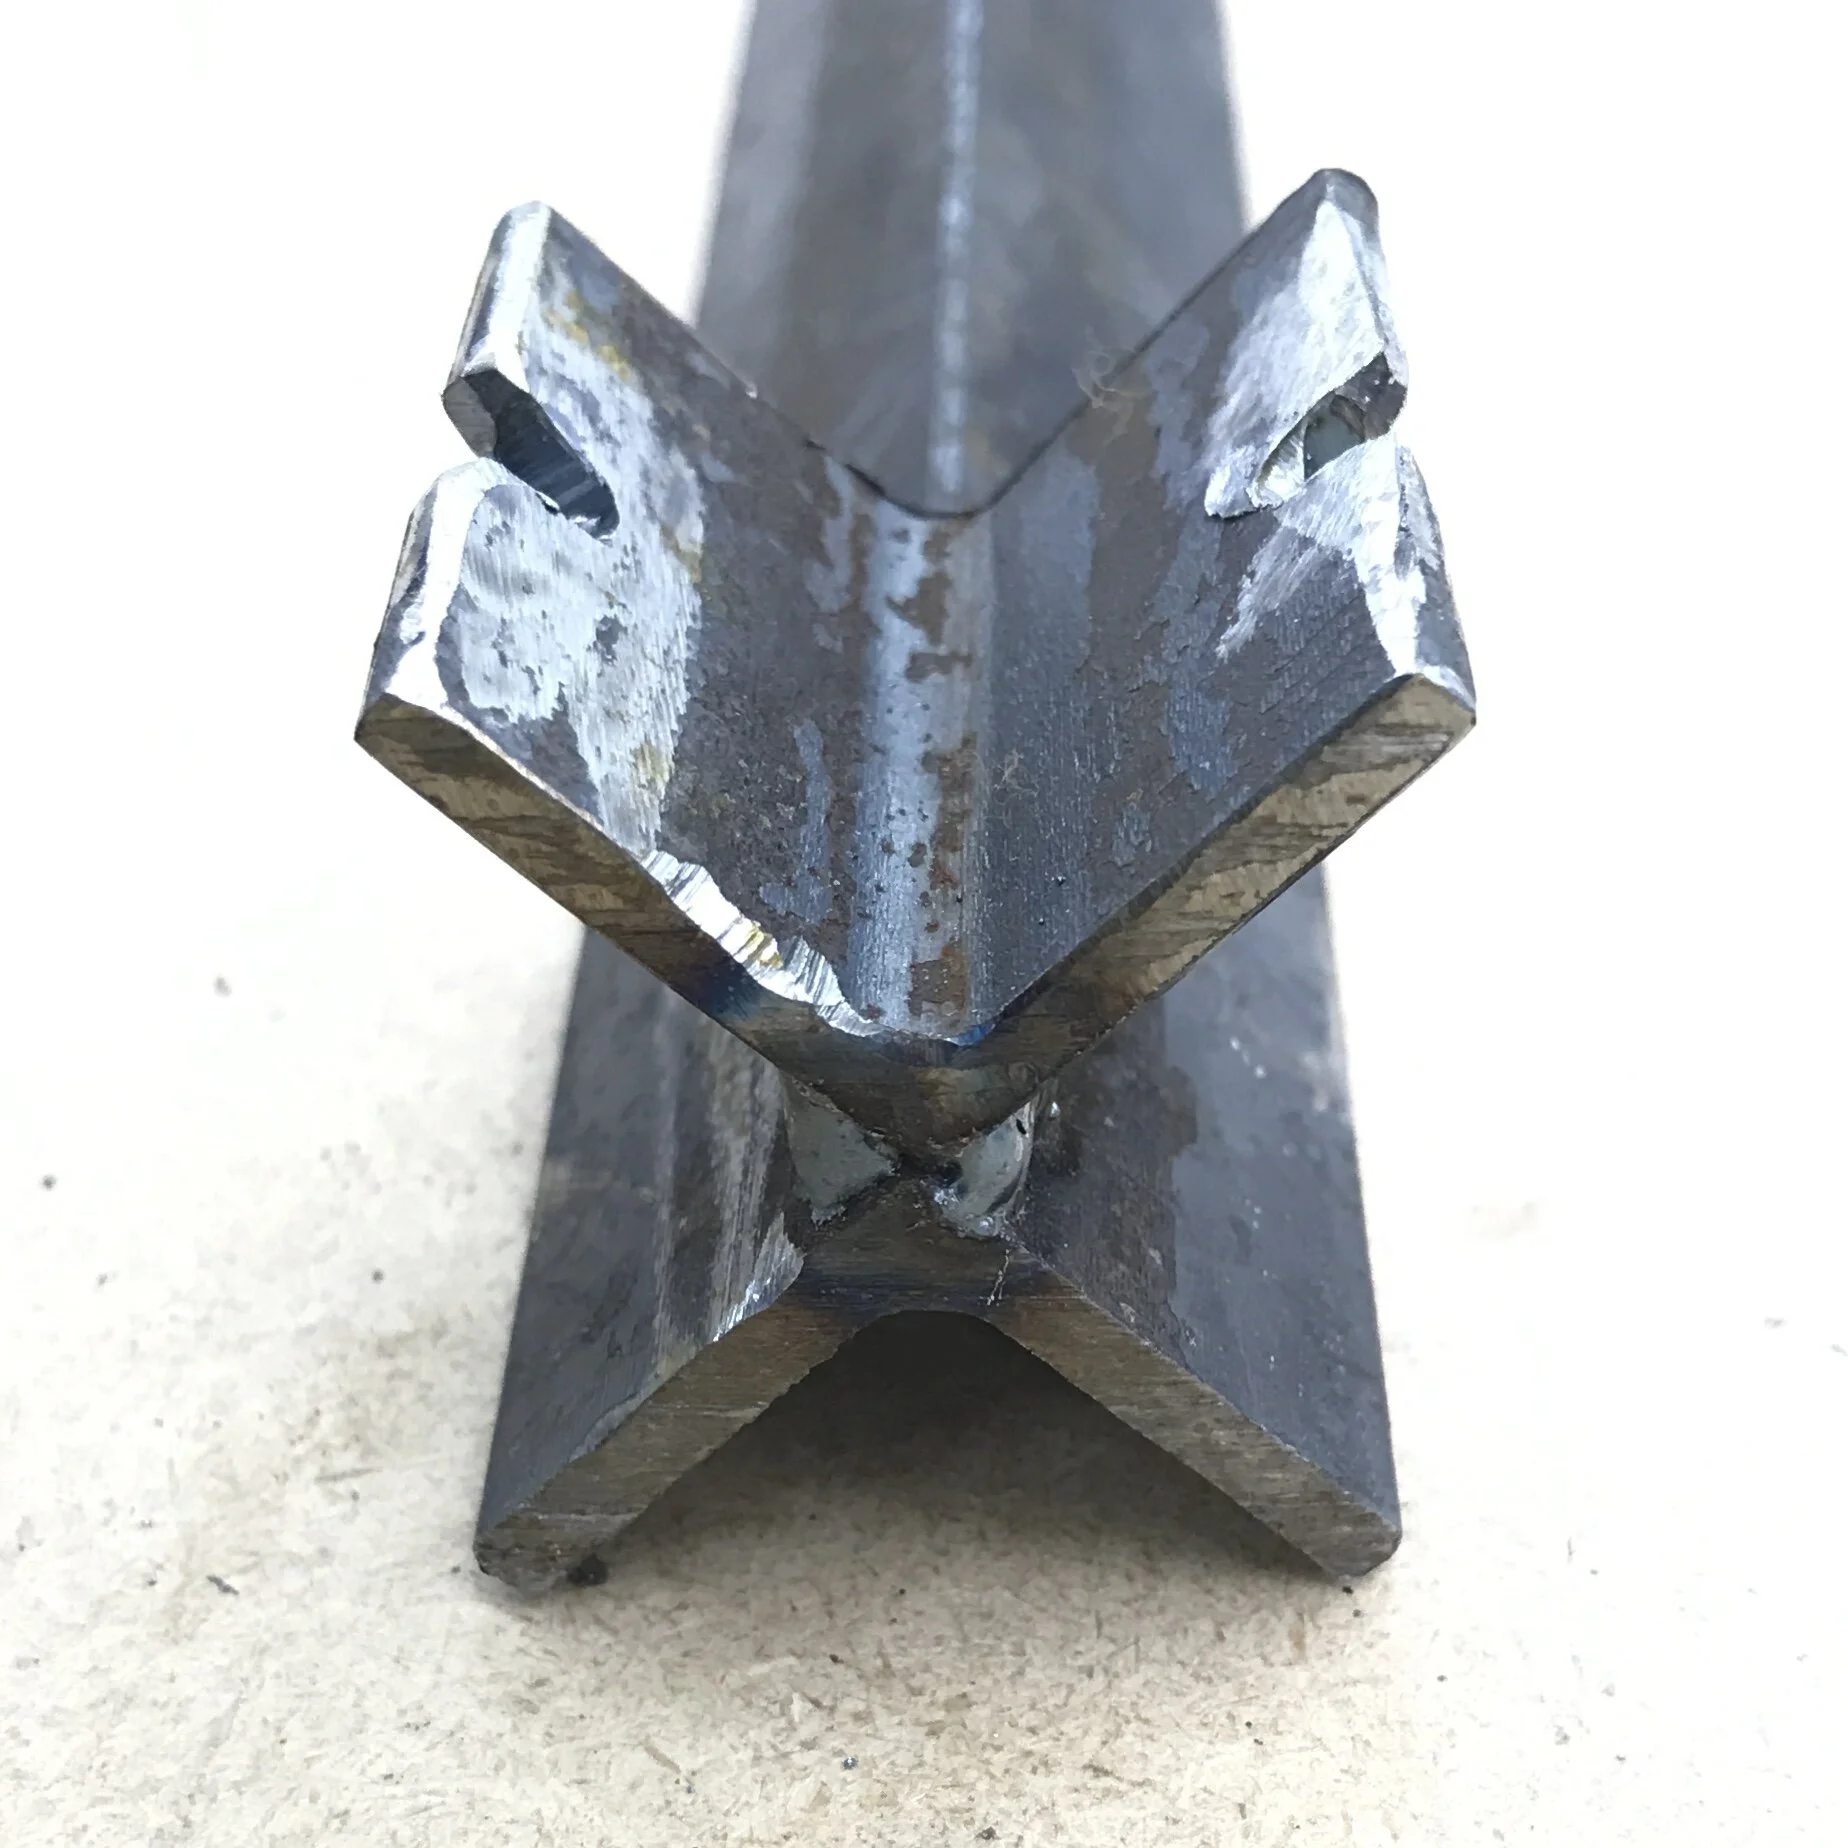
The entire stack of sandwiched bricks is held firm by angle-iron and tensioning wires. At this point I have used no mortar or ceramic glue to join the bricks, in the hope that it will allow for simpler modifications and repairs in the future. The tensioning wired are held away from the kiln skin with small inverted sections of angle welded to form an ‘X’ section.

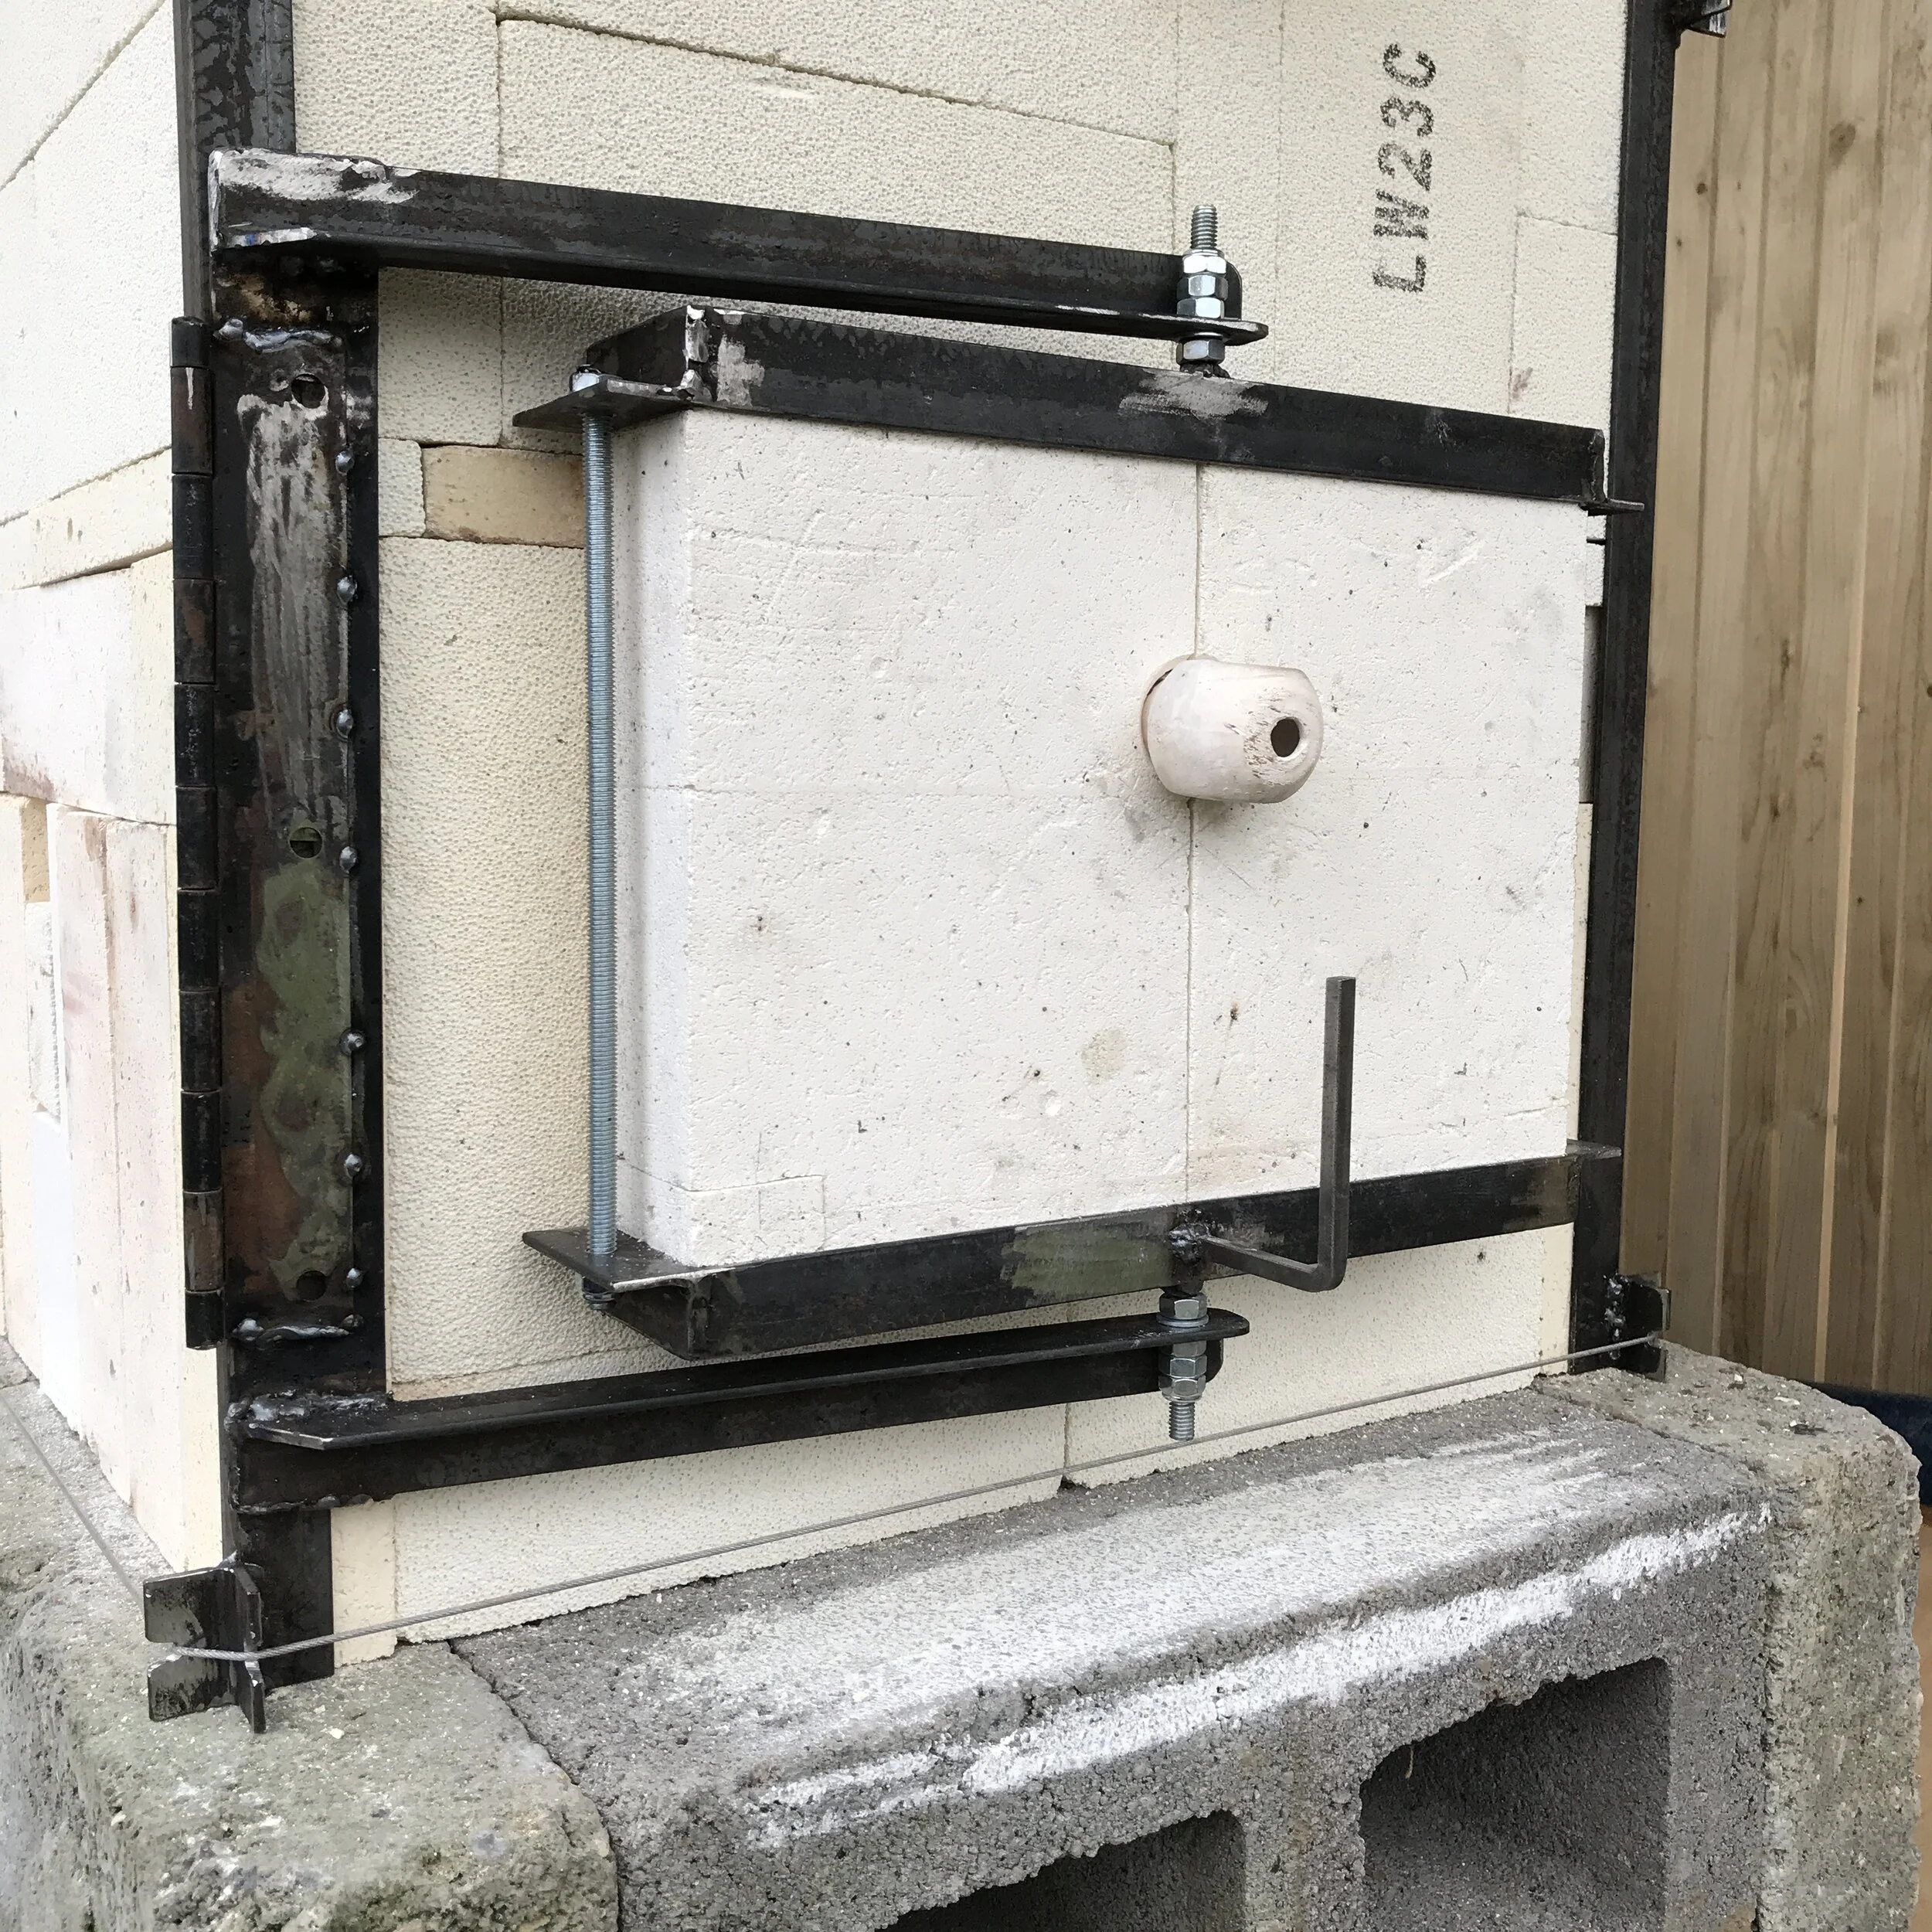
With no side stoke-holes, it seemed to me that I’d be using the door at the front of the firebox a lot and it therefore ought to be well built. With my welding ‘skills’ (a stretch, I know) now almost passable, and with the metal hinge from the reclaimed toploader, I designed a hinge-and-pivot affair allowing the hot face of the door to face away from me at all times. Cutting the bricks for the door was a nerve wracking process involving a lot of fiddly and careful work, and the assembly proved even more anxious making. The brick itself is brittle and fragile in the extreme, while the steel, well.. like steel: hard and unforgiving. But once they were married together and the nuts tightened down, it felt like a real hurdle had been vaulted.
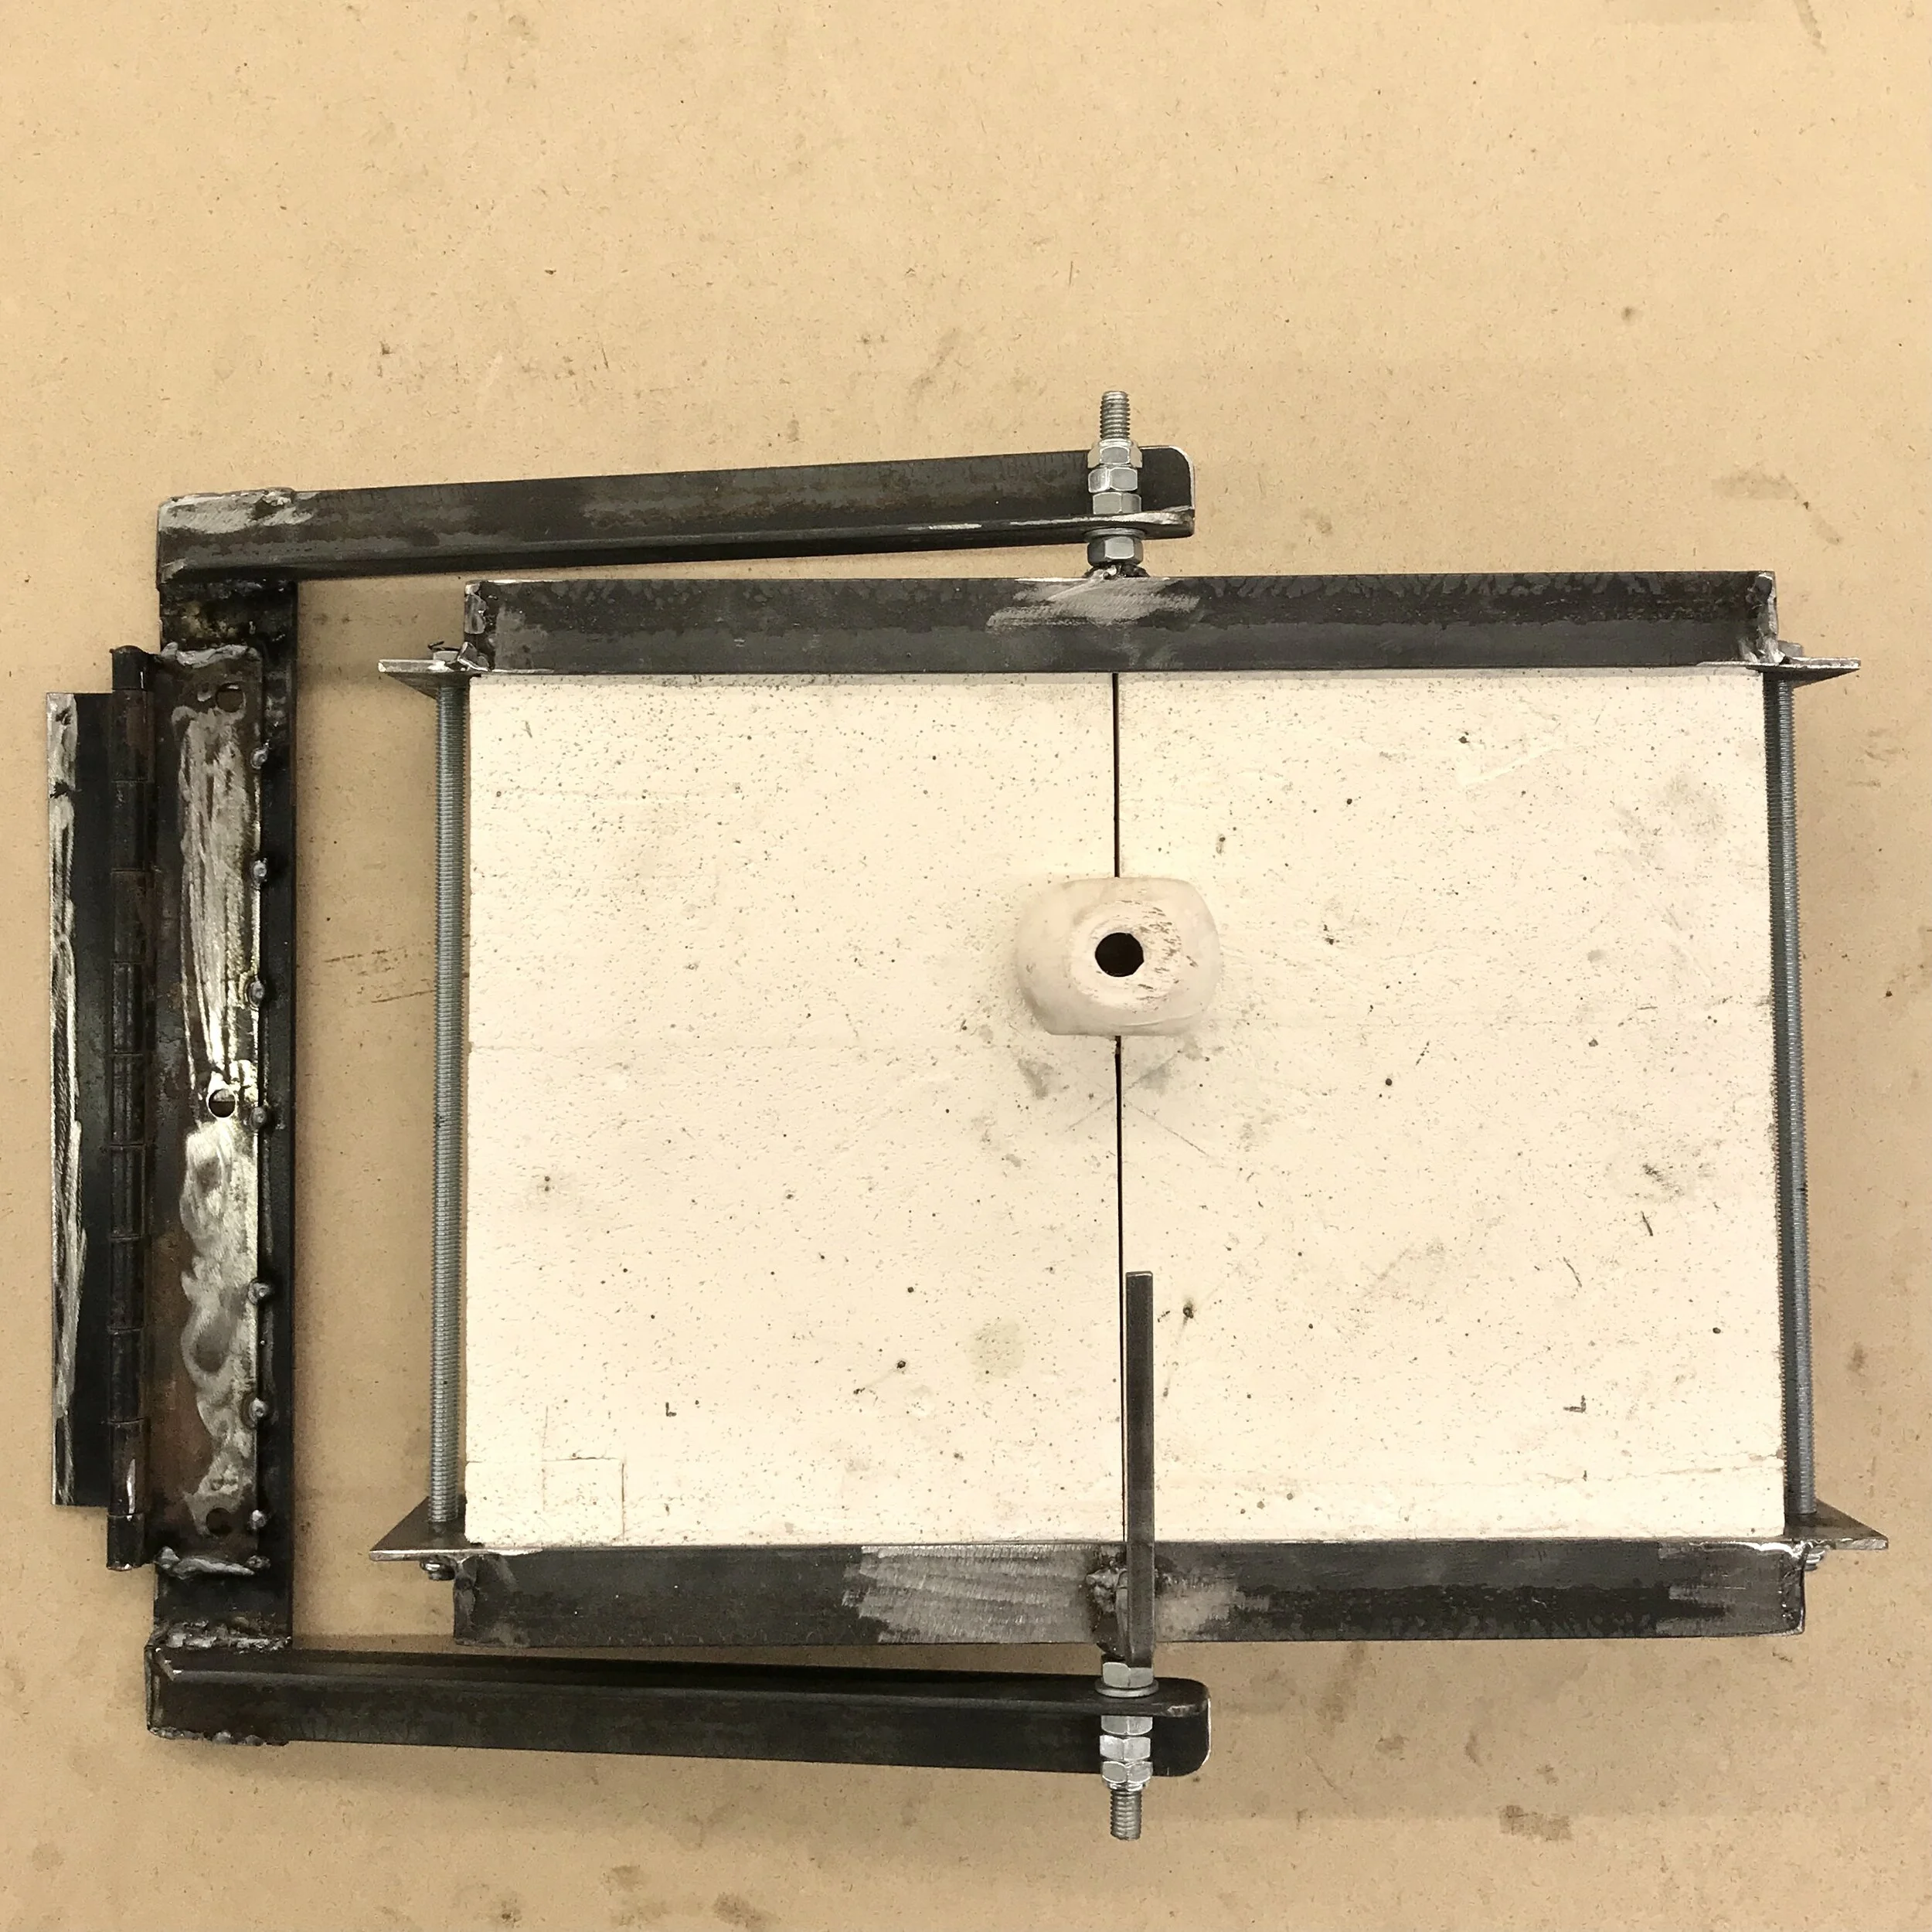
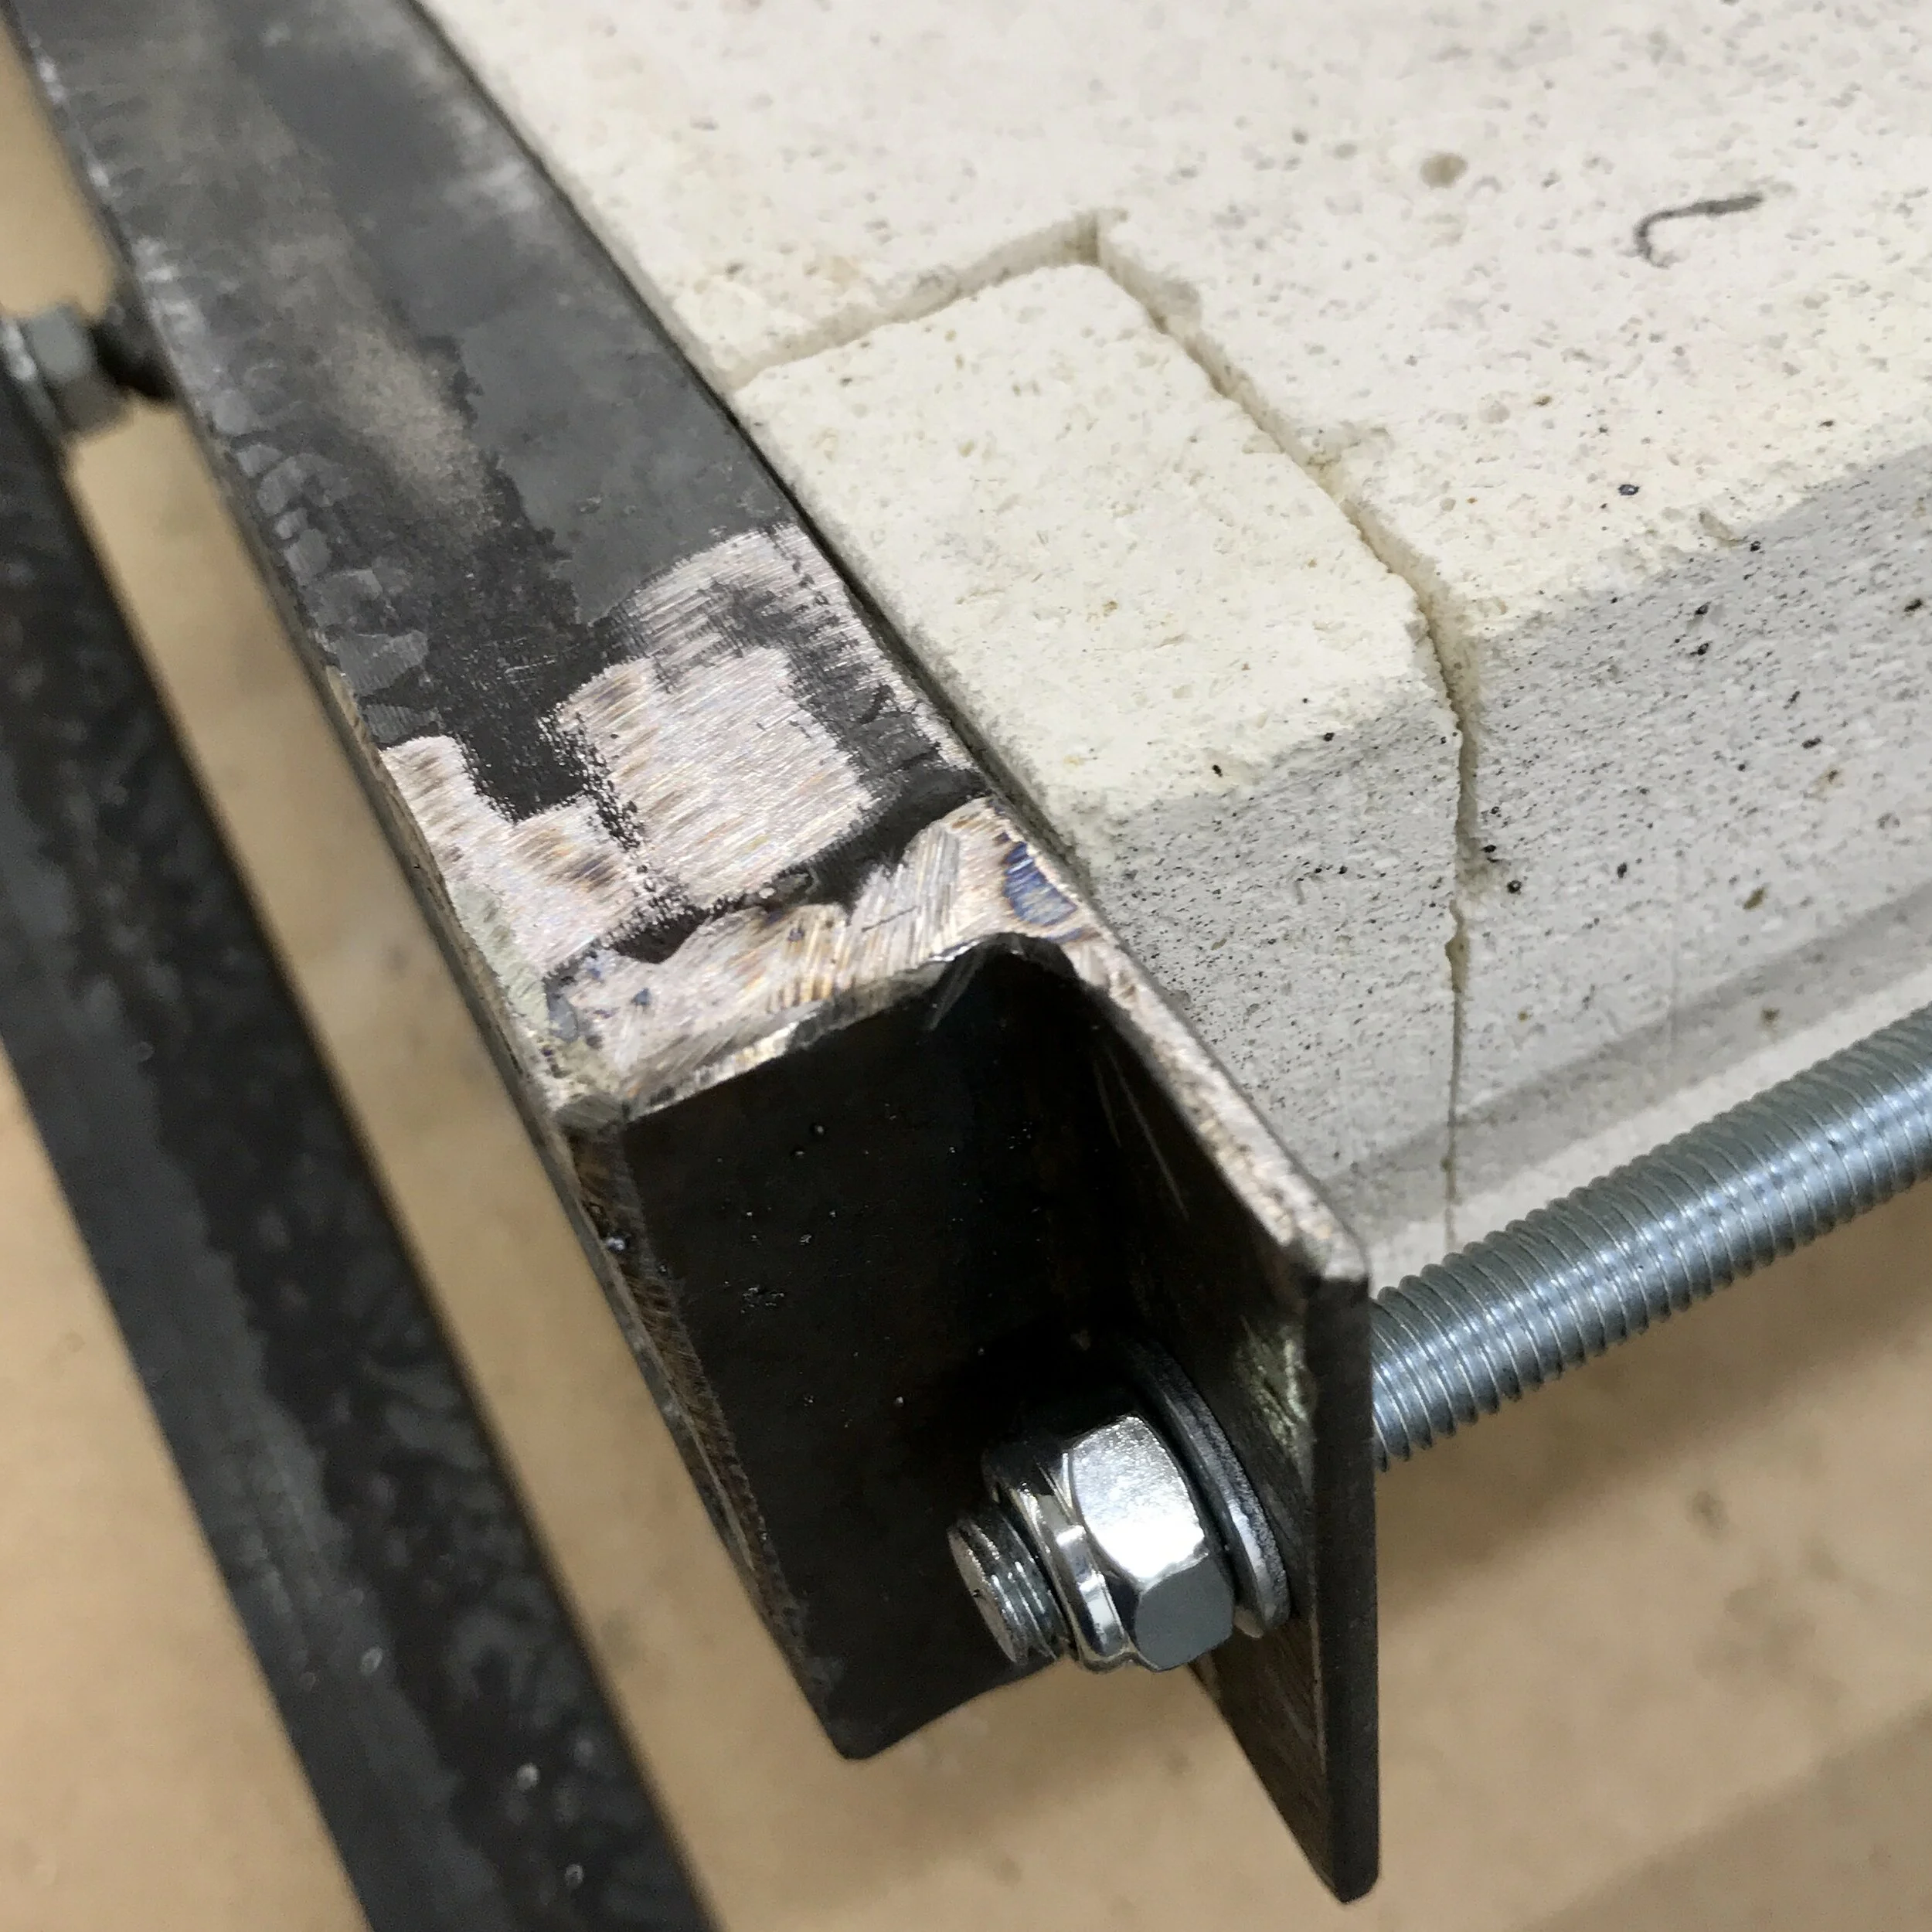

If you decide to make a door like this, remember to cut a small step in the hot-face of the door bricks, so that the angle-iron sits back, and allows the brick to stand proud of the frame, and mate directly onto the brick of the kiln.

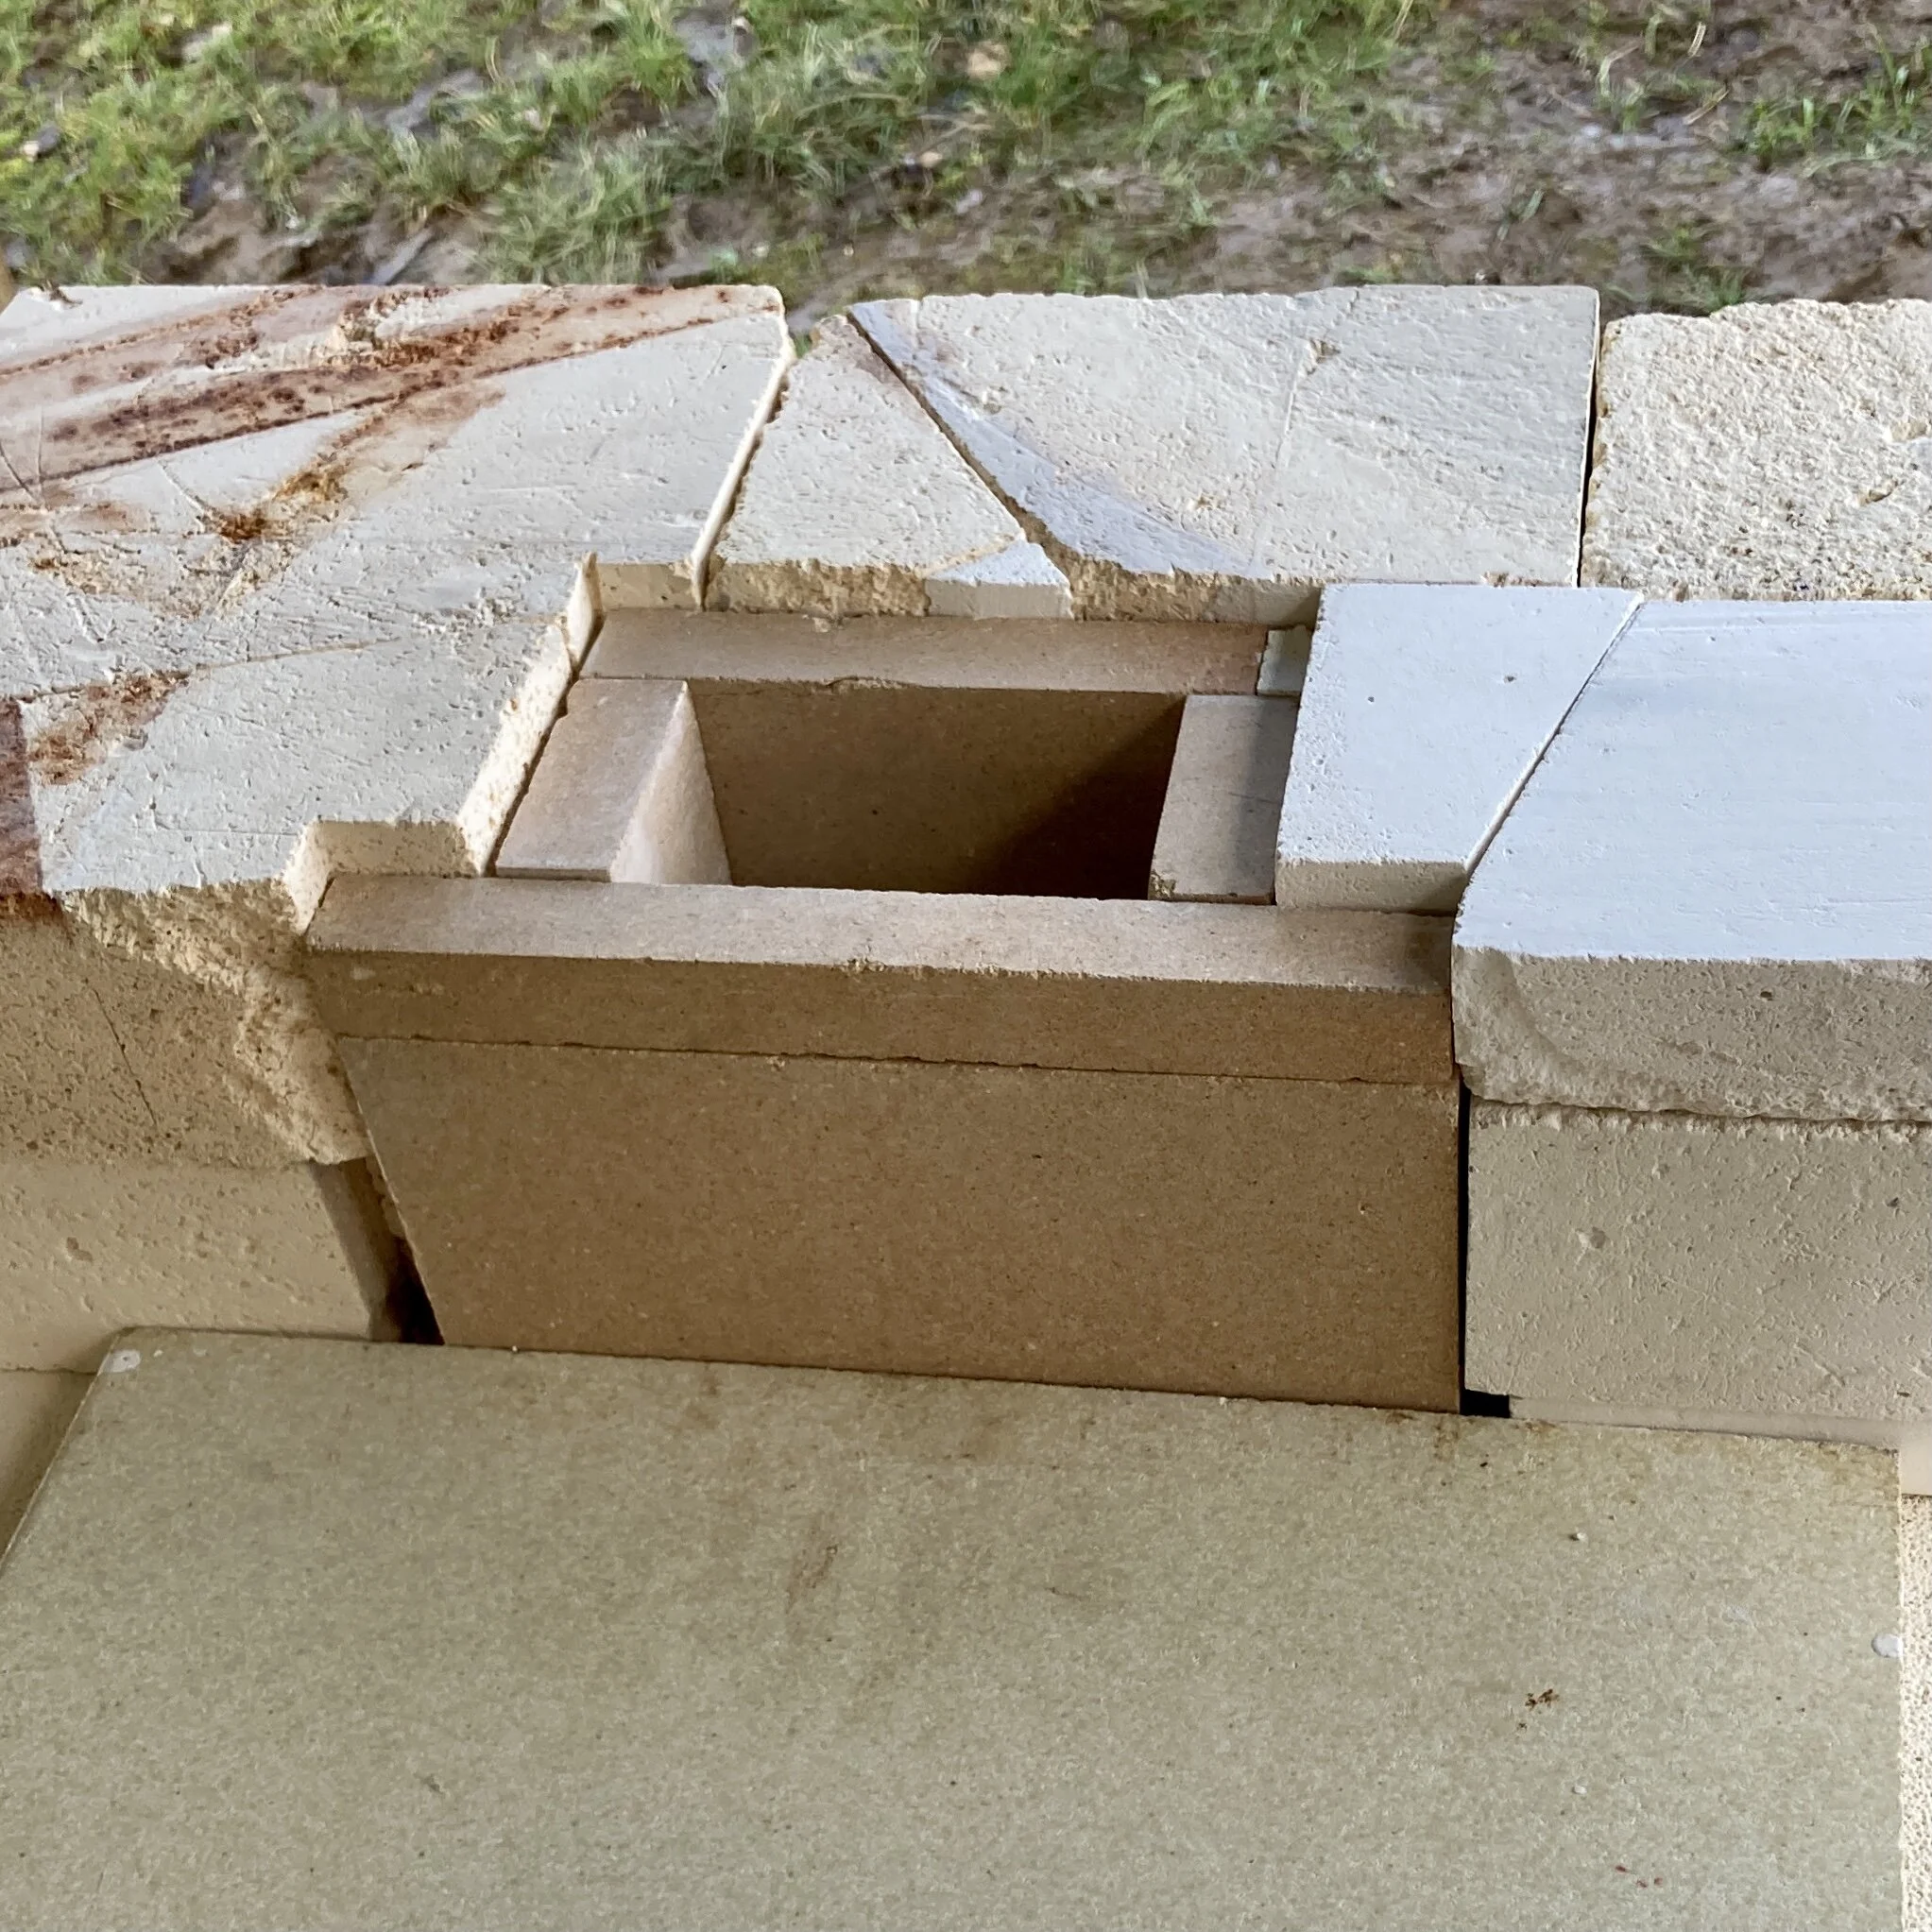
I’ve been cutting the soft bricks using an old panel saw, but the hard bricks need a diamond tipped tile cutting blade, and make a lot more noise. The exit flue involved quite a few of these cuts, and now I am working on the damper surround/support. It feels like the final push now as I build upwards towards the final layer of chimney bricks and figure out how to locate the stove-pipe which will form the last meter of the stack.

A ‘damper’ is essentially something which closes up the exit flue of the kiln. Often made from an old kiln shelf, it can be used to retain heat, increase reduction, and close the whole kiln down at the end of the firing. Mine will sit at the very base of the chimney stack, just above the door, on the front face of the kiln, and consists of a simple split-brick which can be slid in or out.
To be brutally honest, working with reclaimed brick is a real fiddle (for ‘fiddle’ read frustratingly slow, annoyingly dusty, and somehow unsatisfactory…) The jigsaw puzzle gets more complicated as I run out of bricks, and I am conscious of all the joints being what will thermally compromise the kiln. Still, the pile of scraps is growing and, thankfully, so is the chimney stack. The core flue of hard-bricks is now skinned with insulating bricks and with one more ‘lift’ I should be able to cut the sleeve which will locate the stove pipe.

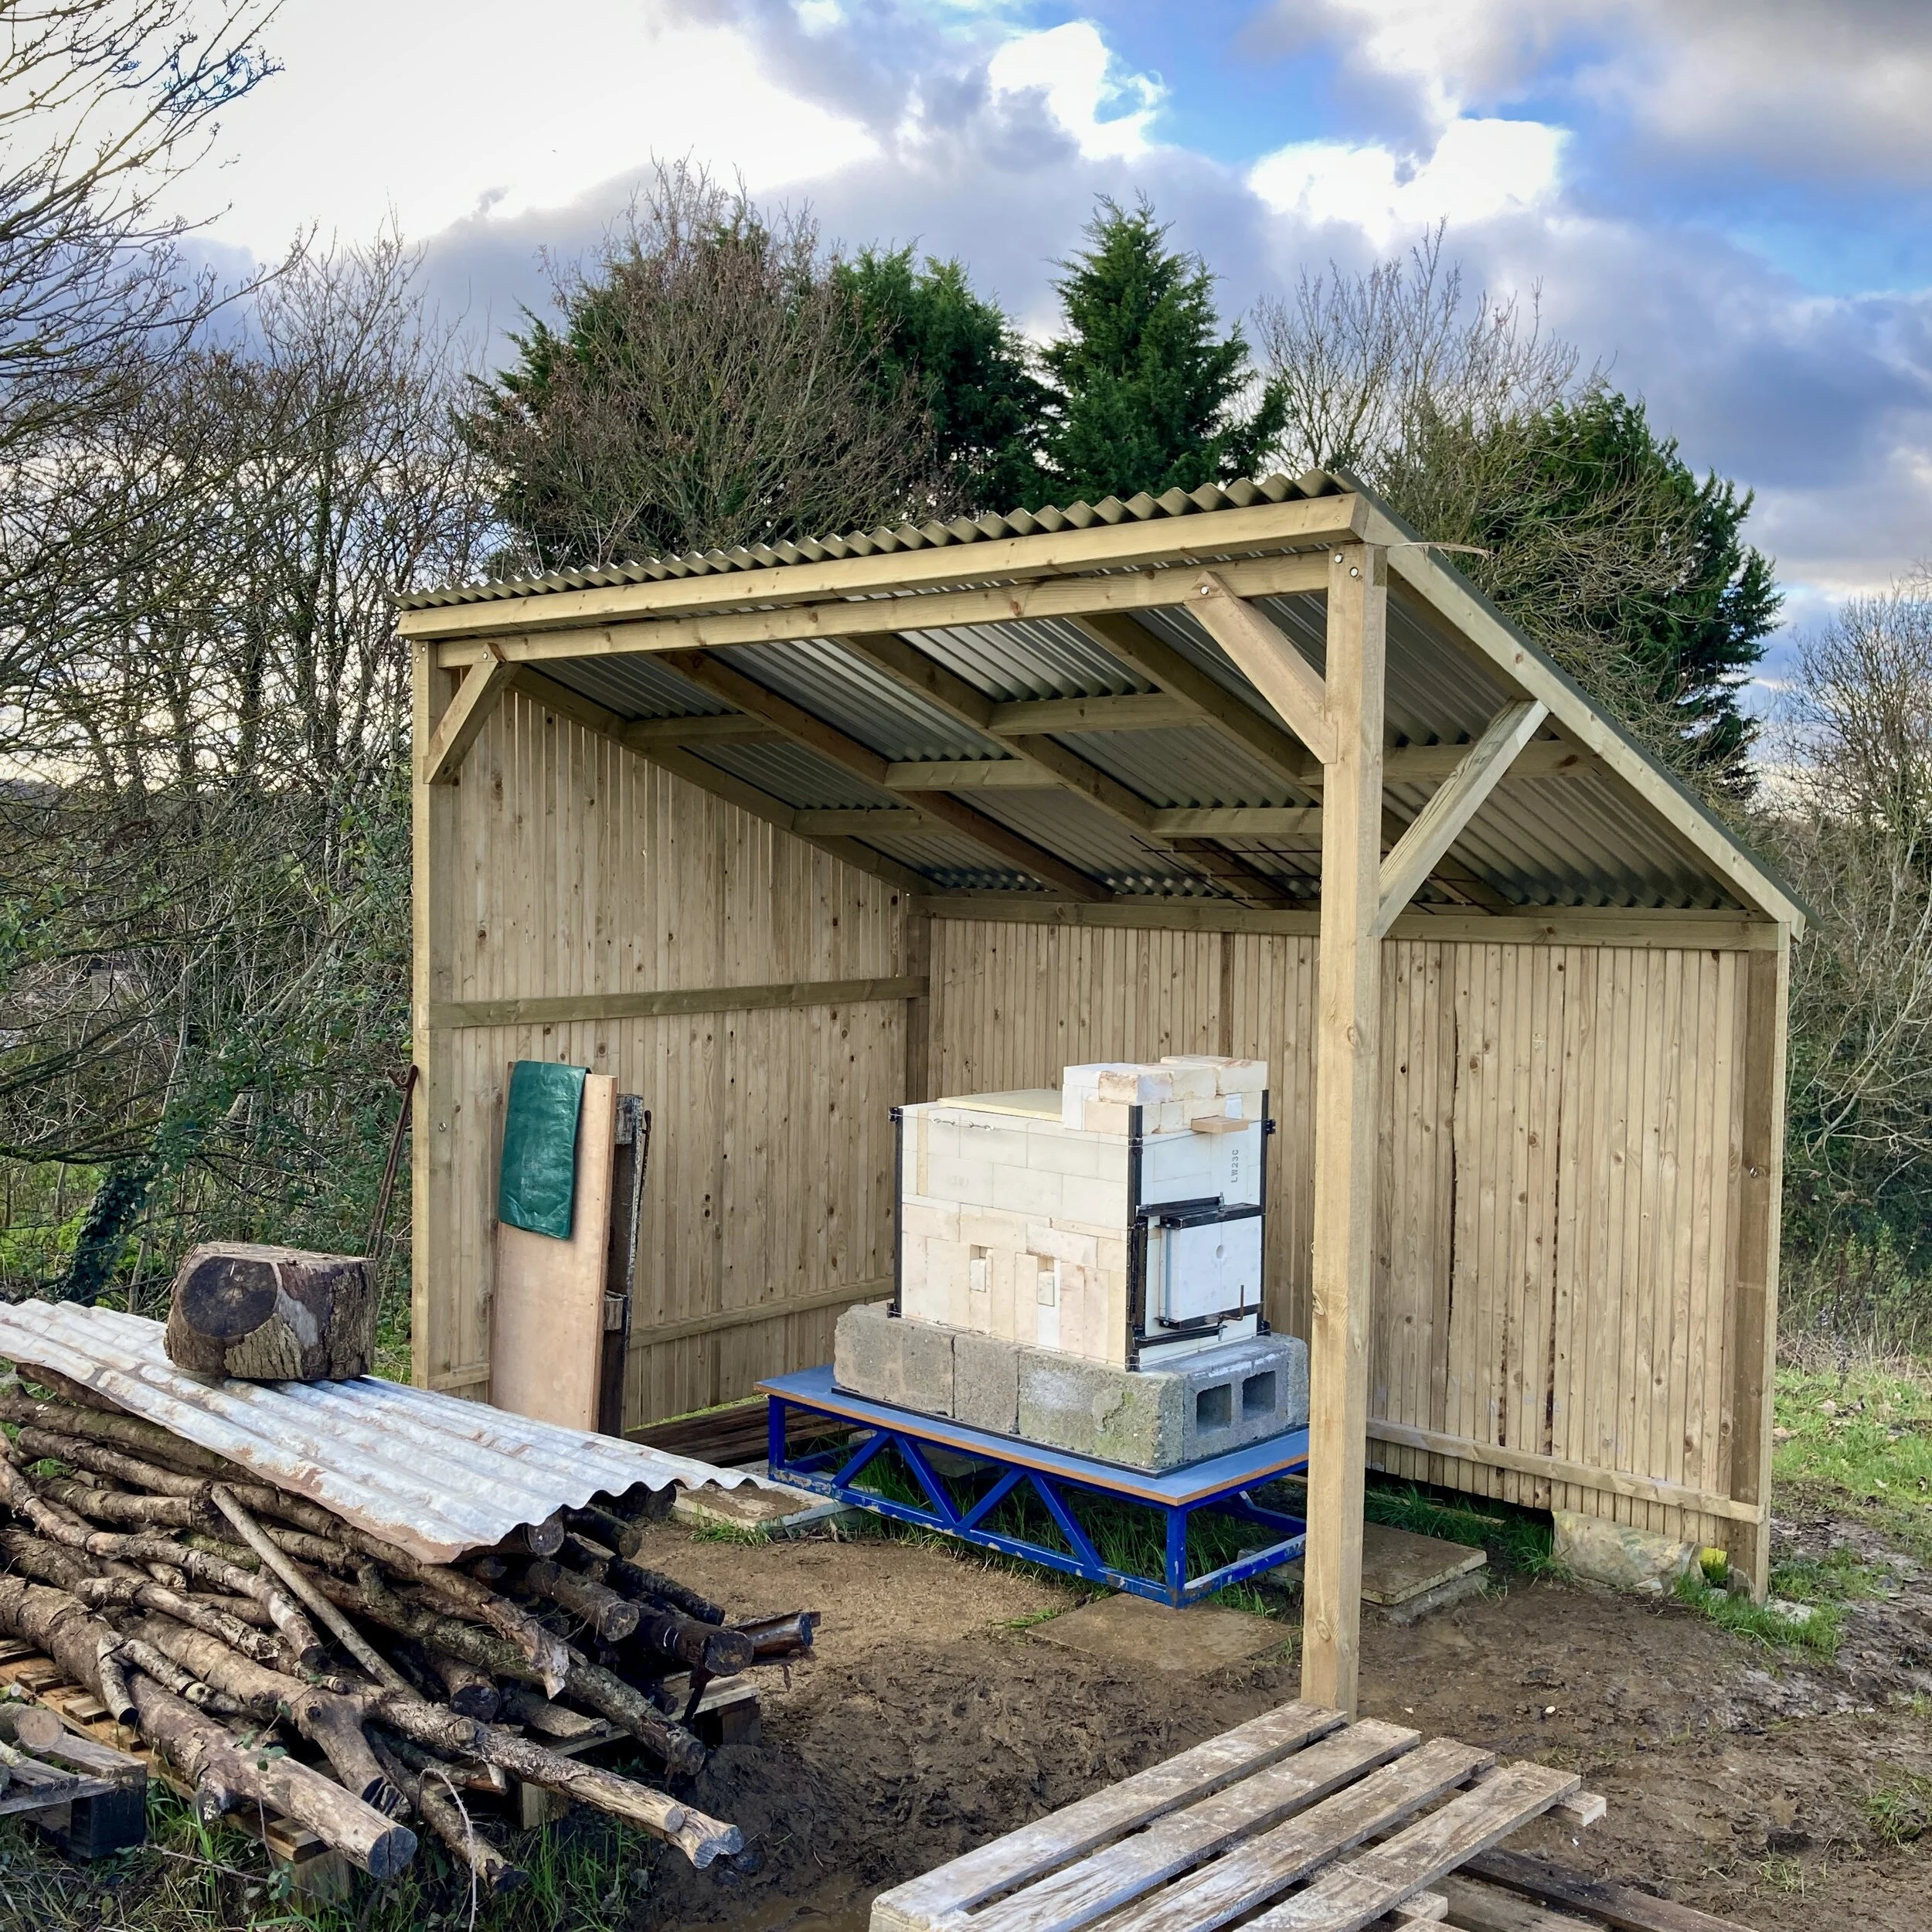
As the kiln begins to look a bit more like a kiln, and with New Year in sight, I start to look at the bigger picture of actually firing. The firebox can take 50cm sticks, and we recently felled three sycamore trees, so I stripped all of the branches 20-40mm in diameter with a billhook, ready for cutting down and drying. A couple of wooden pallets laid at the back of the kiln shed should provide some air flow under what will, with luck, become a healthy little wood stack.
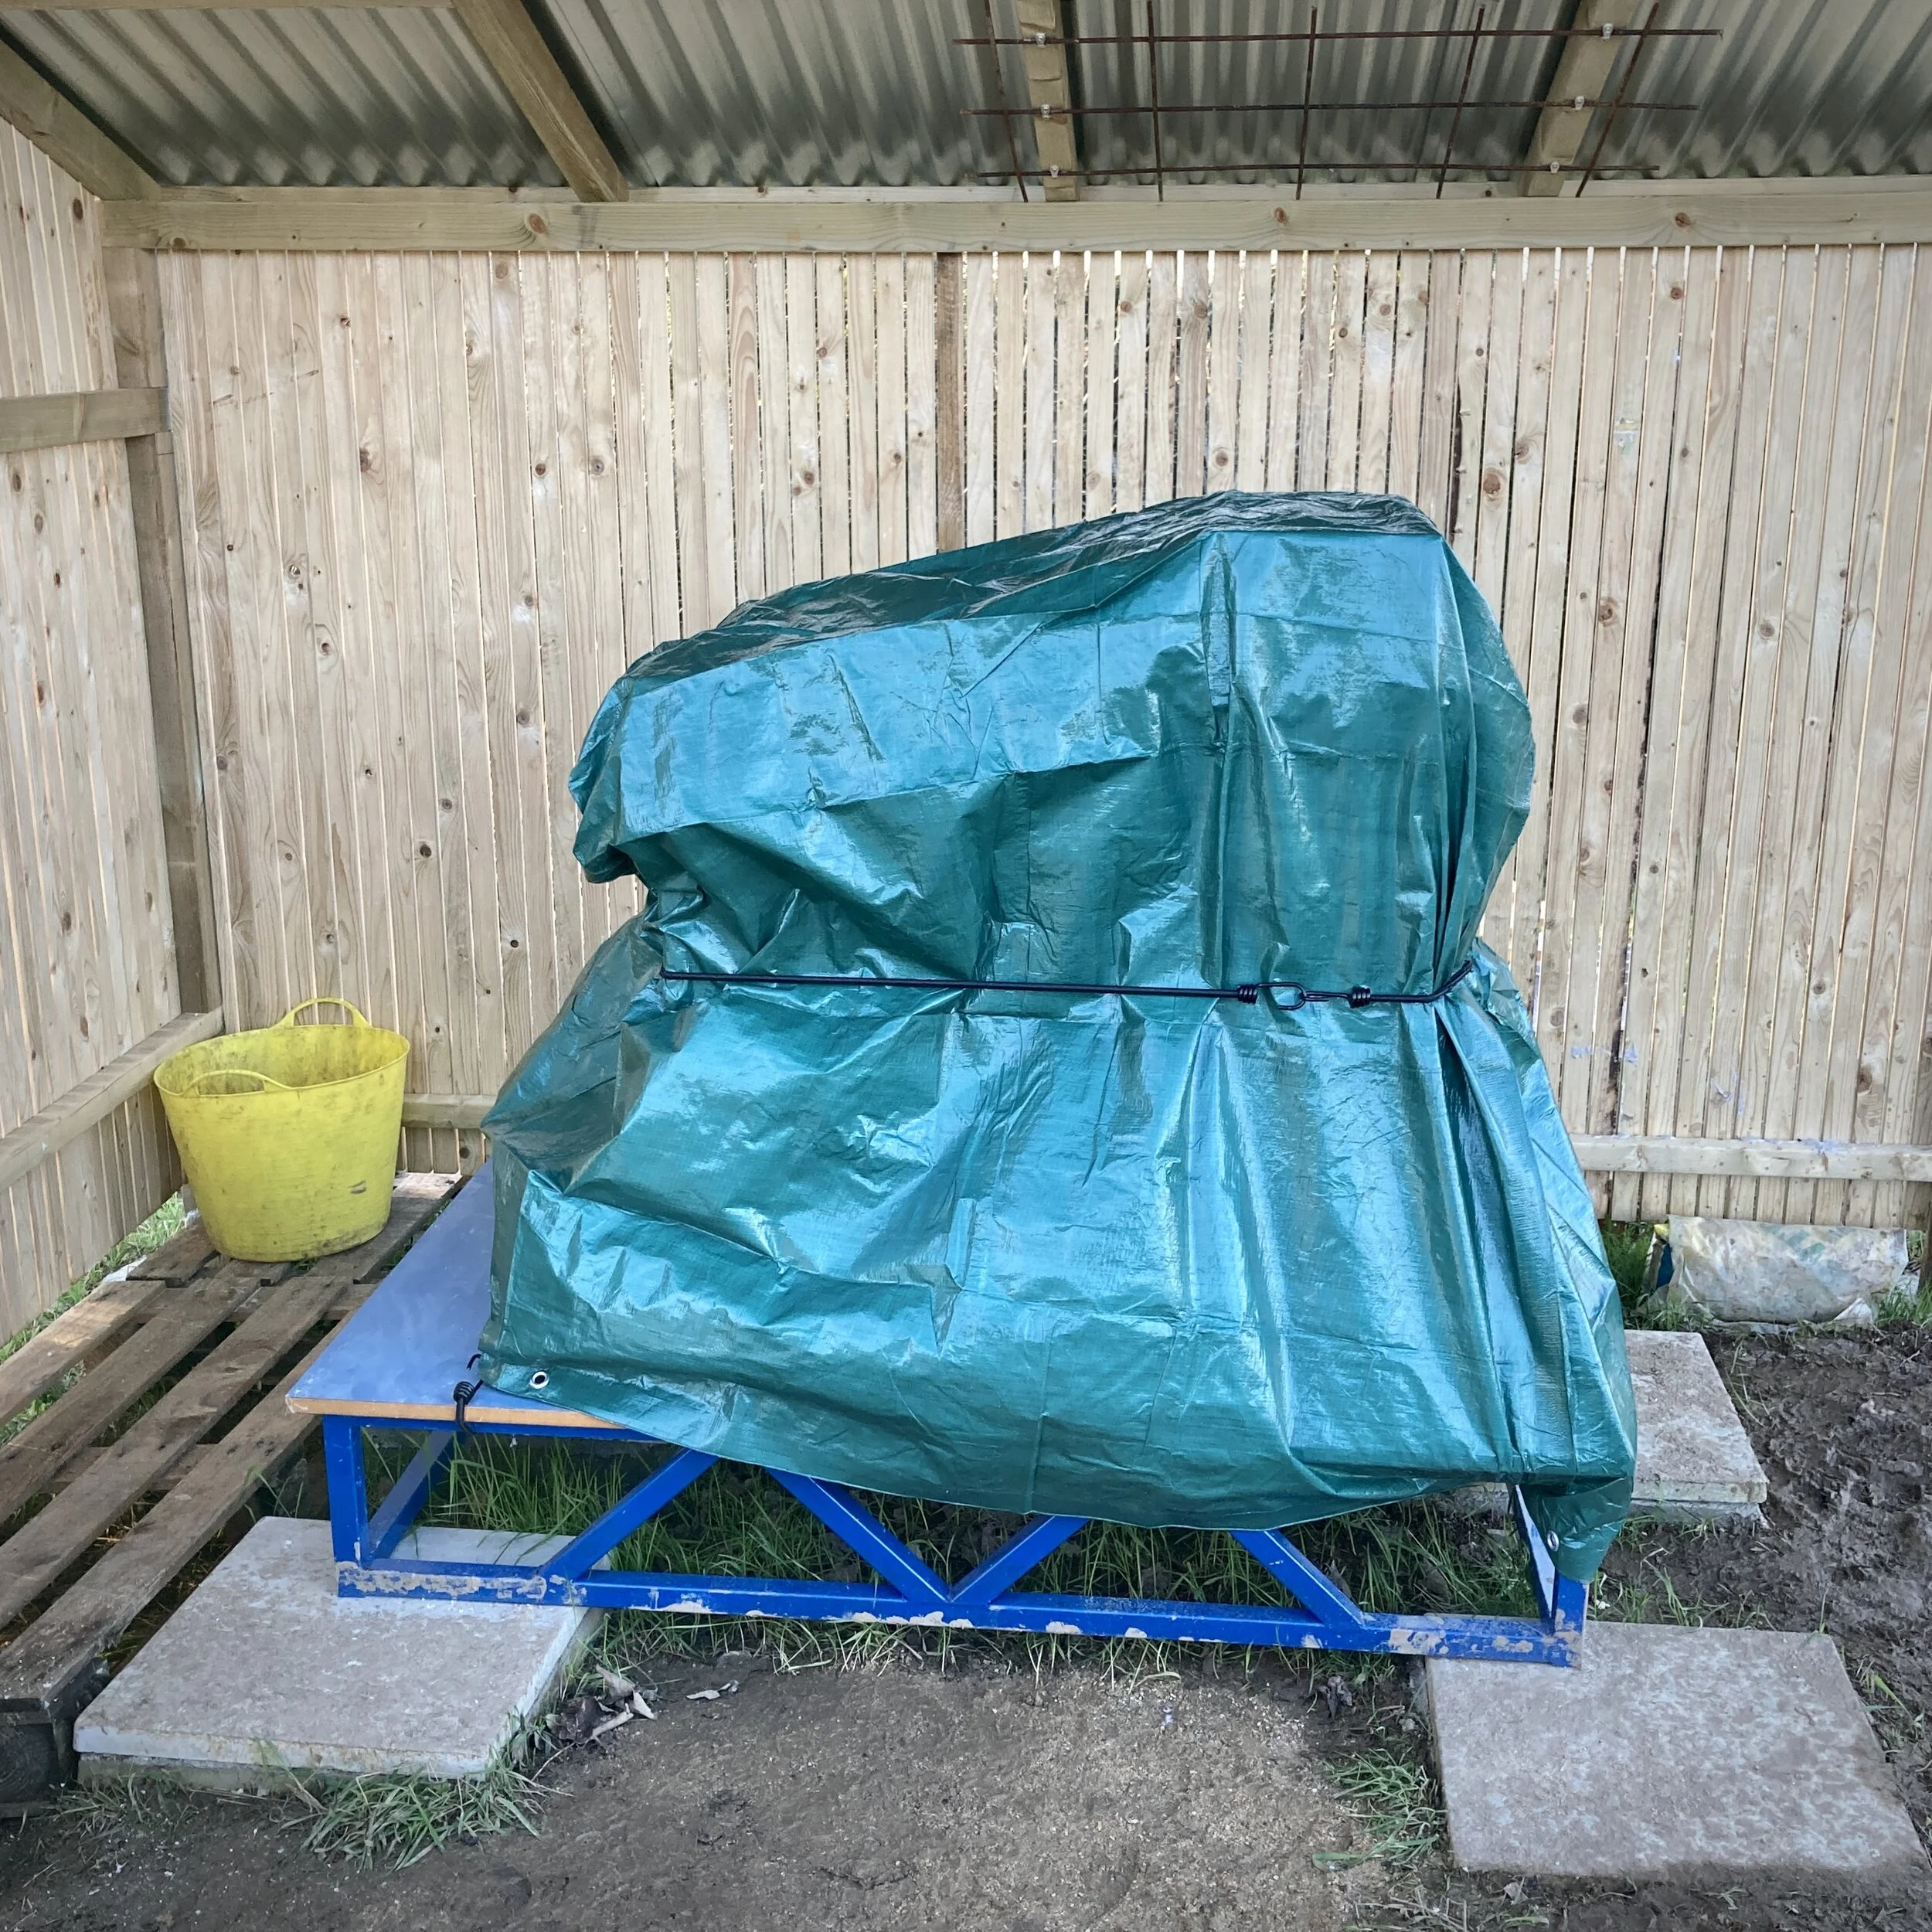
Having suspected I would need to sew my own 3D tarpaulin rain cover, I ran a quick web search and eventually found that they already exist in various guises. There appear to be several which are sold as rain covers for outdoor furniture and BBQs, and these less expensive affairs used to cover shipping pallets, in numerous standard sizes. With the help of a few shock-cords, I now feel a bit happier that she’s fully weatherproof.
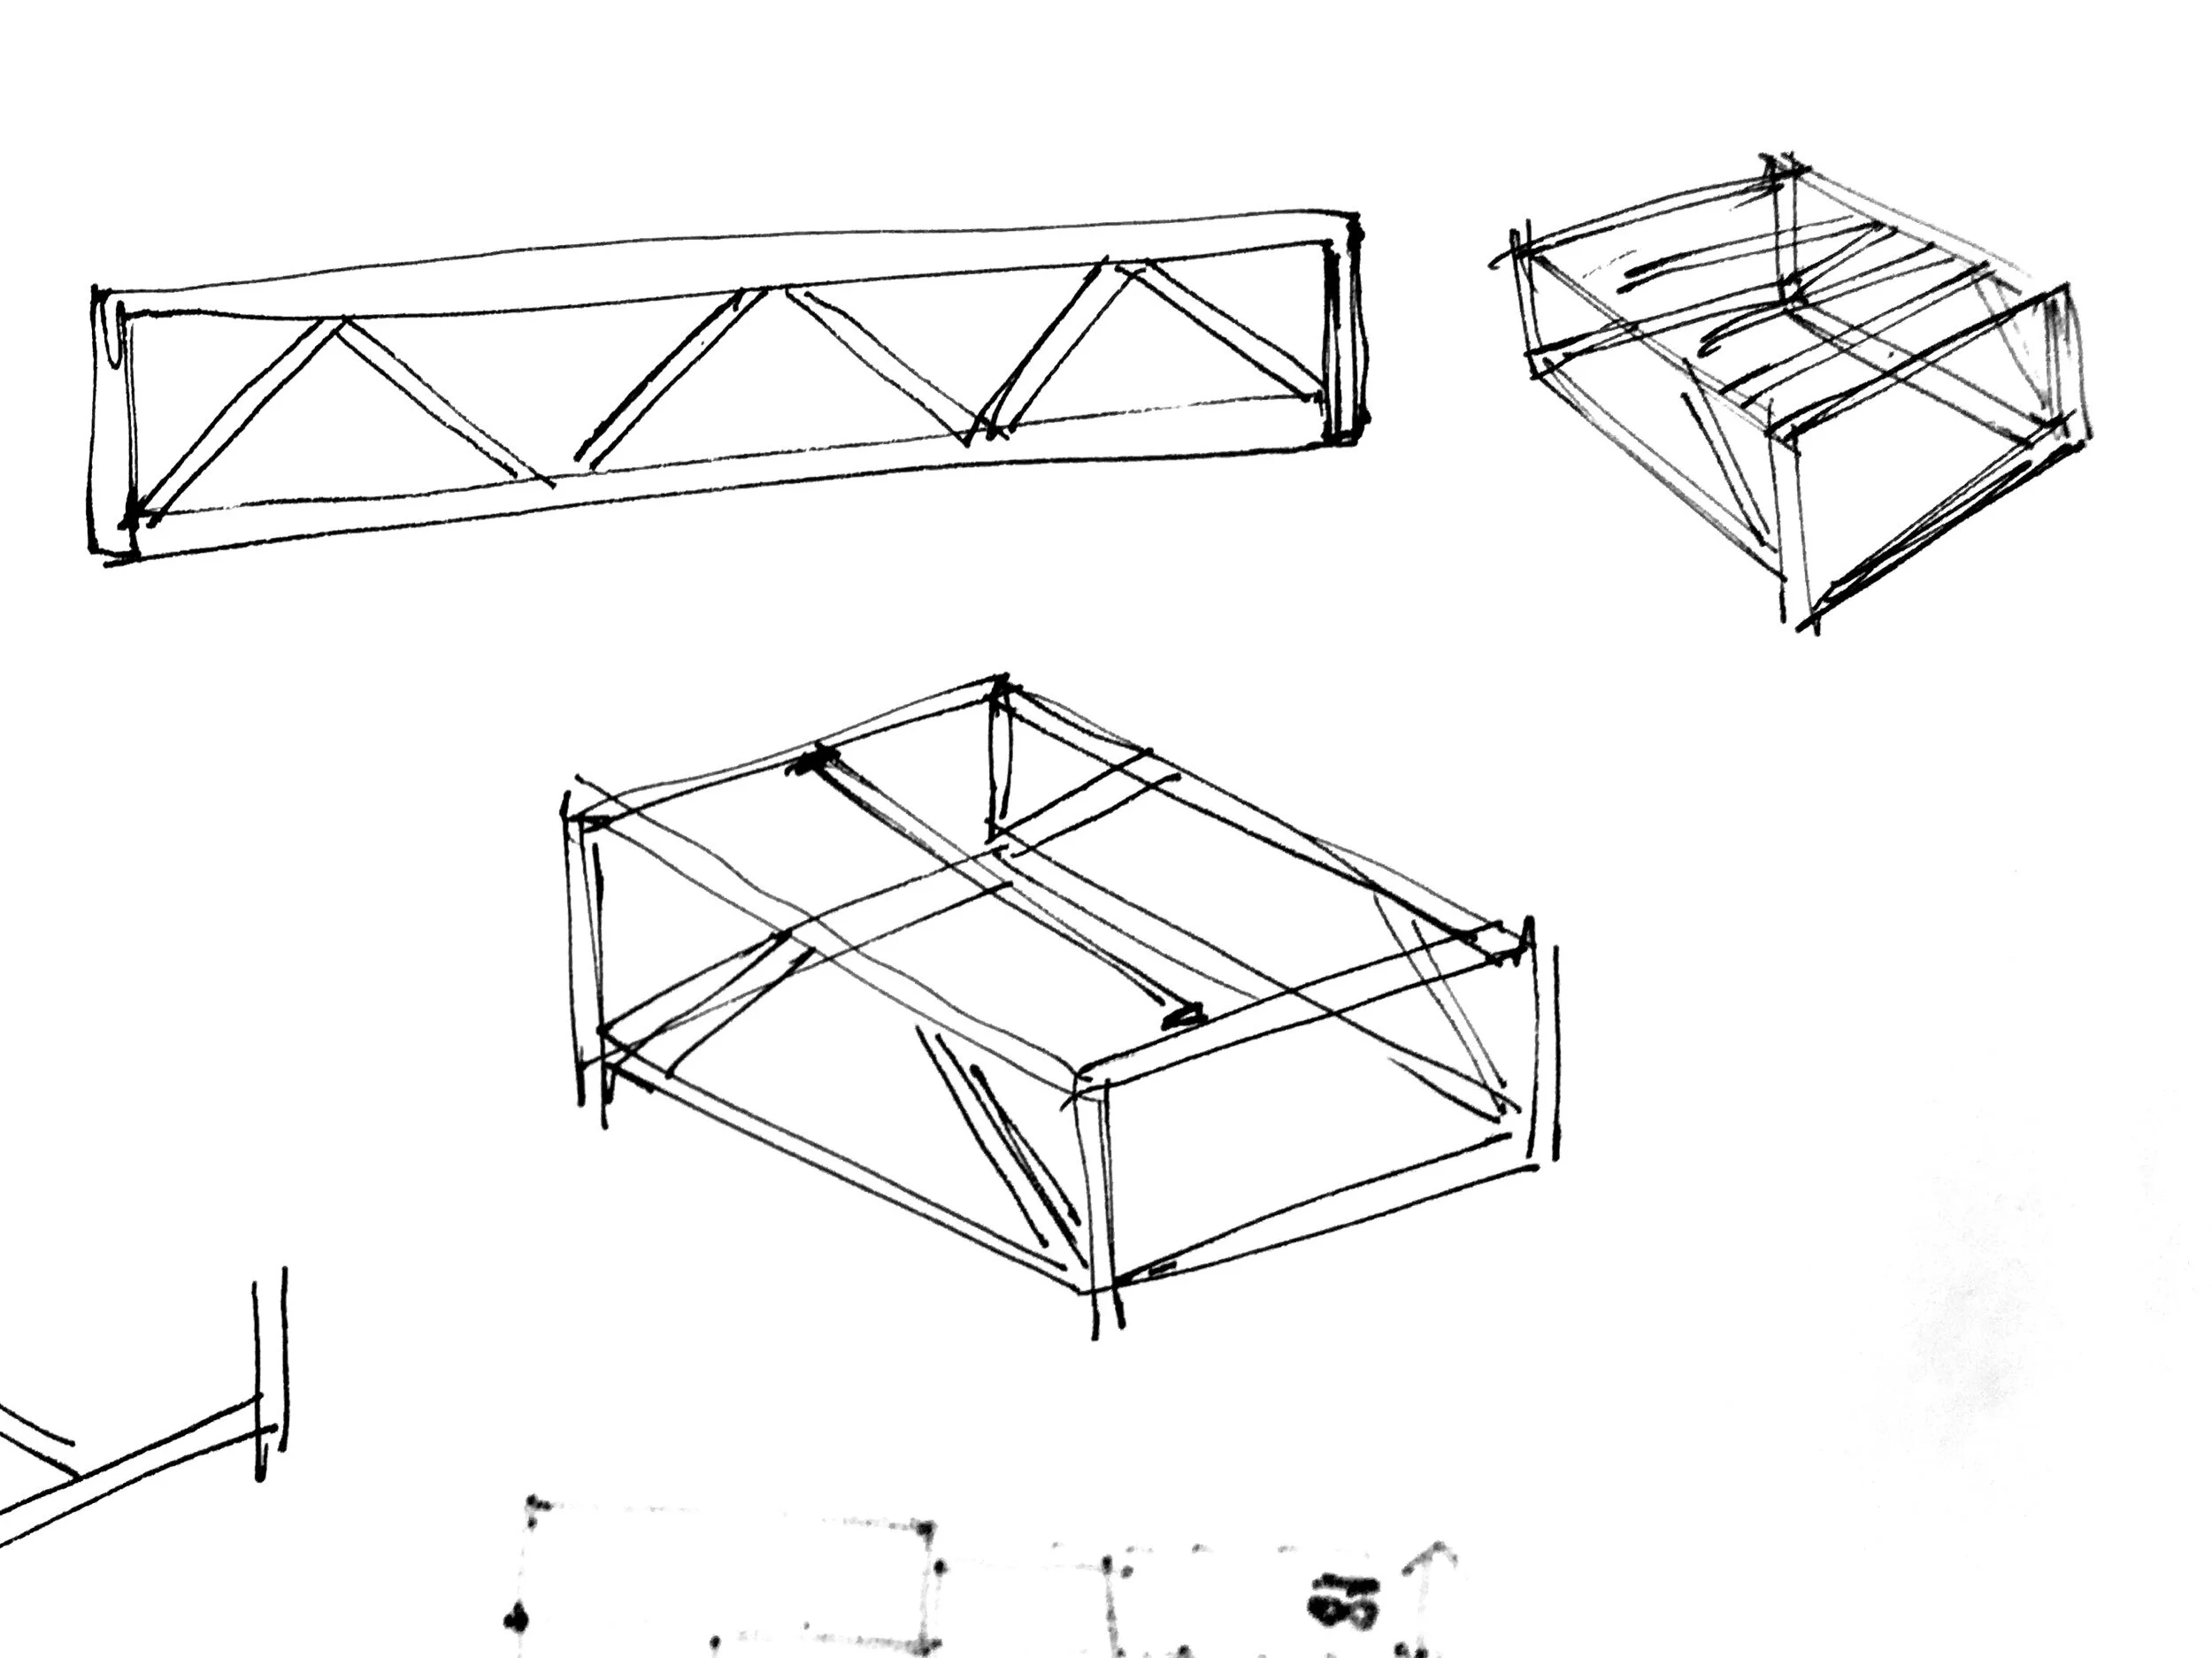
The roof of the kiln doubles as the door (lid) to the ware-chamber, and needs some consideration. the reclaimed kiln-shelf, whilst an almost perfect size, is definitely not sufficiently insulated, so either requires an additional layer of something, or perhaps excluding altogether. Ceramic fibre is brilliantly lightweight, and can be shaped, folded, pinned and supported in steelwork. It is also eye wateringly expensive. The current plan involves using the shelf as the surface in direct contact with the kiln atmosphere, buying an additional 14 lightweight fire-bricks, and bracing the whole lot in steel rather like the door to the firebox. This way, the chemical resistance of the shelf is backed by the insulating properties of the bricks, in just the same way as the rest of the kiln.
If you got this far and didn’t give up, then thank you. - you deserve a medal. Maybe you have some thoughts on the build process, and/or maybe you can help with this next question: Should I consider rendering the outside surface of the kiln to further seal and insulate it, and in the hope that it will further weatherproof it? Send me your thoughts via the Contact page.. My fears here are that the render will not adhere well to the kiln, or that it will offer little insulation or weatherproofing. Will it be impossible to shape and apply? Are there any reliable recipes? Can one add a plasticiser (such as those used in plastering or stuccowork?) Will it make the bricks impossible to reclaim for future kilns of modifications? ….
UPDATE 29-12-20
The list of “little” jobs and tweaks still remaining is plenty long enough, but today I made the collar which will hold the upper section of the chimney (a 1m length of stove-pipe) upright:
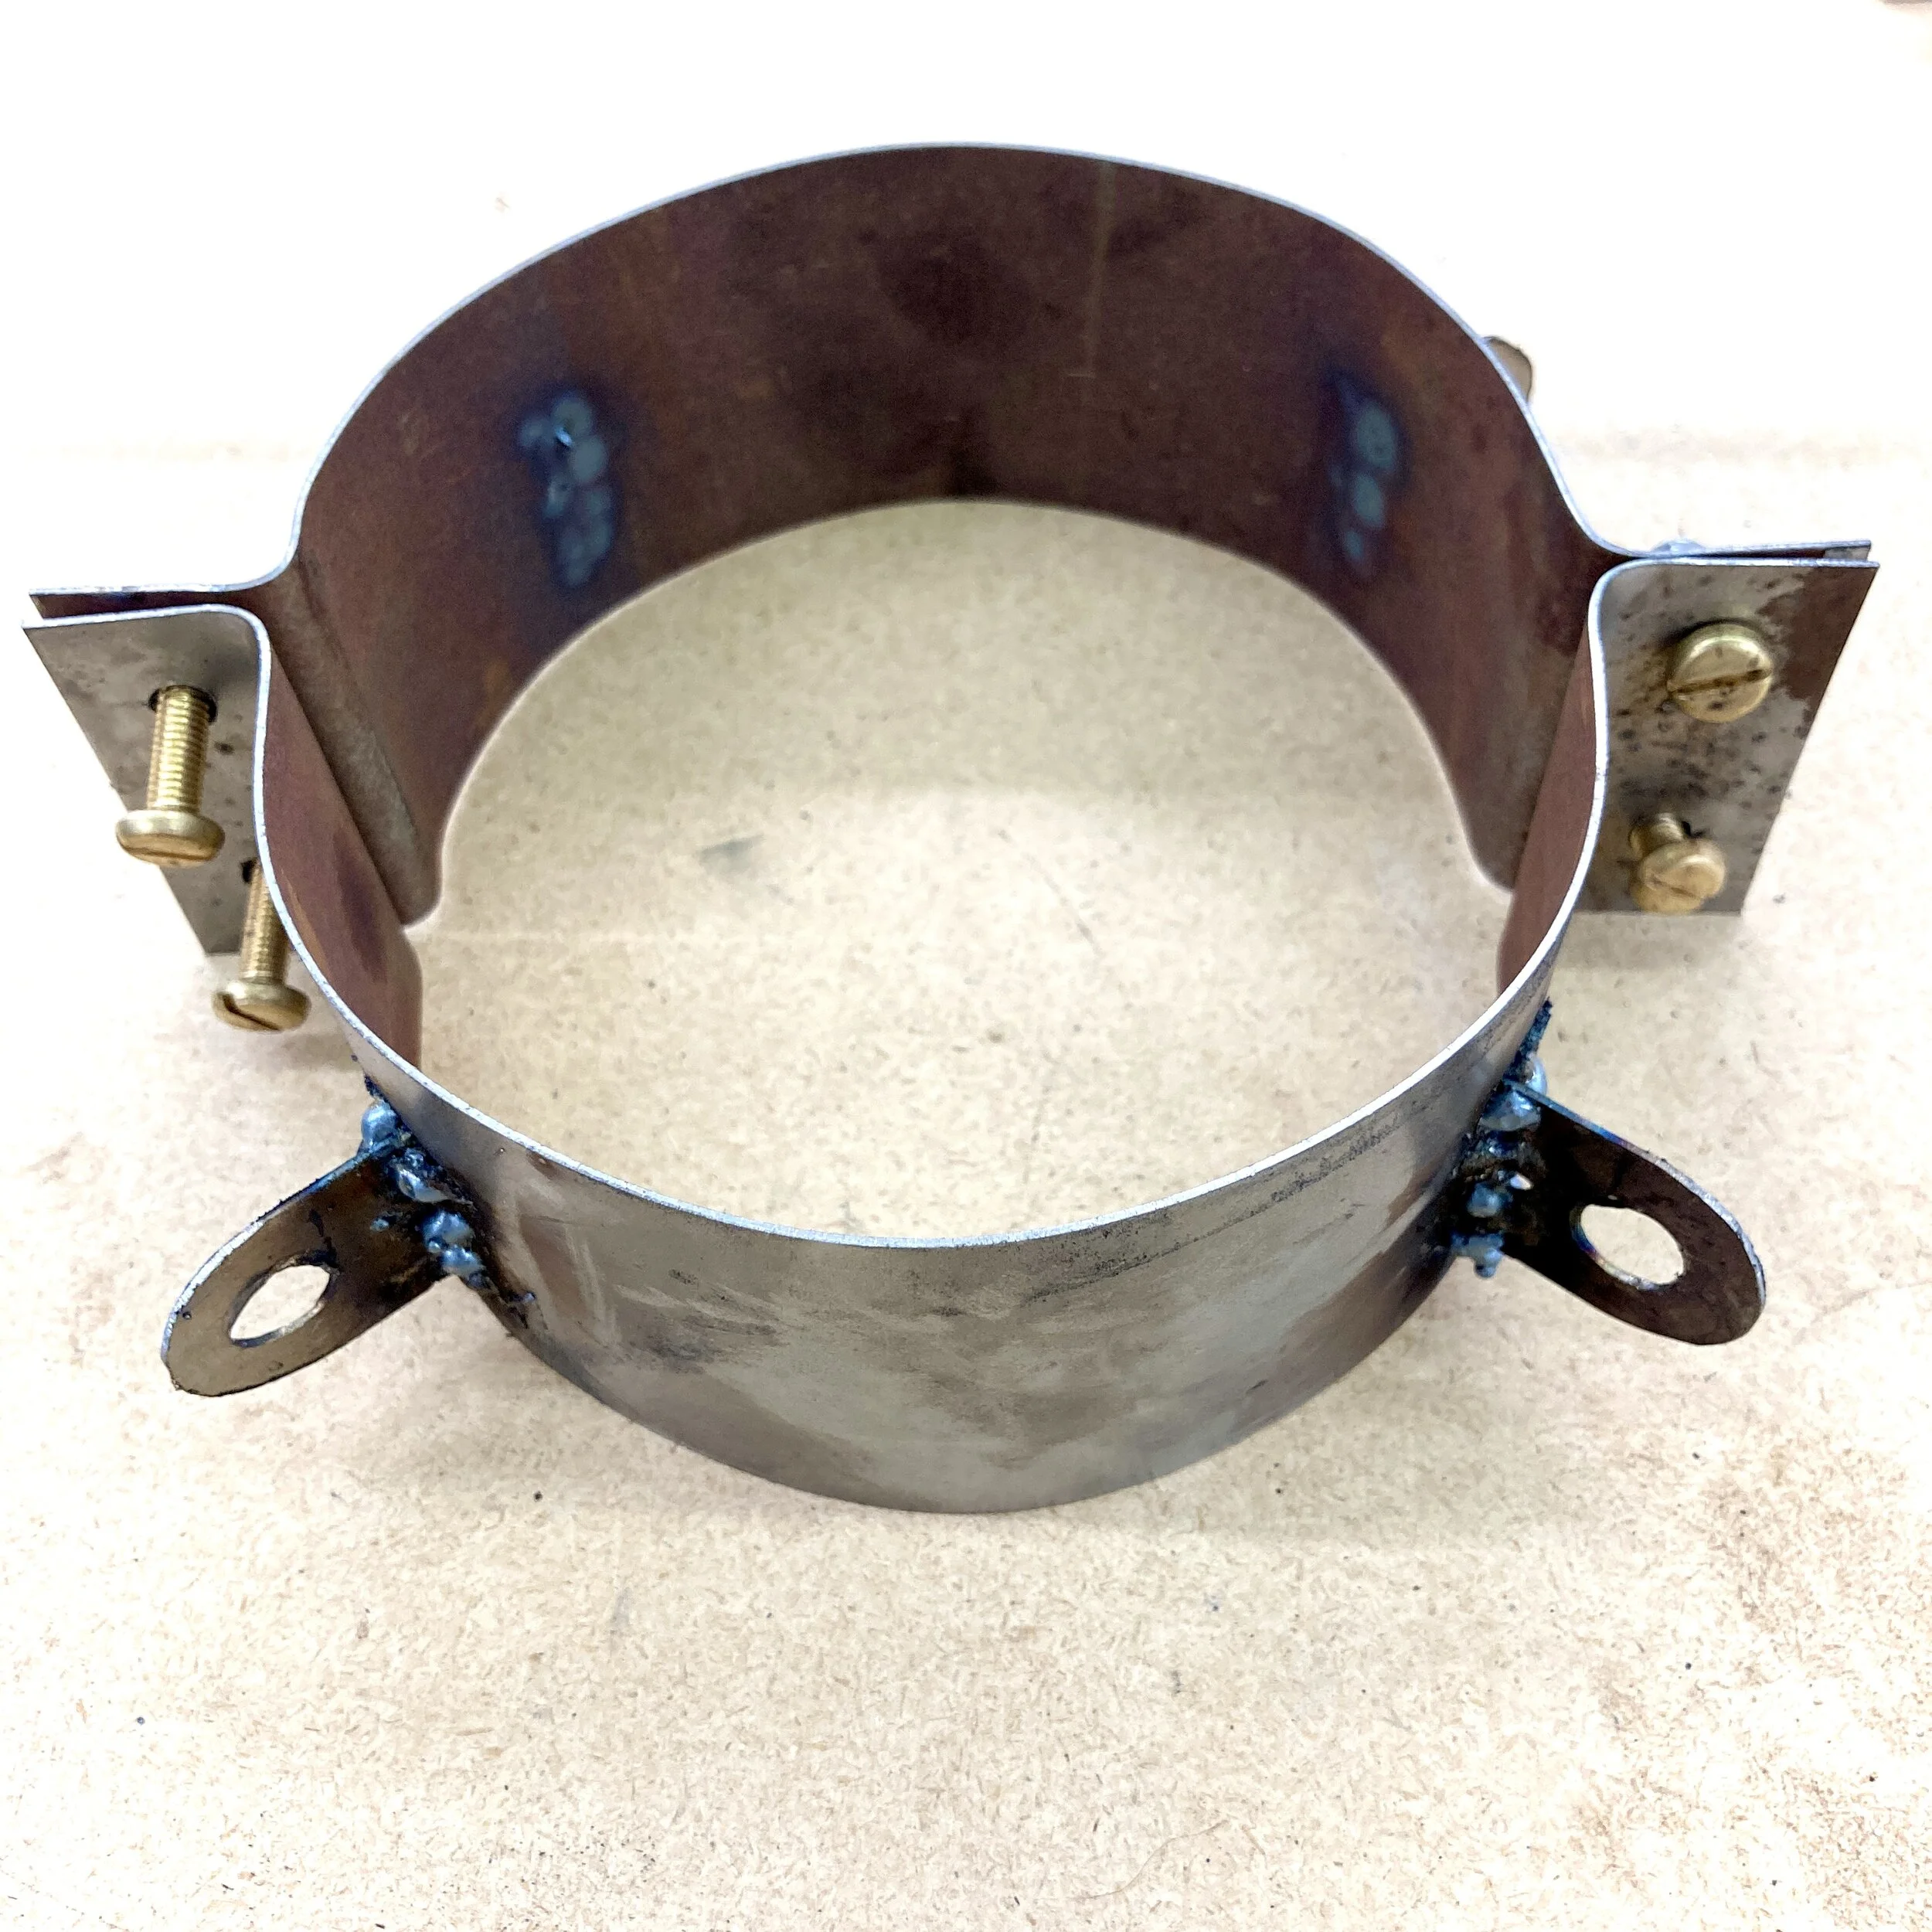

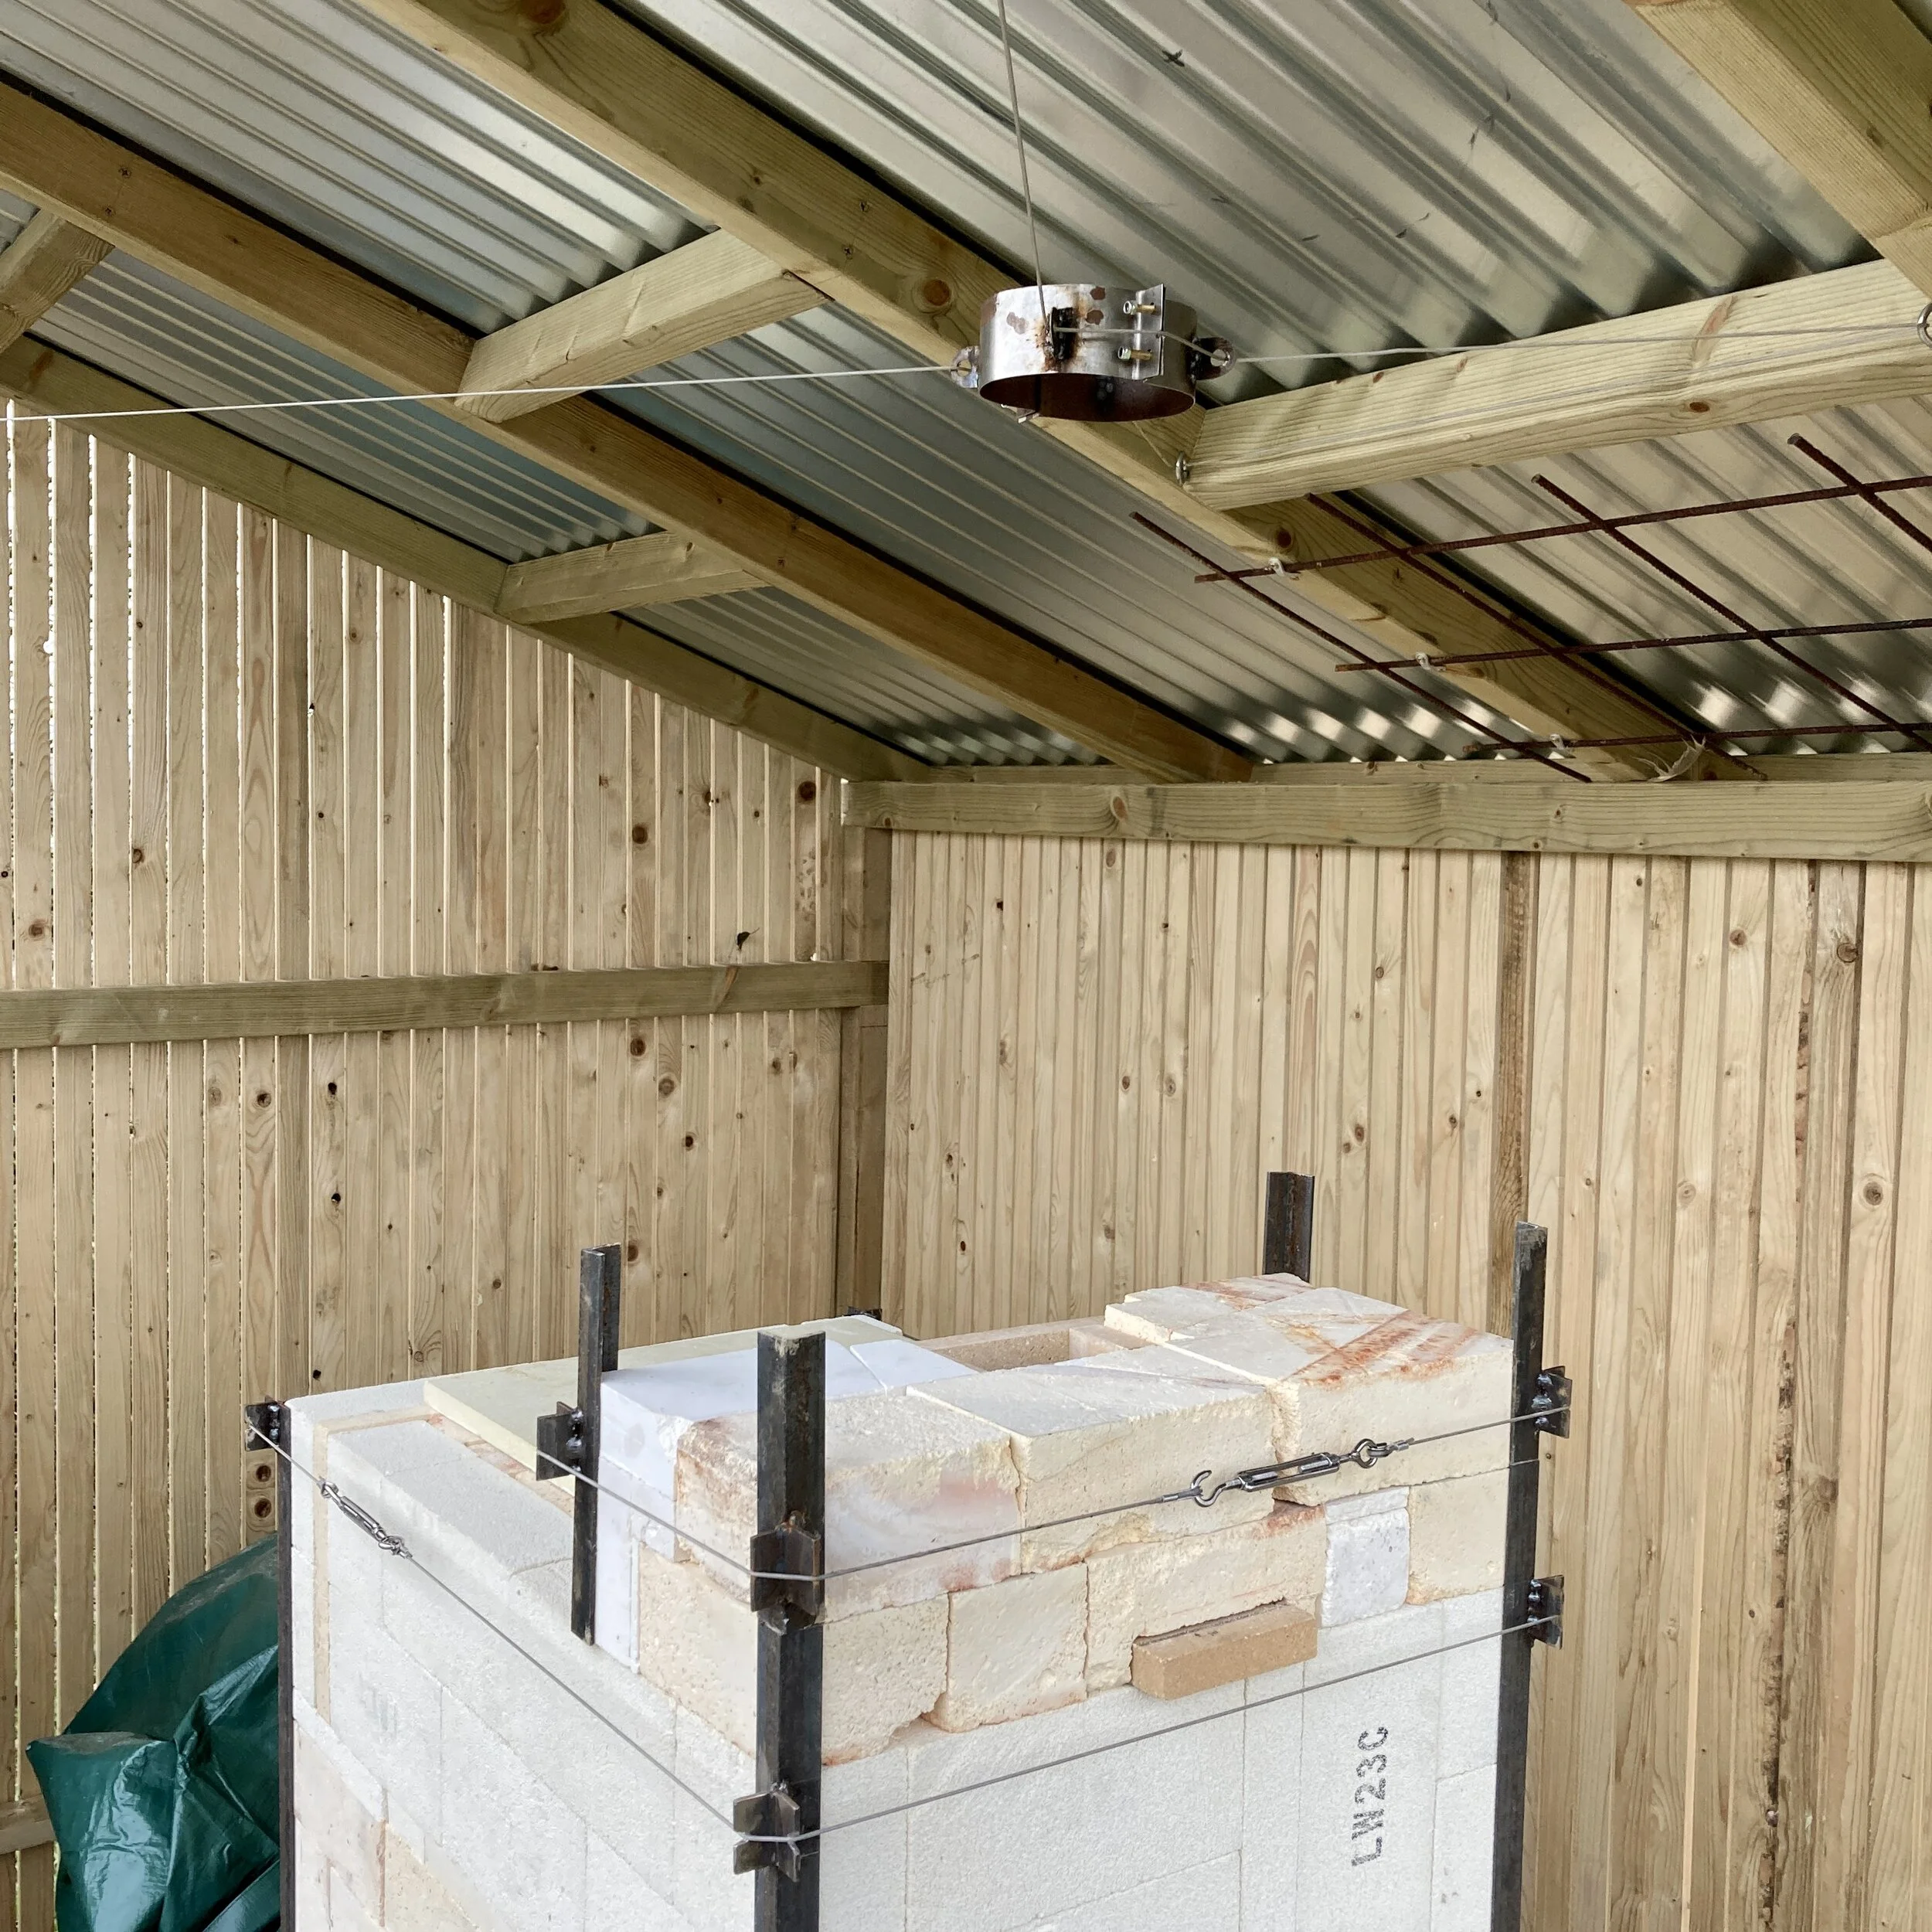

Not so pleased with the welding on this piece, but I am happy that it will work OK. (The steel is quite a thin gauge and I struggled to get the settings right on the MIG plant.)
Using braded steel cable, a tensioner, and four anchor points screwed into the kiln-shed, I have managed to suspend the collar directly above the flue. Soon, a length of ceramic fibre blanket will arrive, and I will line the collar to reduce heat transfer from the stove-pipe. All of this should hold the pipe in place and also allow me to remove the metal section of chimney between firings so that I can cap the hole in the corrugated steel roof, and stop rain ingress.
Tomorrow I collect the last few bricks for the top of the chimney stack and for the roof of the ware-chamber!


